For Your Hands Only — Building the Agora 1/8 Scale 2CV – Part 1
By George Dyke….
Agora models in the UK are noted for model the building experience the they offer to enthusiasts. Their premium quality models are purchased on a subscription basis, delivering parts over time so as not to overwhelm builders but give them an immersive experience that, combined with online instructions and videos, provide enjoyment assembling big-scale models that become a collector’s pride and joy.
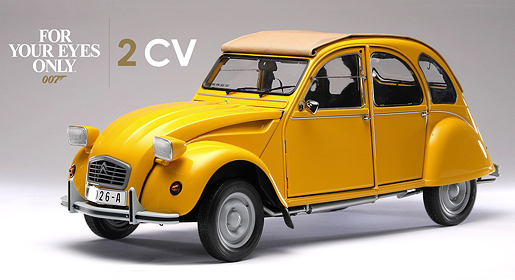
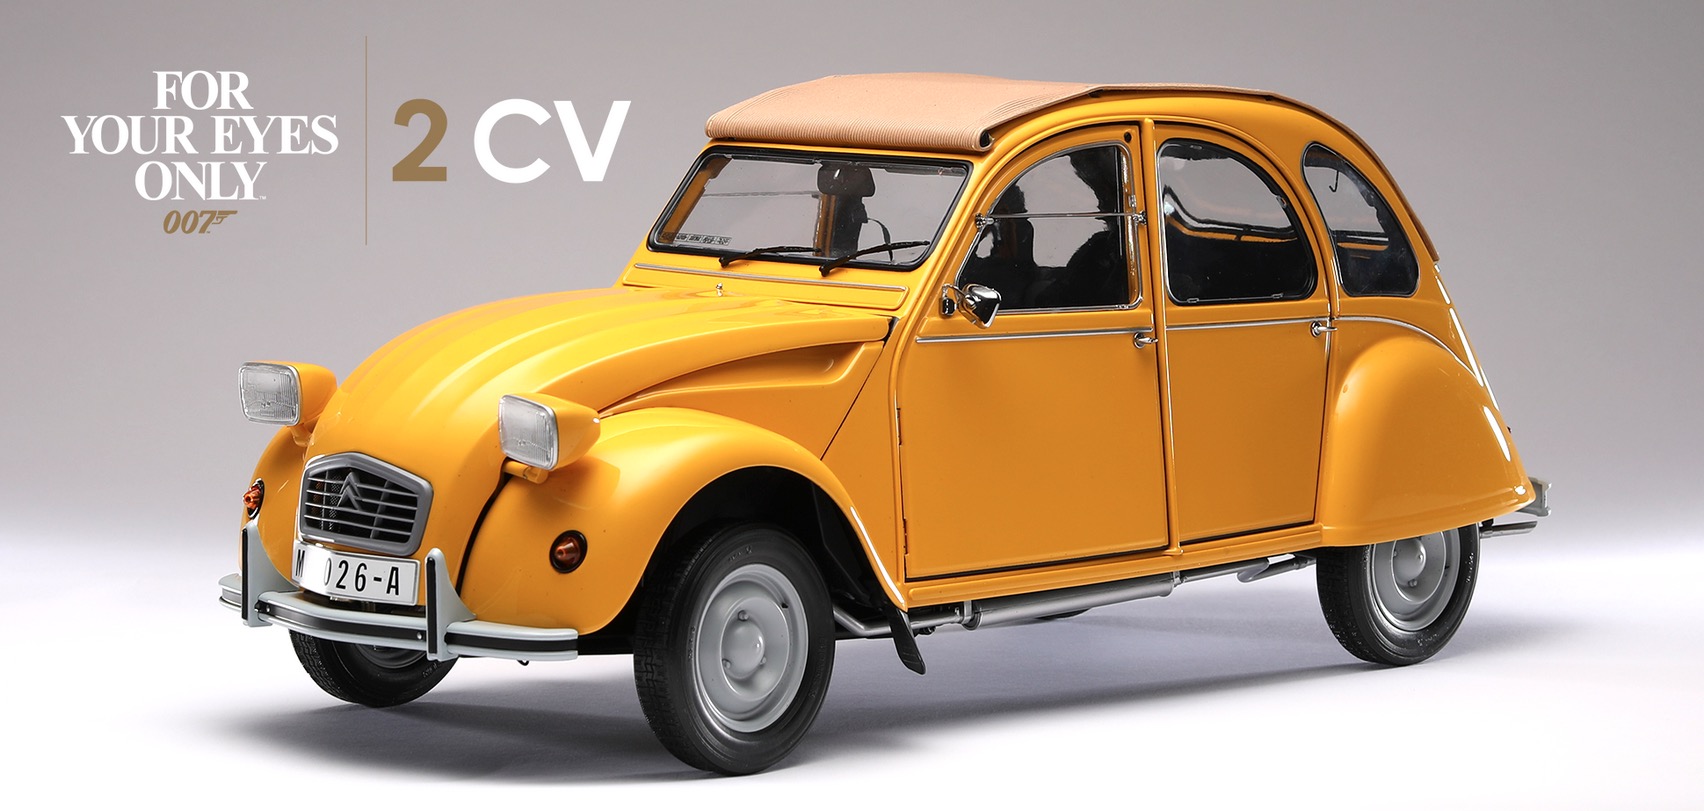
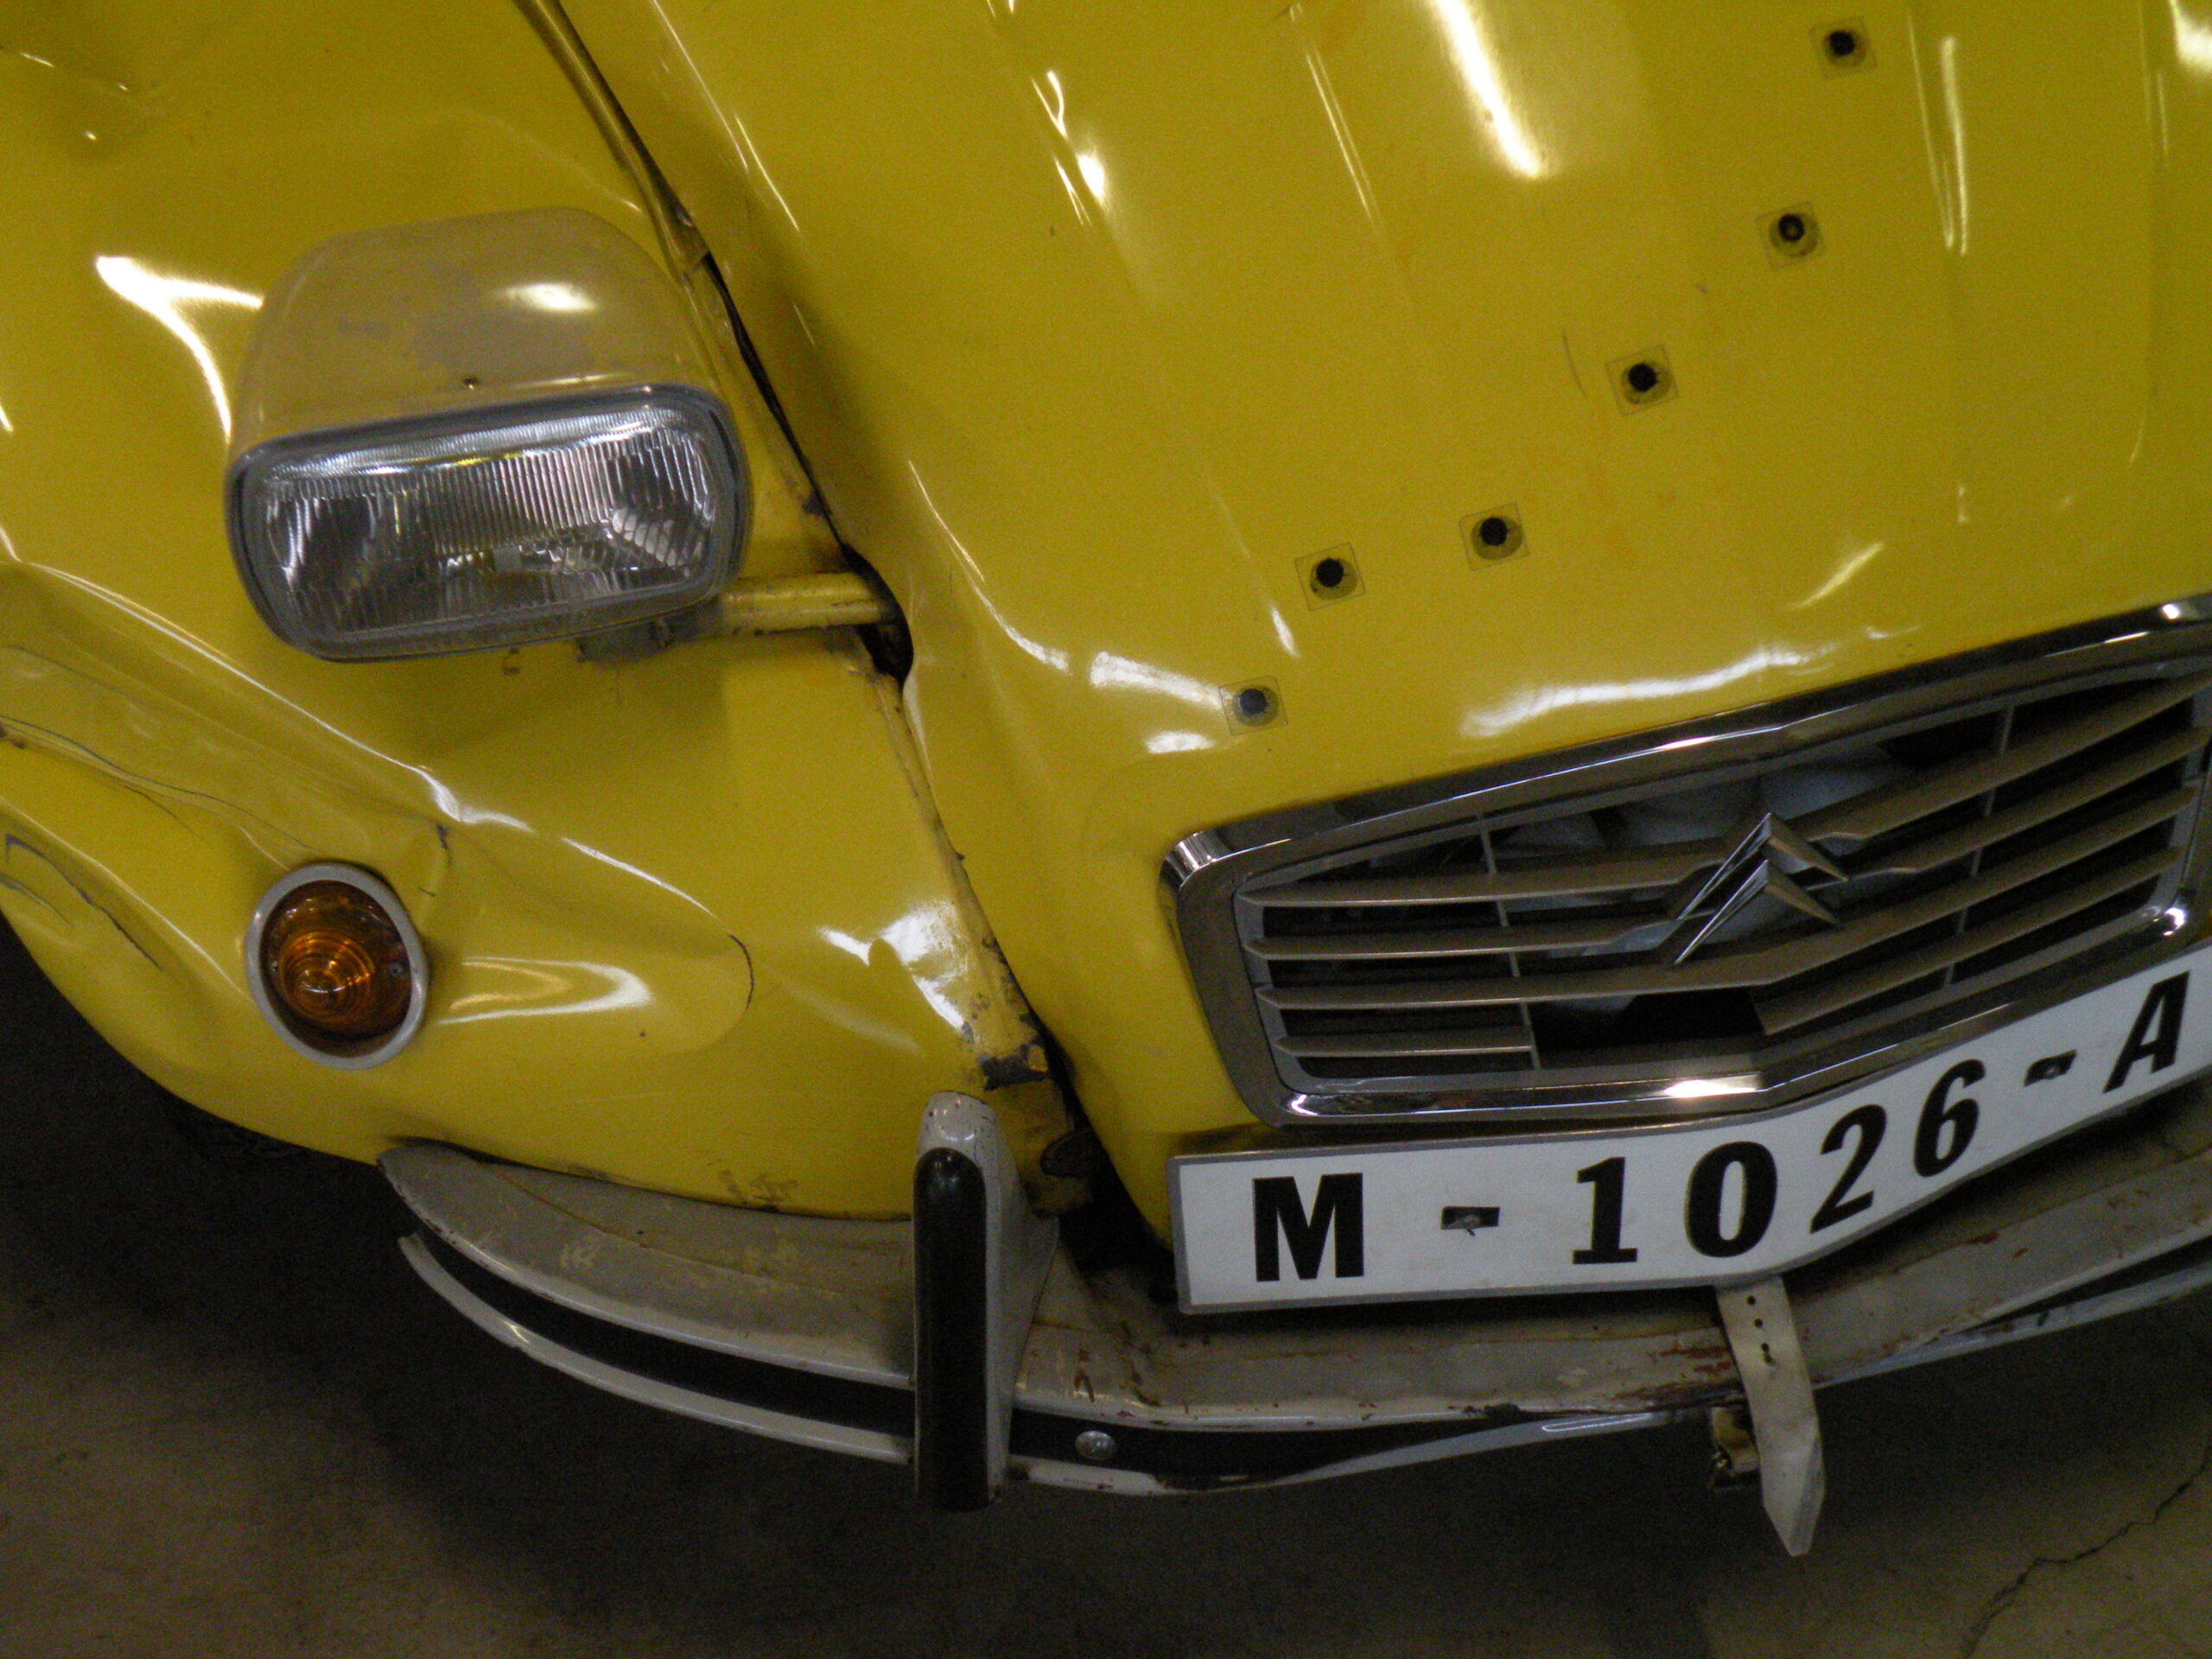
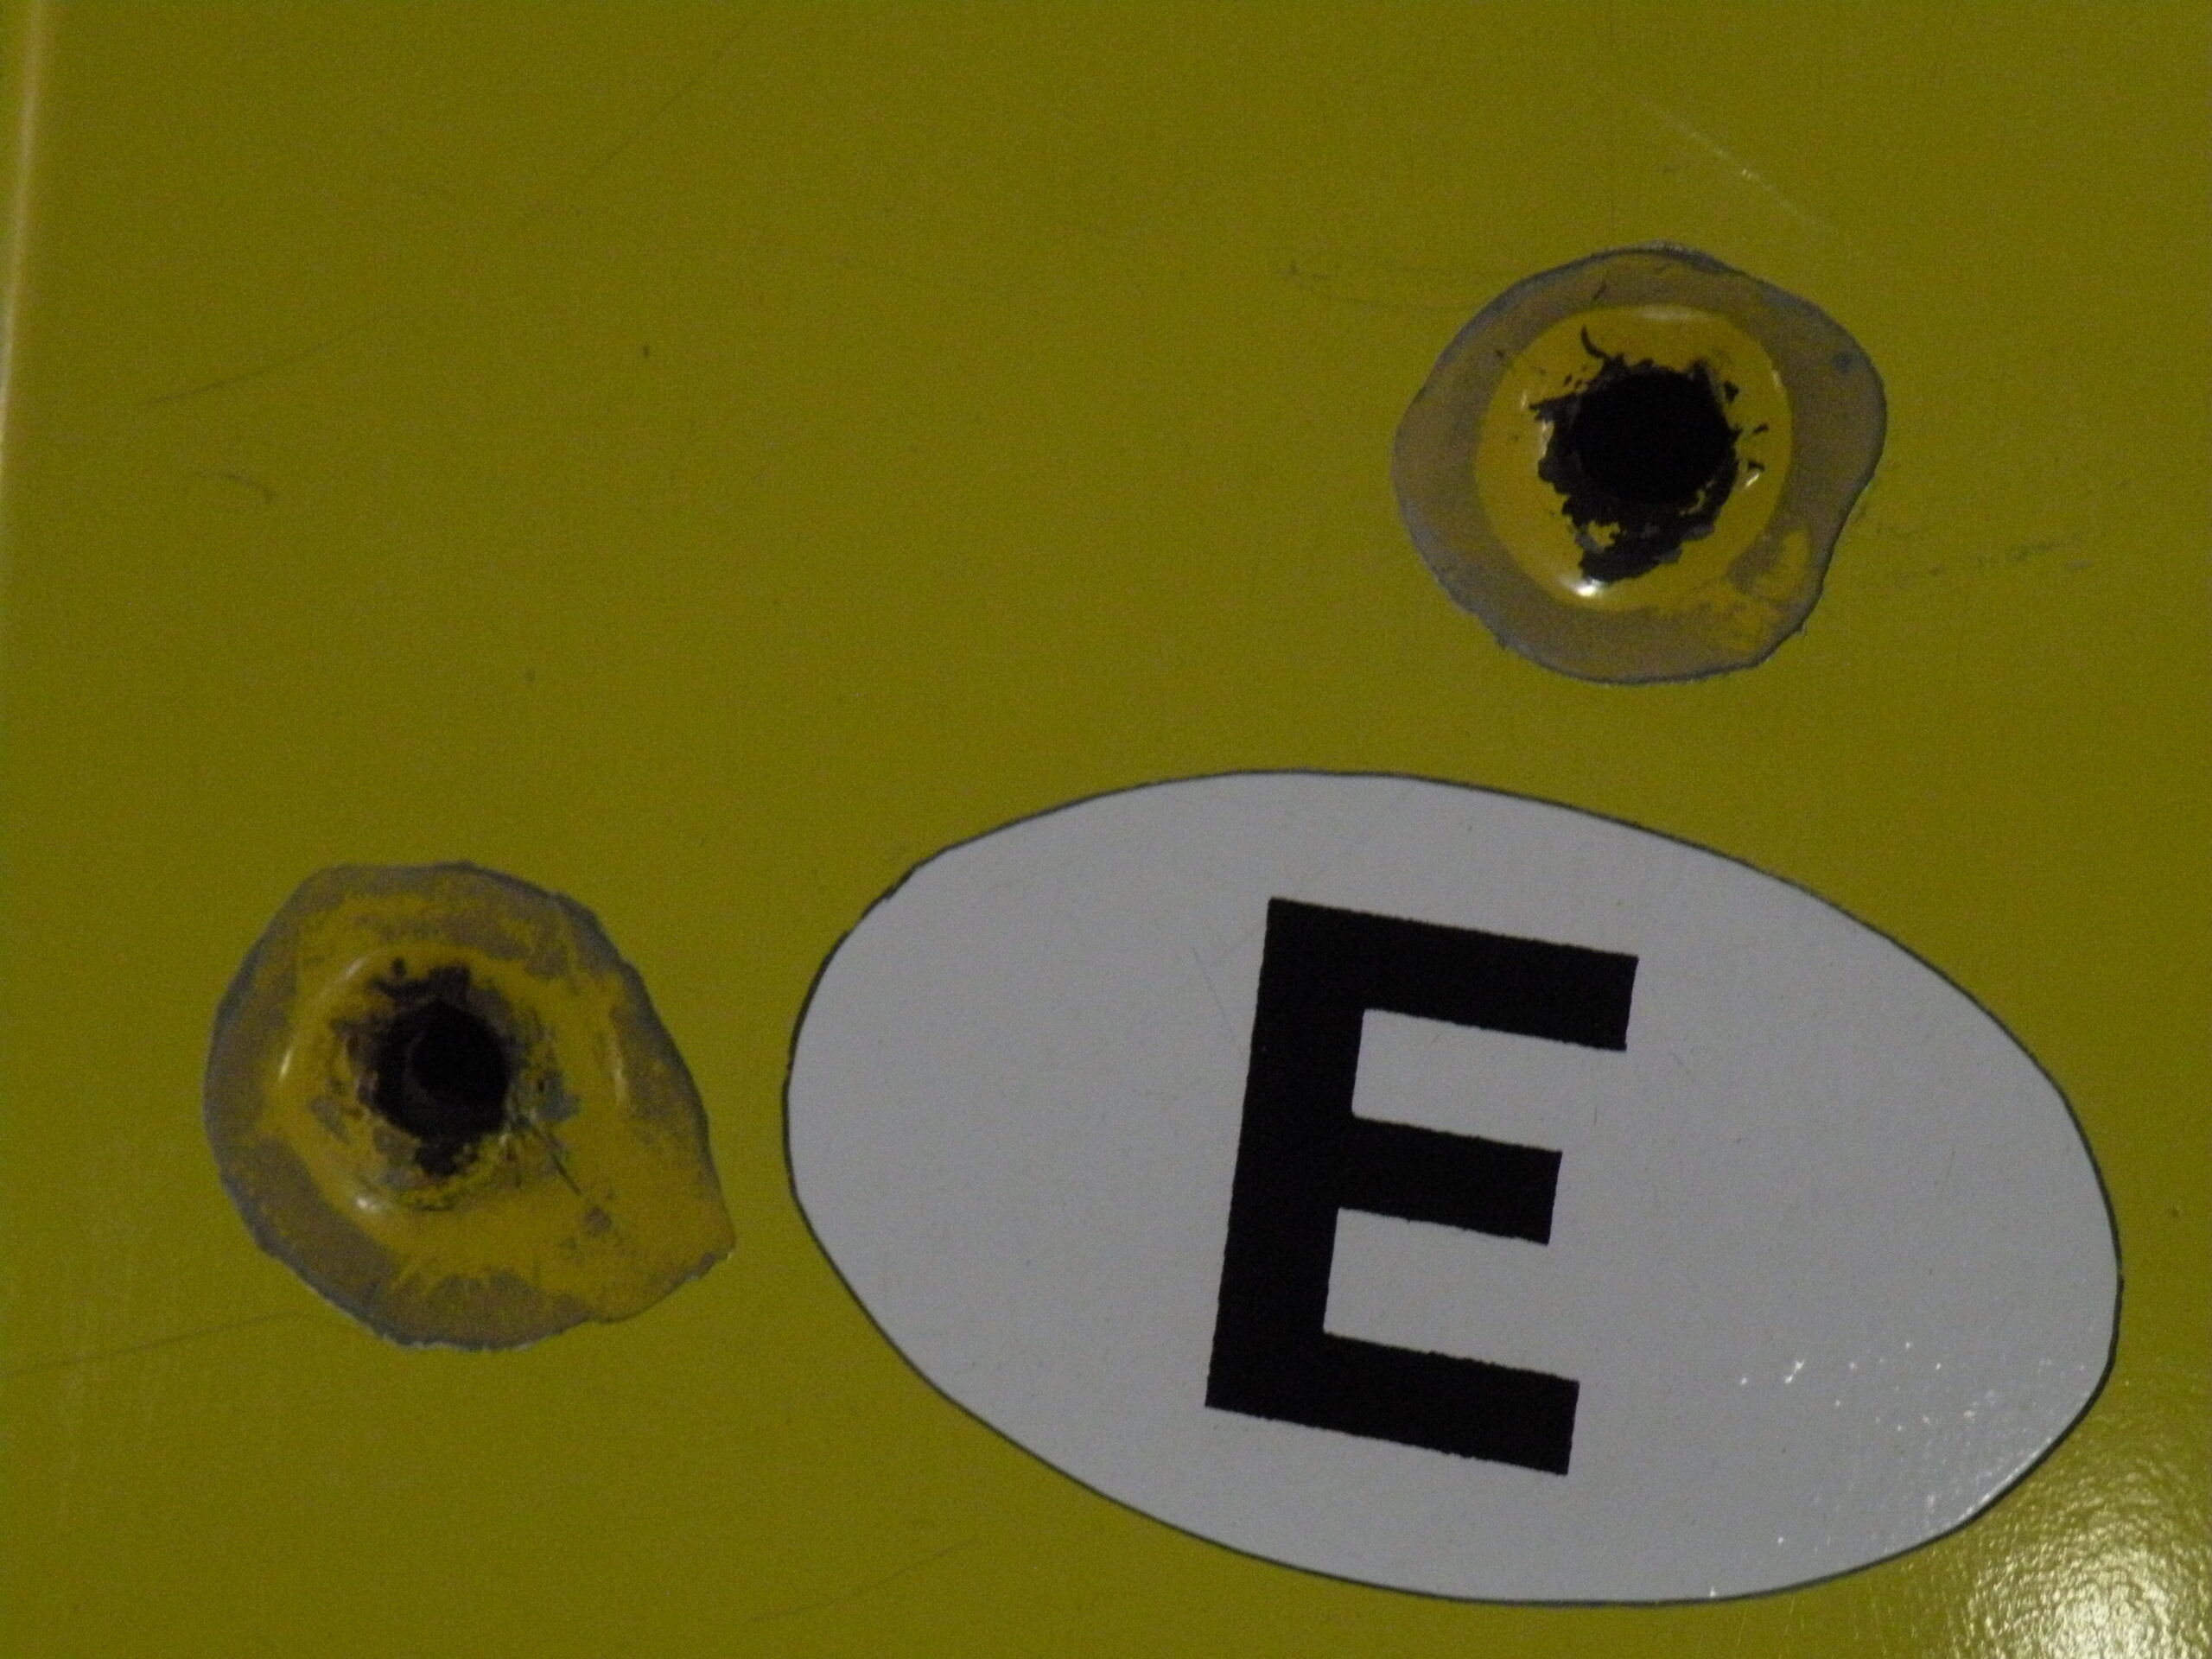
Agora states that their models are “museum quality”. They recently launched a 1/8 scale model of the Citroën 2CV that appears in the James Bond film ‘For Your Eyes Only’. Customers are given the choice to build the car as it appears in the movie (with bullet holes in the trunk), or as a regular factory release (without the bullet holes).
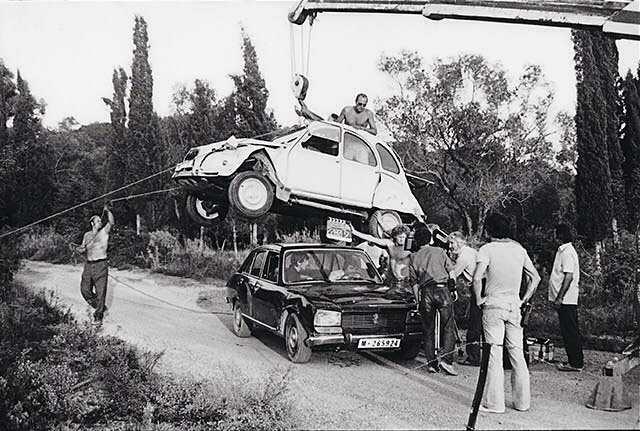
I have seen one of actual 2CVs used in the movie, during a visit to the Citroën Conservatory just north of Paris back in 2011. I was intrigued to see how Agora decided to present it.
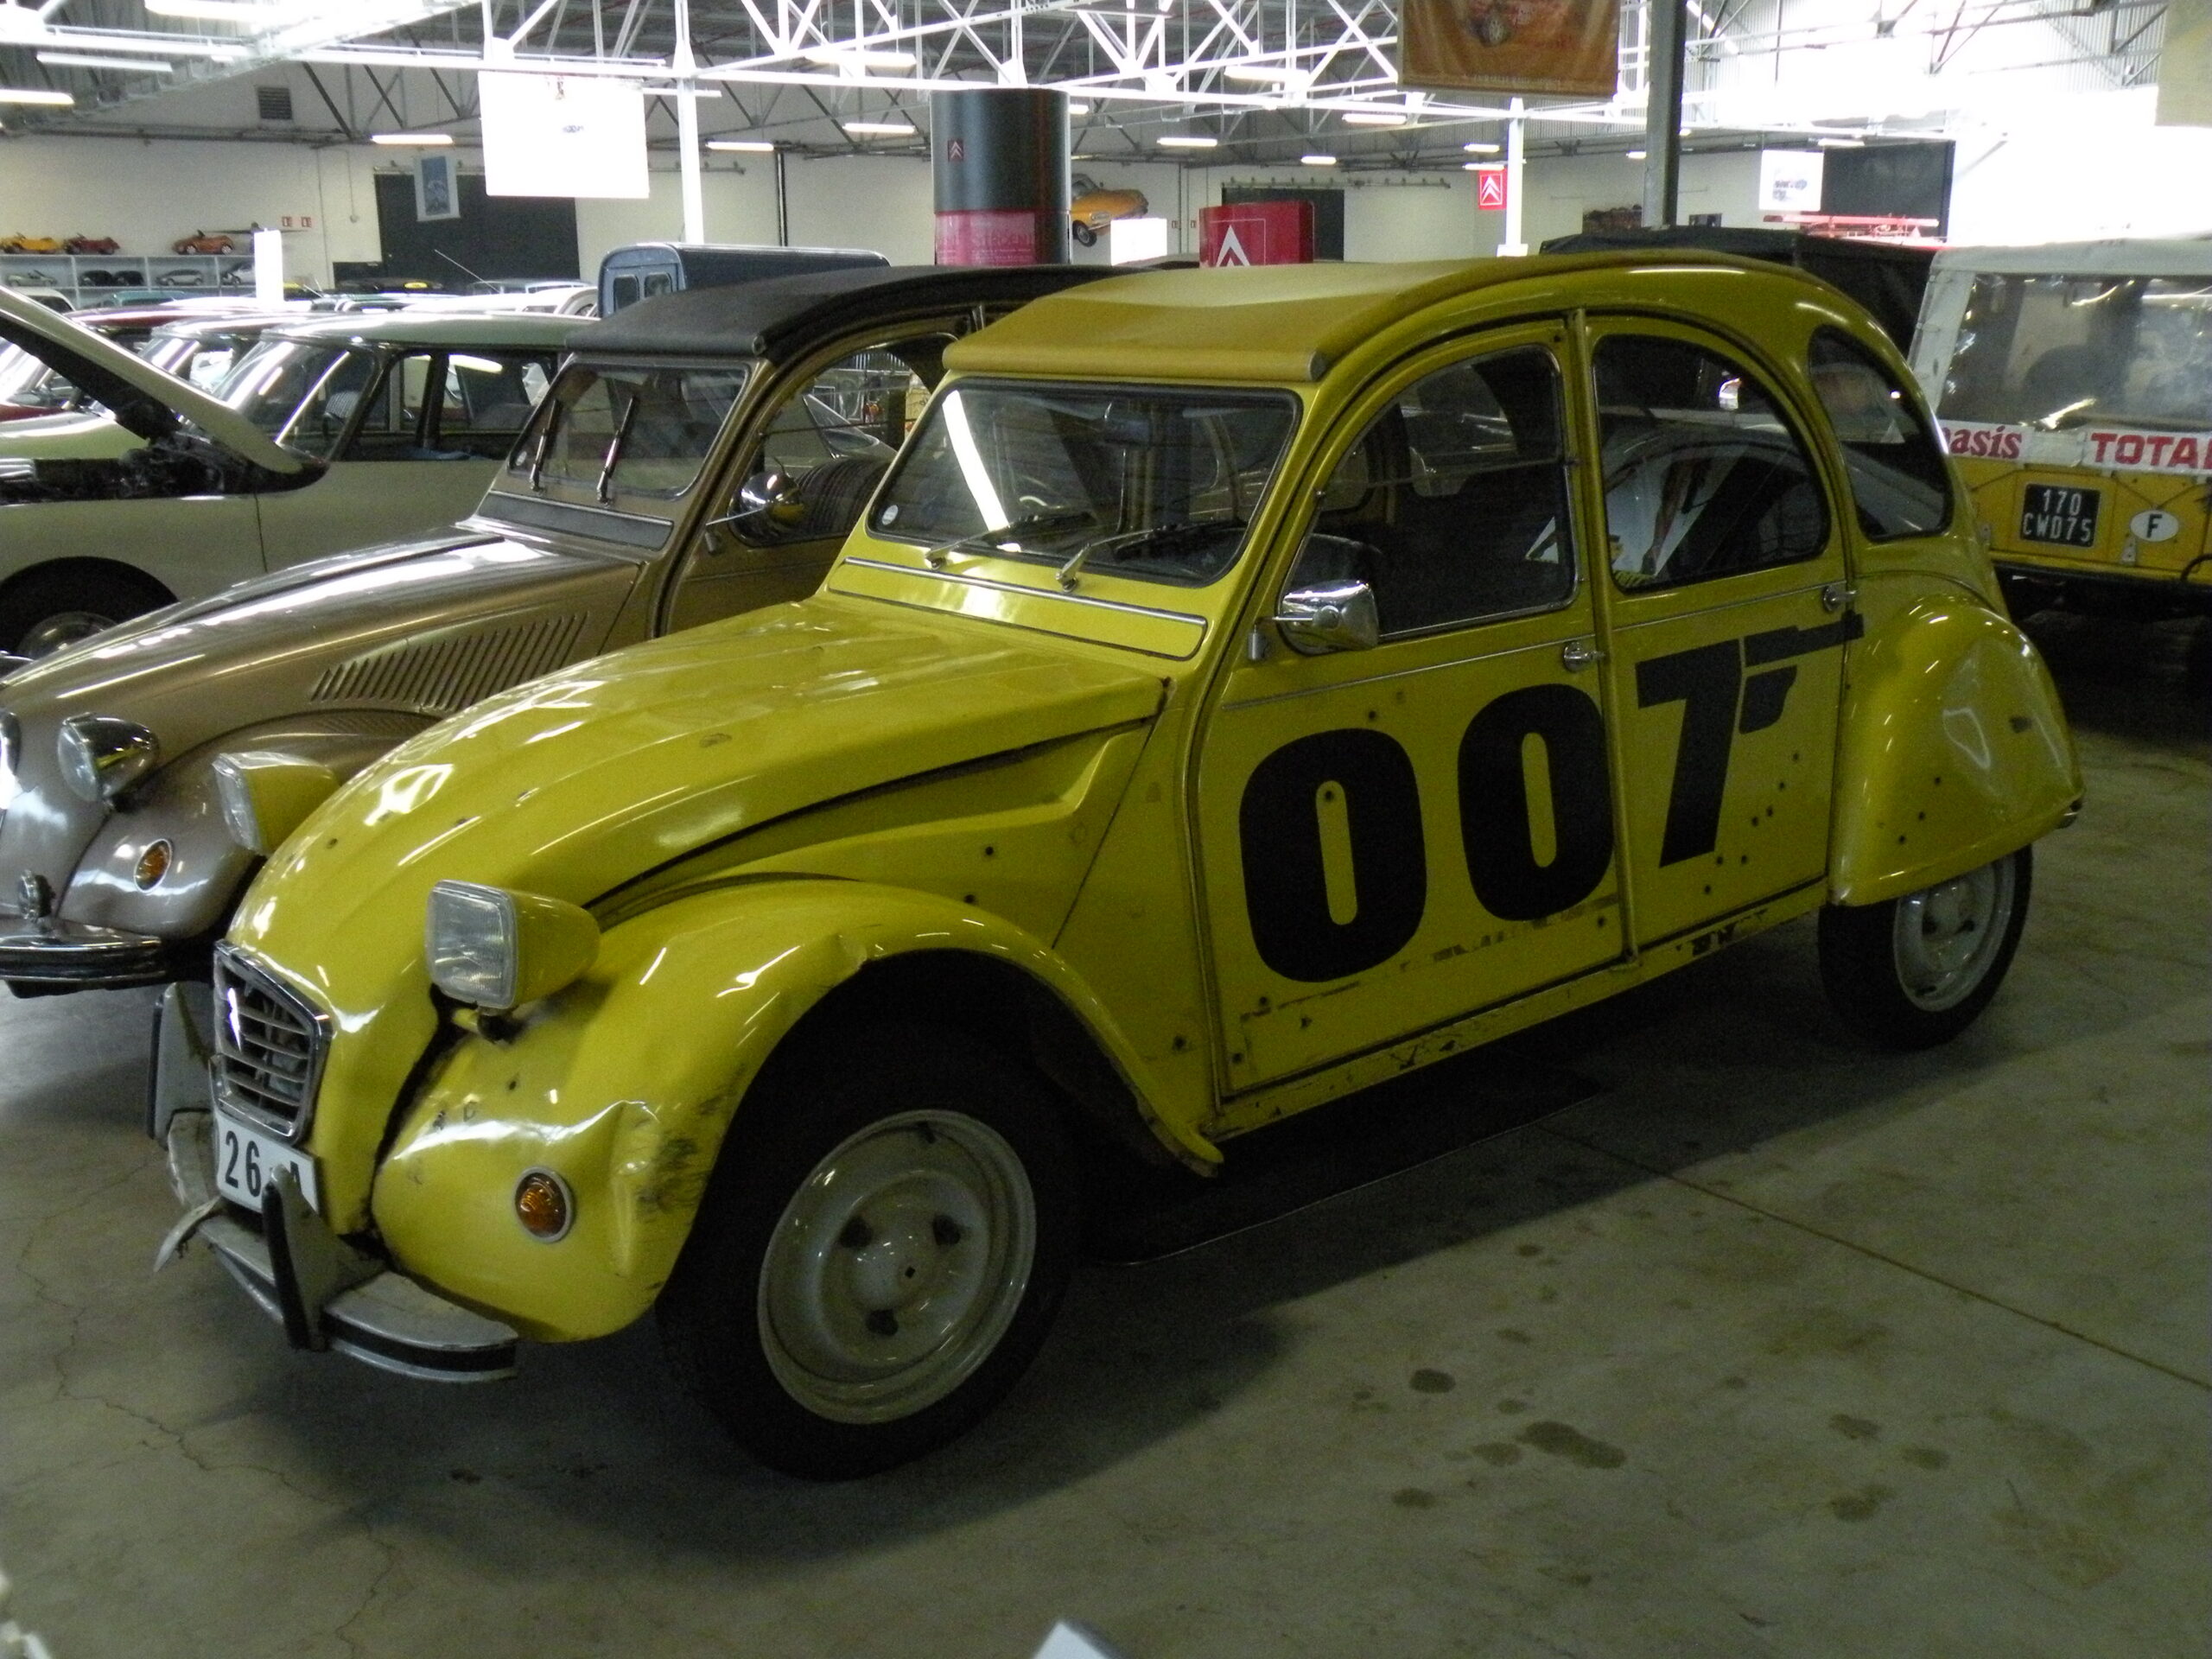
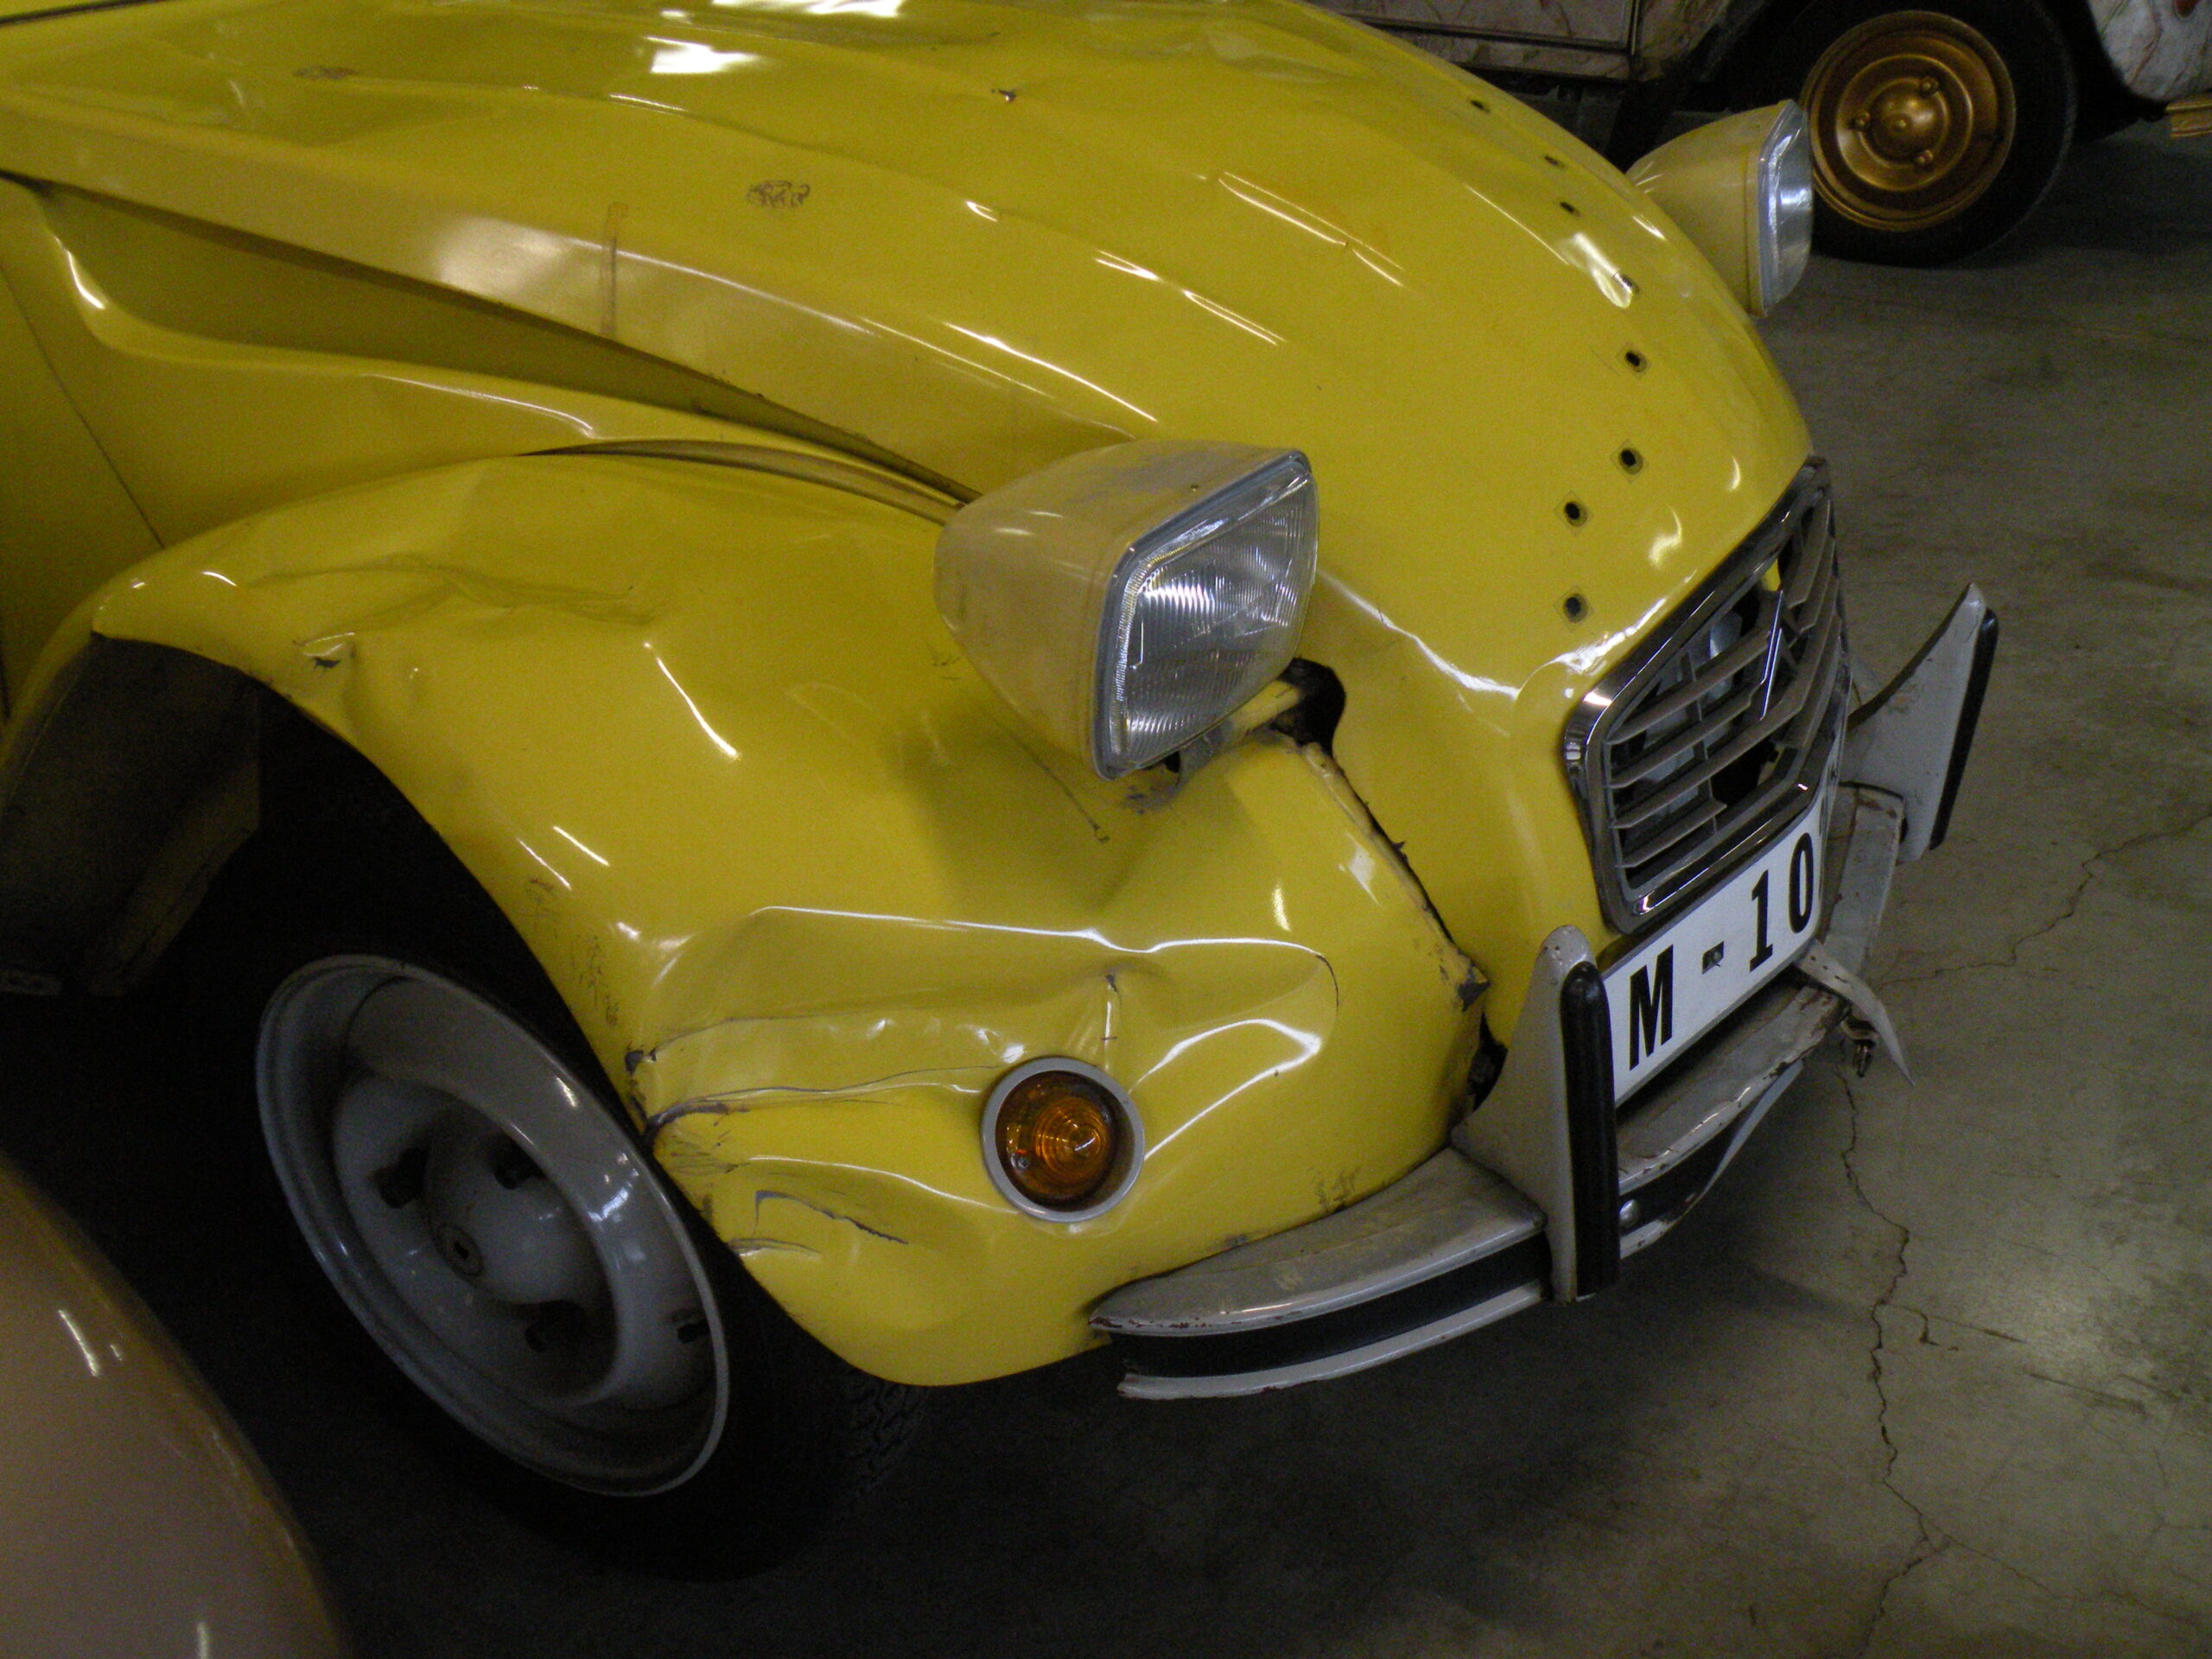
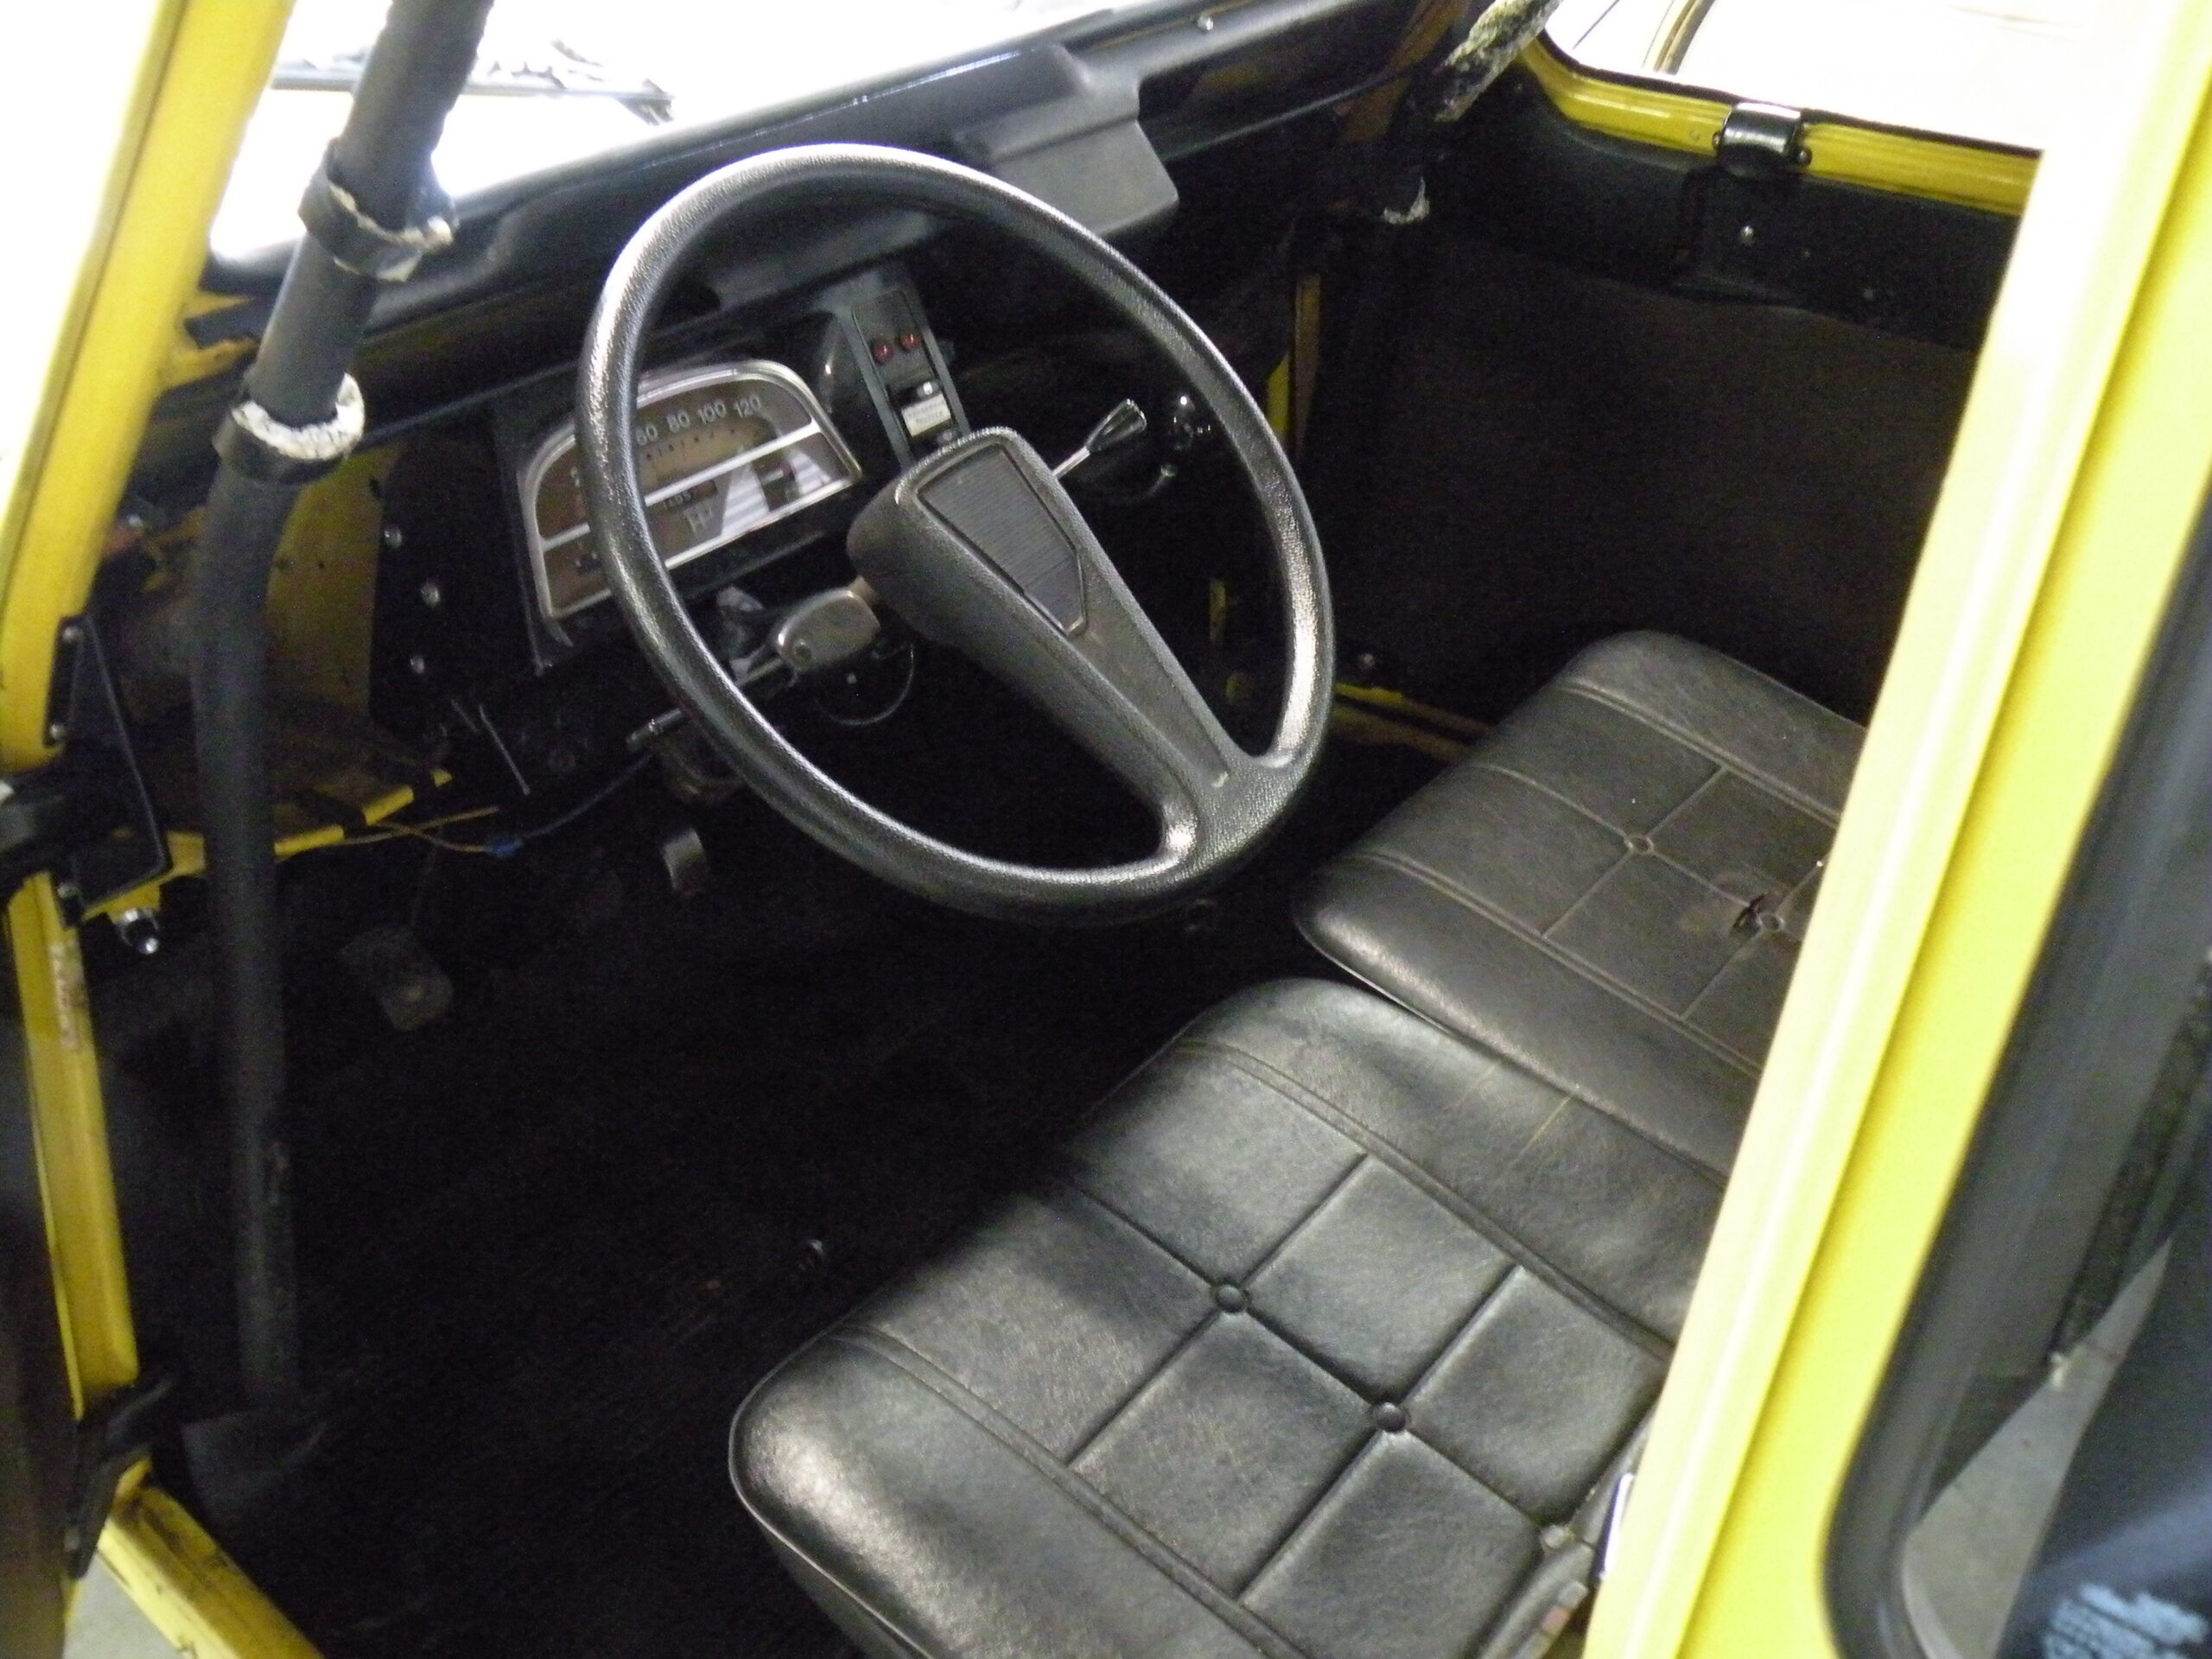
Actually, three 2CVs were used in filming; two were used to shoot the chase, the third for the interior scenes only. The chase 2CVs were modified by switching out the frame and using one from the Ami Super. A GS 1015 cc engine was implanted in place of the 602 cc standard unit. In doing so, the front end of the 2 chase 2CVs were subtly elongated to accommodate their 4 cylinder power plants. Roll bars were added to the interior to protect Roger Moore and Carole Bouquet in the rollover scene of the film. Citroën also fitted more robust seats that I think they sourced from their M35 Wankel rotary engine model.
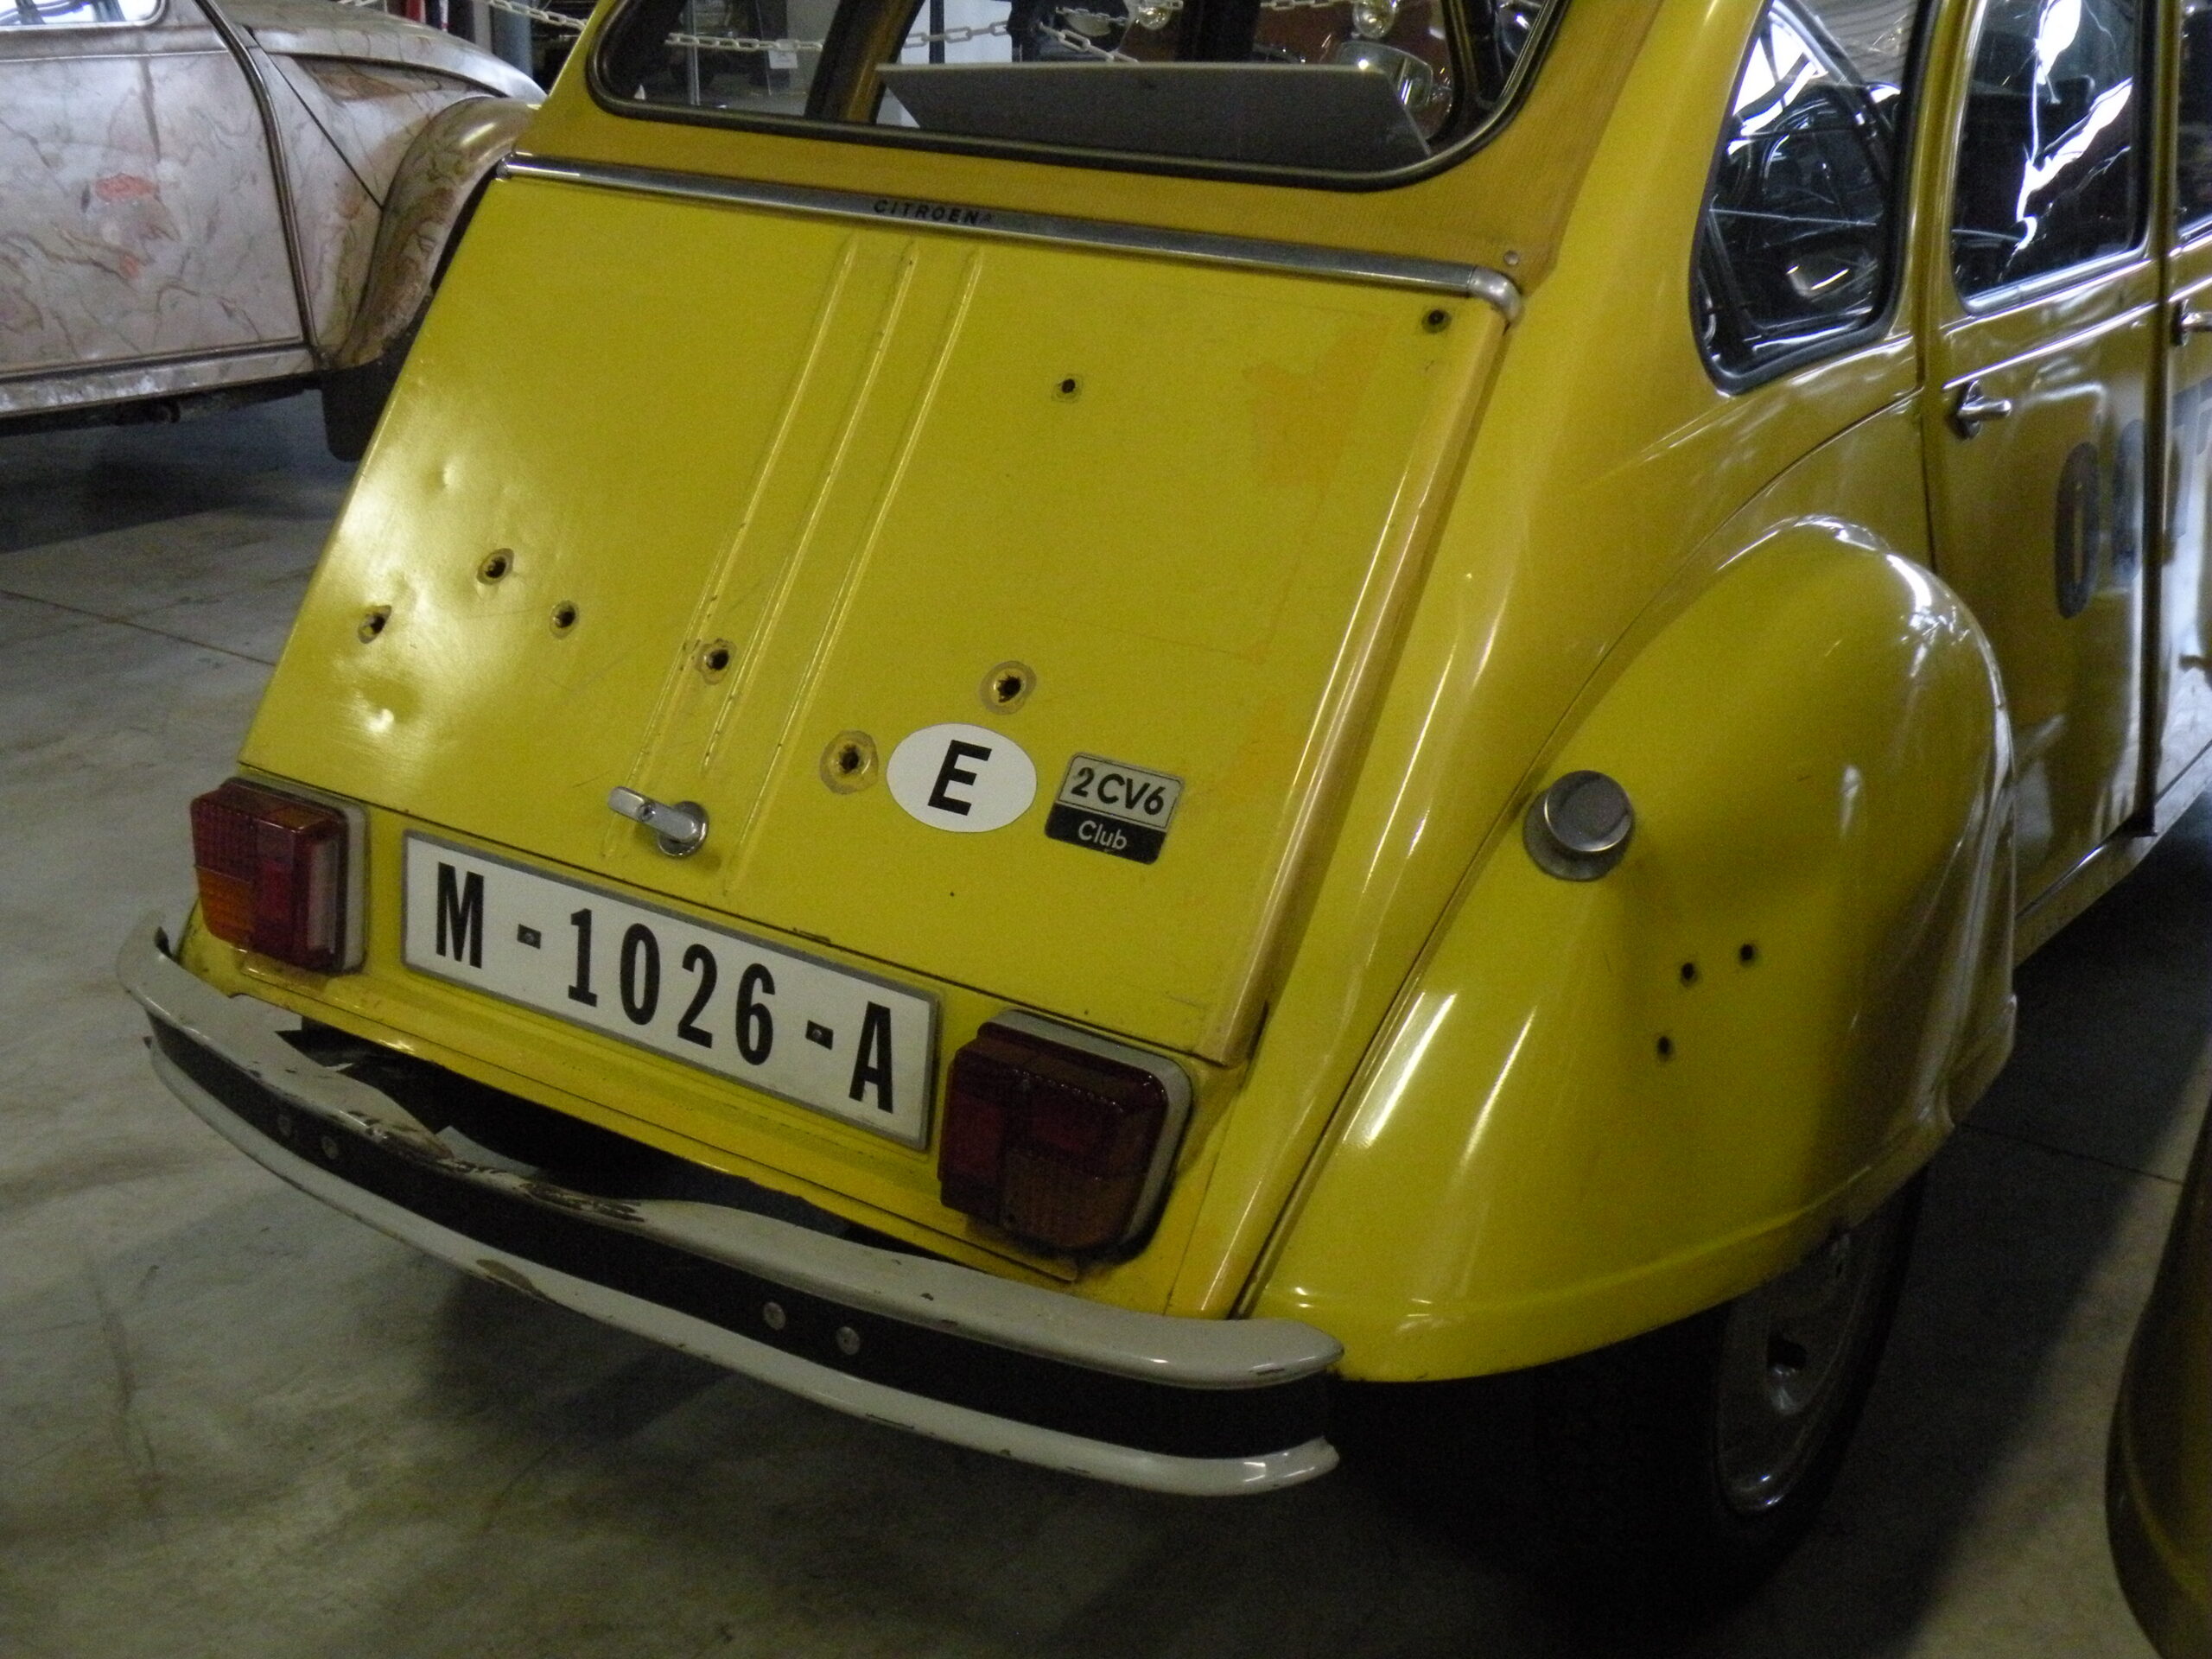
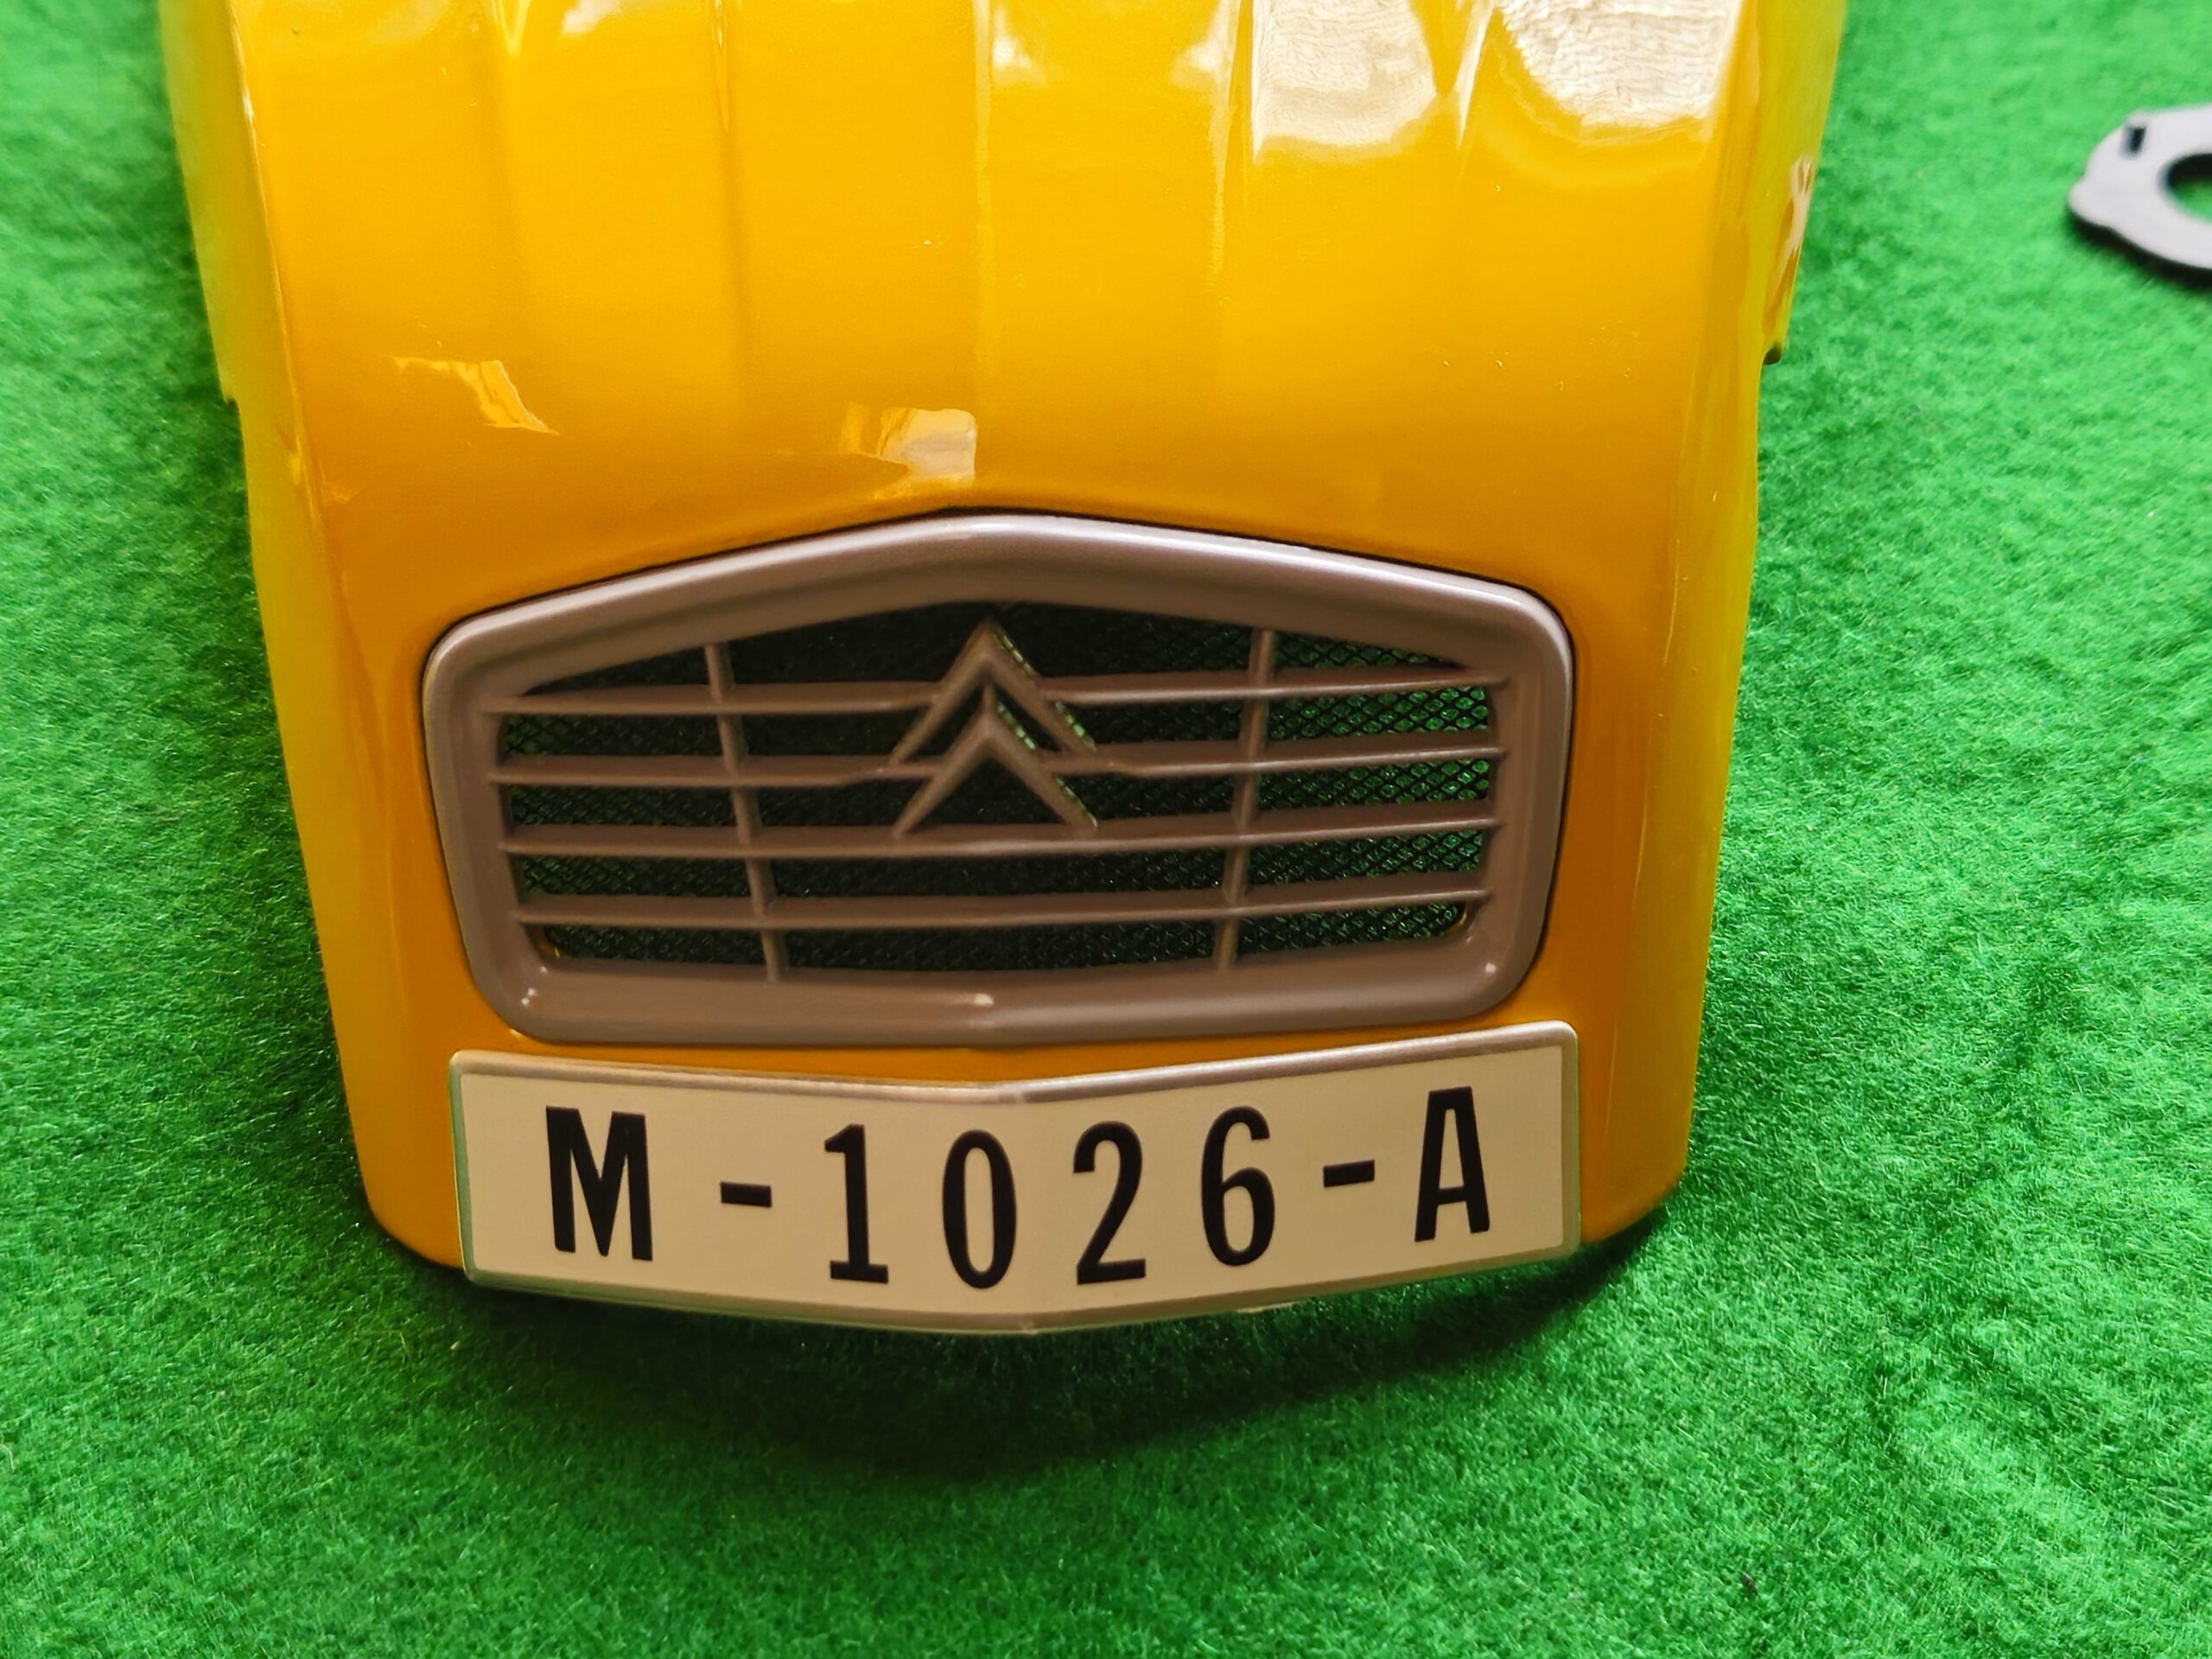
I was intrigued to see if they opted to replicate the two GS engine equipped 2CVs or base their model on Citroen’s offering of the limited 007 series that consisted of 1000 cars, 500 of which were reserved for the French market, all with the standard 602cc 2CV engine. (Each of the limited edition 2CV 007 is somewhat unique in that at the factory the bullet hole stickers were applied without any predefined positioning on the body, so no two cars are exactly the same.)

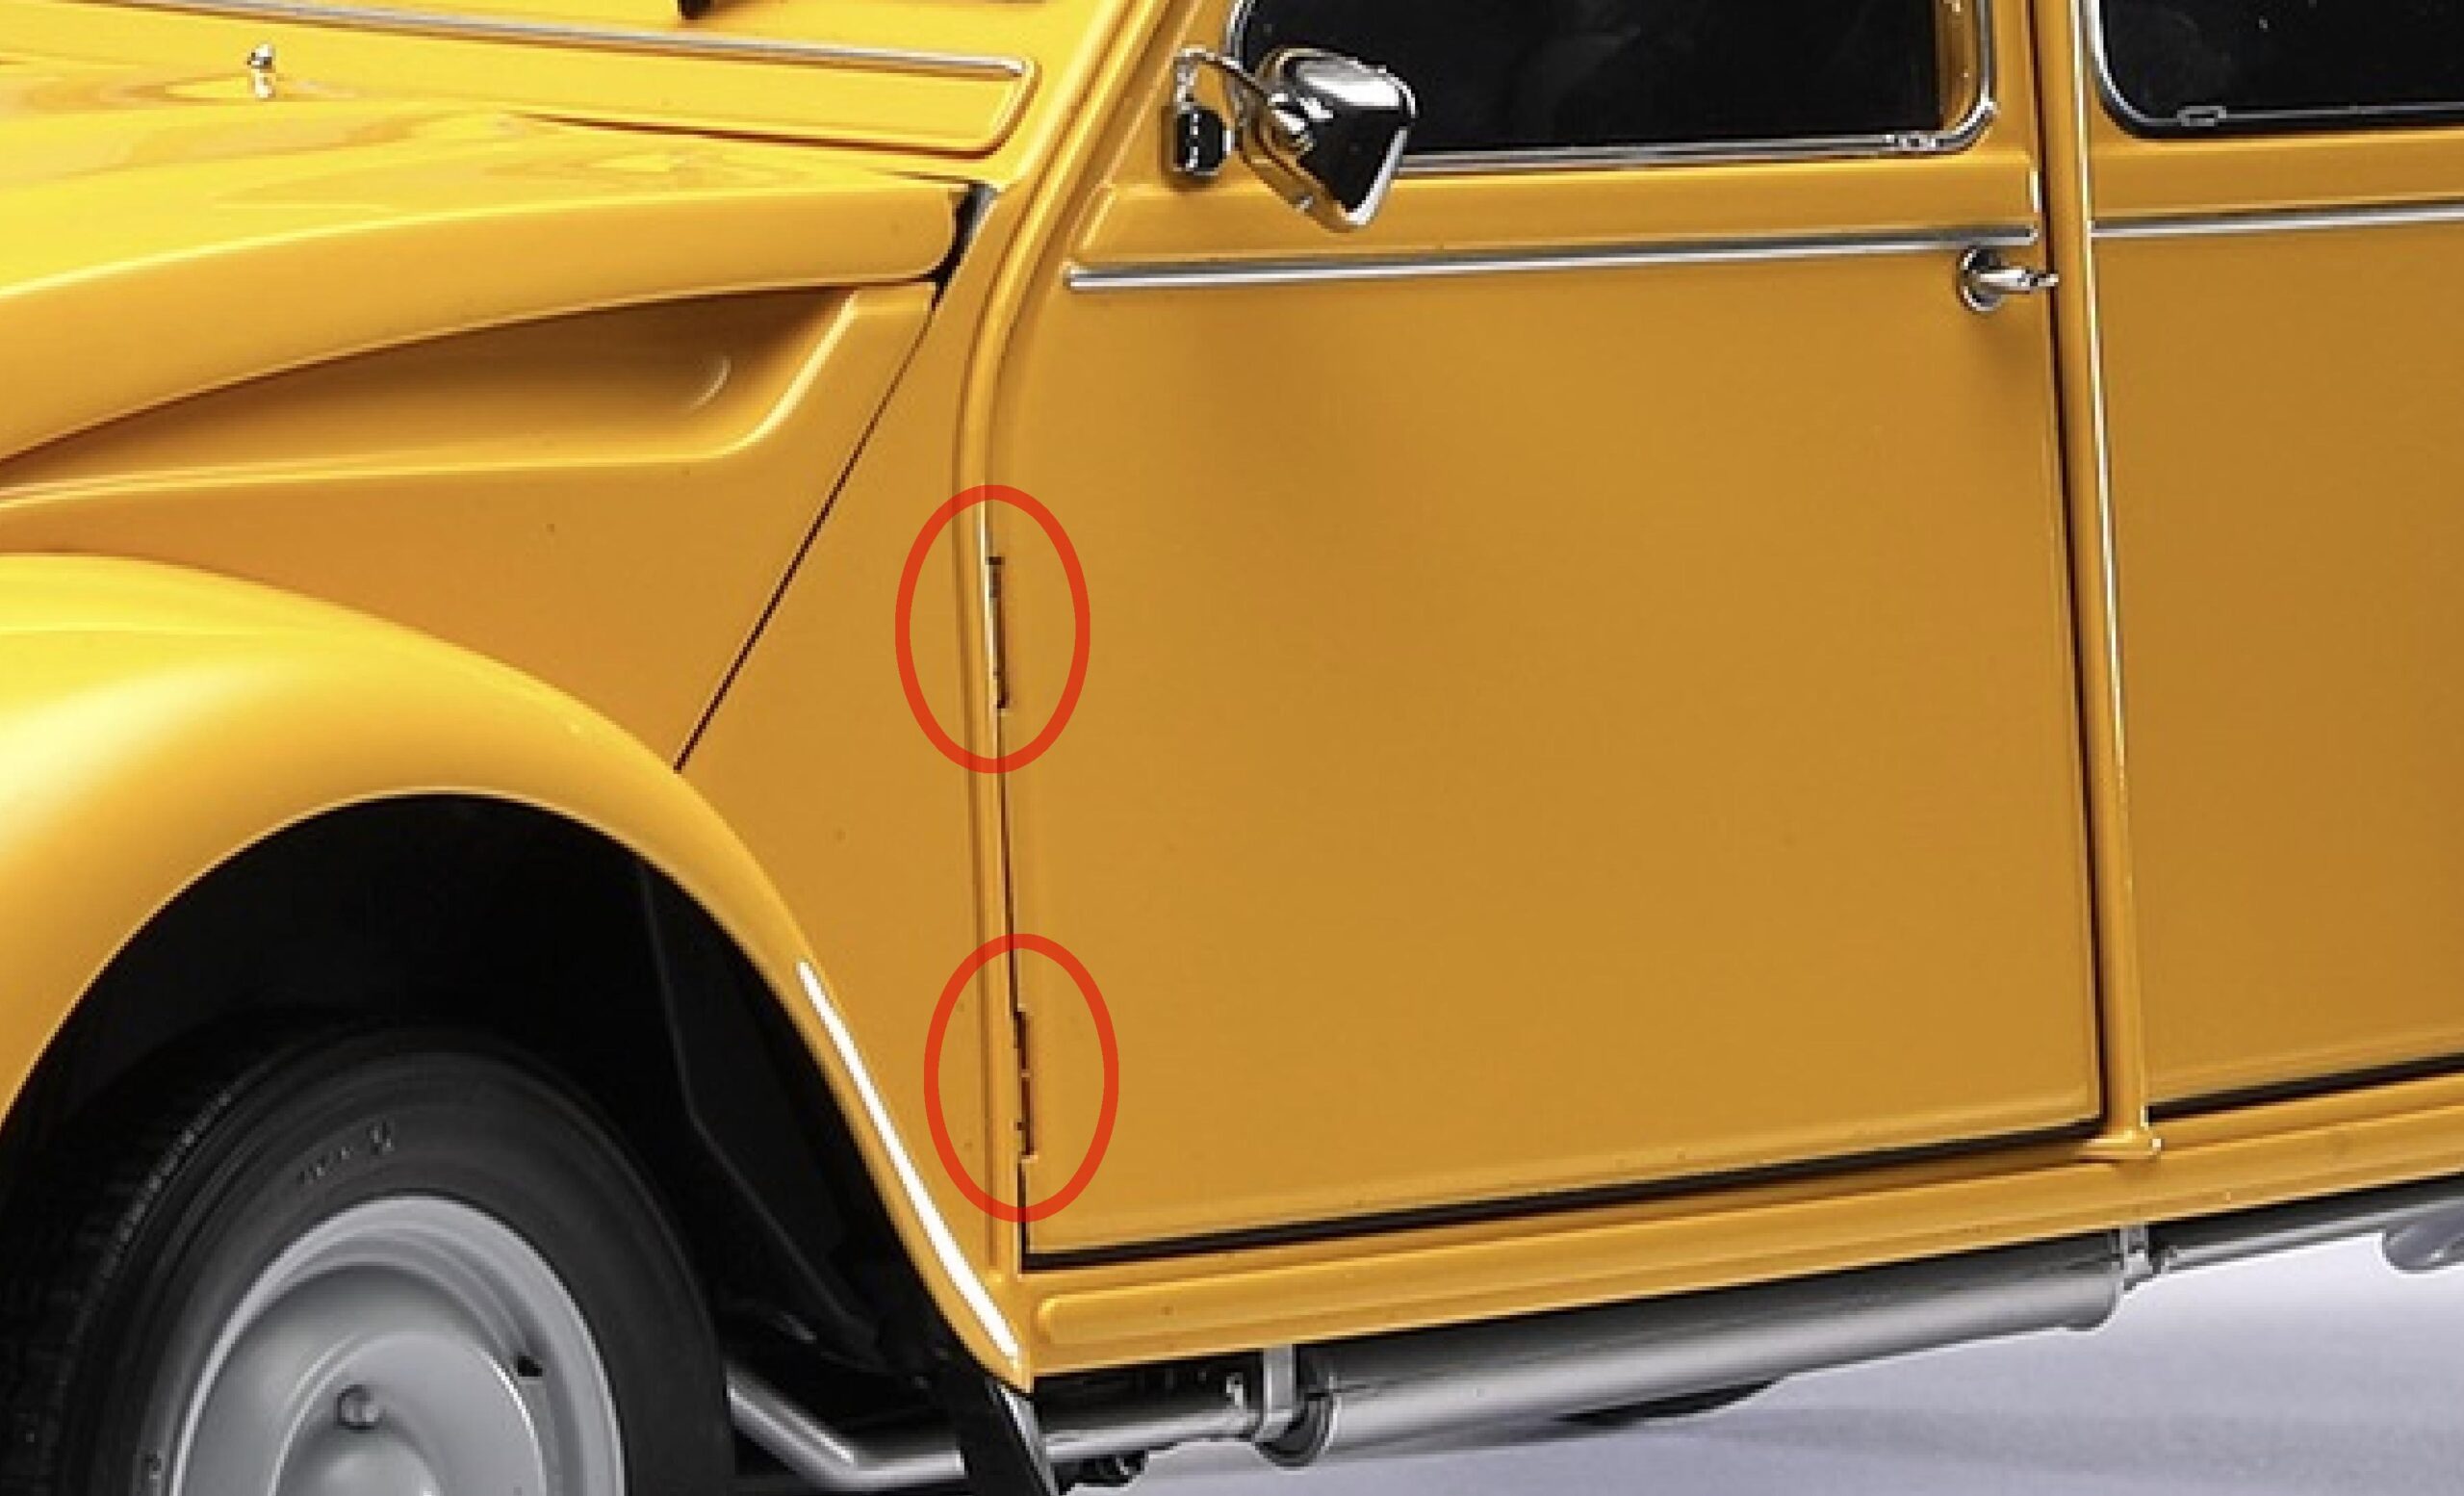
Photos of the completed model shown by Agora indicated that they are offering a big-scale model of the limited series 007; standard body and 602 cc engine. The detail looked impressive, the model kit of the Citroën 2CV has been designed using state-of-the-art 3D laser scanning technology of an original car. All the individual parts come pre-painted allowing you to create an authentic collector’s piece. But one thing they did not get right is that there are recesses on each front door skin where the doors are hiedng. They are not present on an actual 2CV. (I suppose those could be filled and the door repainted, but that would require modelling skill beyond what Agora intended customers to do.)
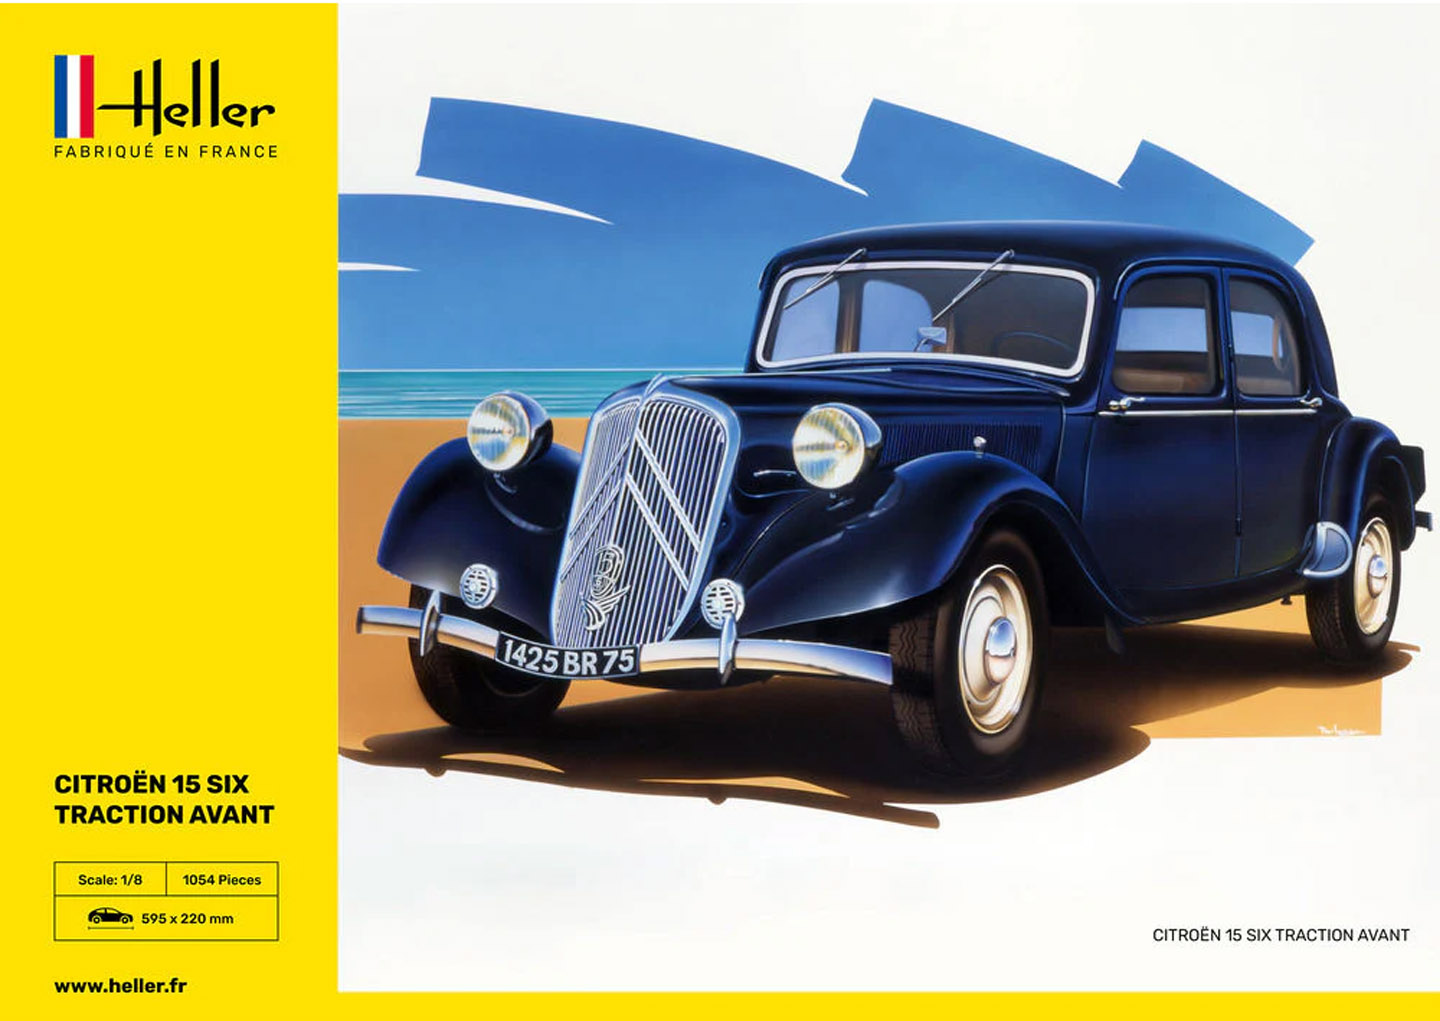
Even so, would this be a model as complex as trying to build the actual car? It has functioning lights, a functioning horn, and hinged front windows. I’m not an experienced model builder and the last thing I want is to be faced with construction of something as complex as the Heller 1/8 scale Traction Avant 15-6 model, that gives most proficient model builders pause to proceed and ultimately offer it to sell it to the next brave soul.
One thing that did surprise me was that the cost for the Agora model experience — £1,499.00. Purchasing online, I was given the options of having their series of 007 model kits shipped to me monthly over a 12 or 24 month period. As I wanted to complete the model as soon as possible at my ripe old age, I chose the shorter method.
I also had concern that if the model is coming in multiple shipments, that could be a problem paying Canadian duty, tax and brokerage import fees on my end. Trying to sort that out with Canada Border Services would be a hassle.
I was pleasantly surprised to see package #1 measuring just 12 x 8.5 x 4” arrive at my door with no need to pay any charge. Agora say they ship worldwide, and my package was postmarked that it shipped from Ft. Lauderdale, Florida.
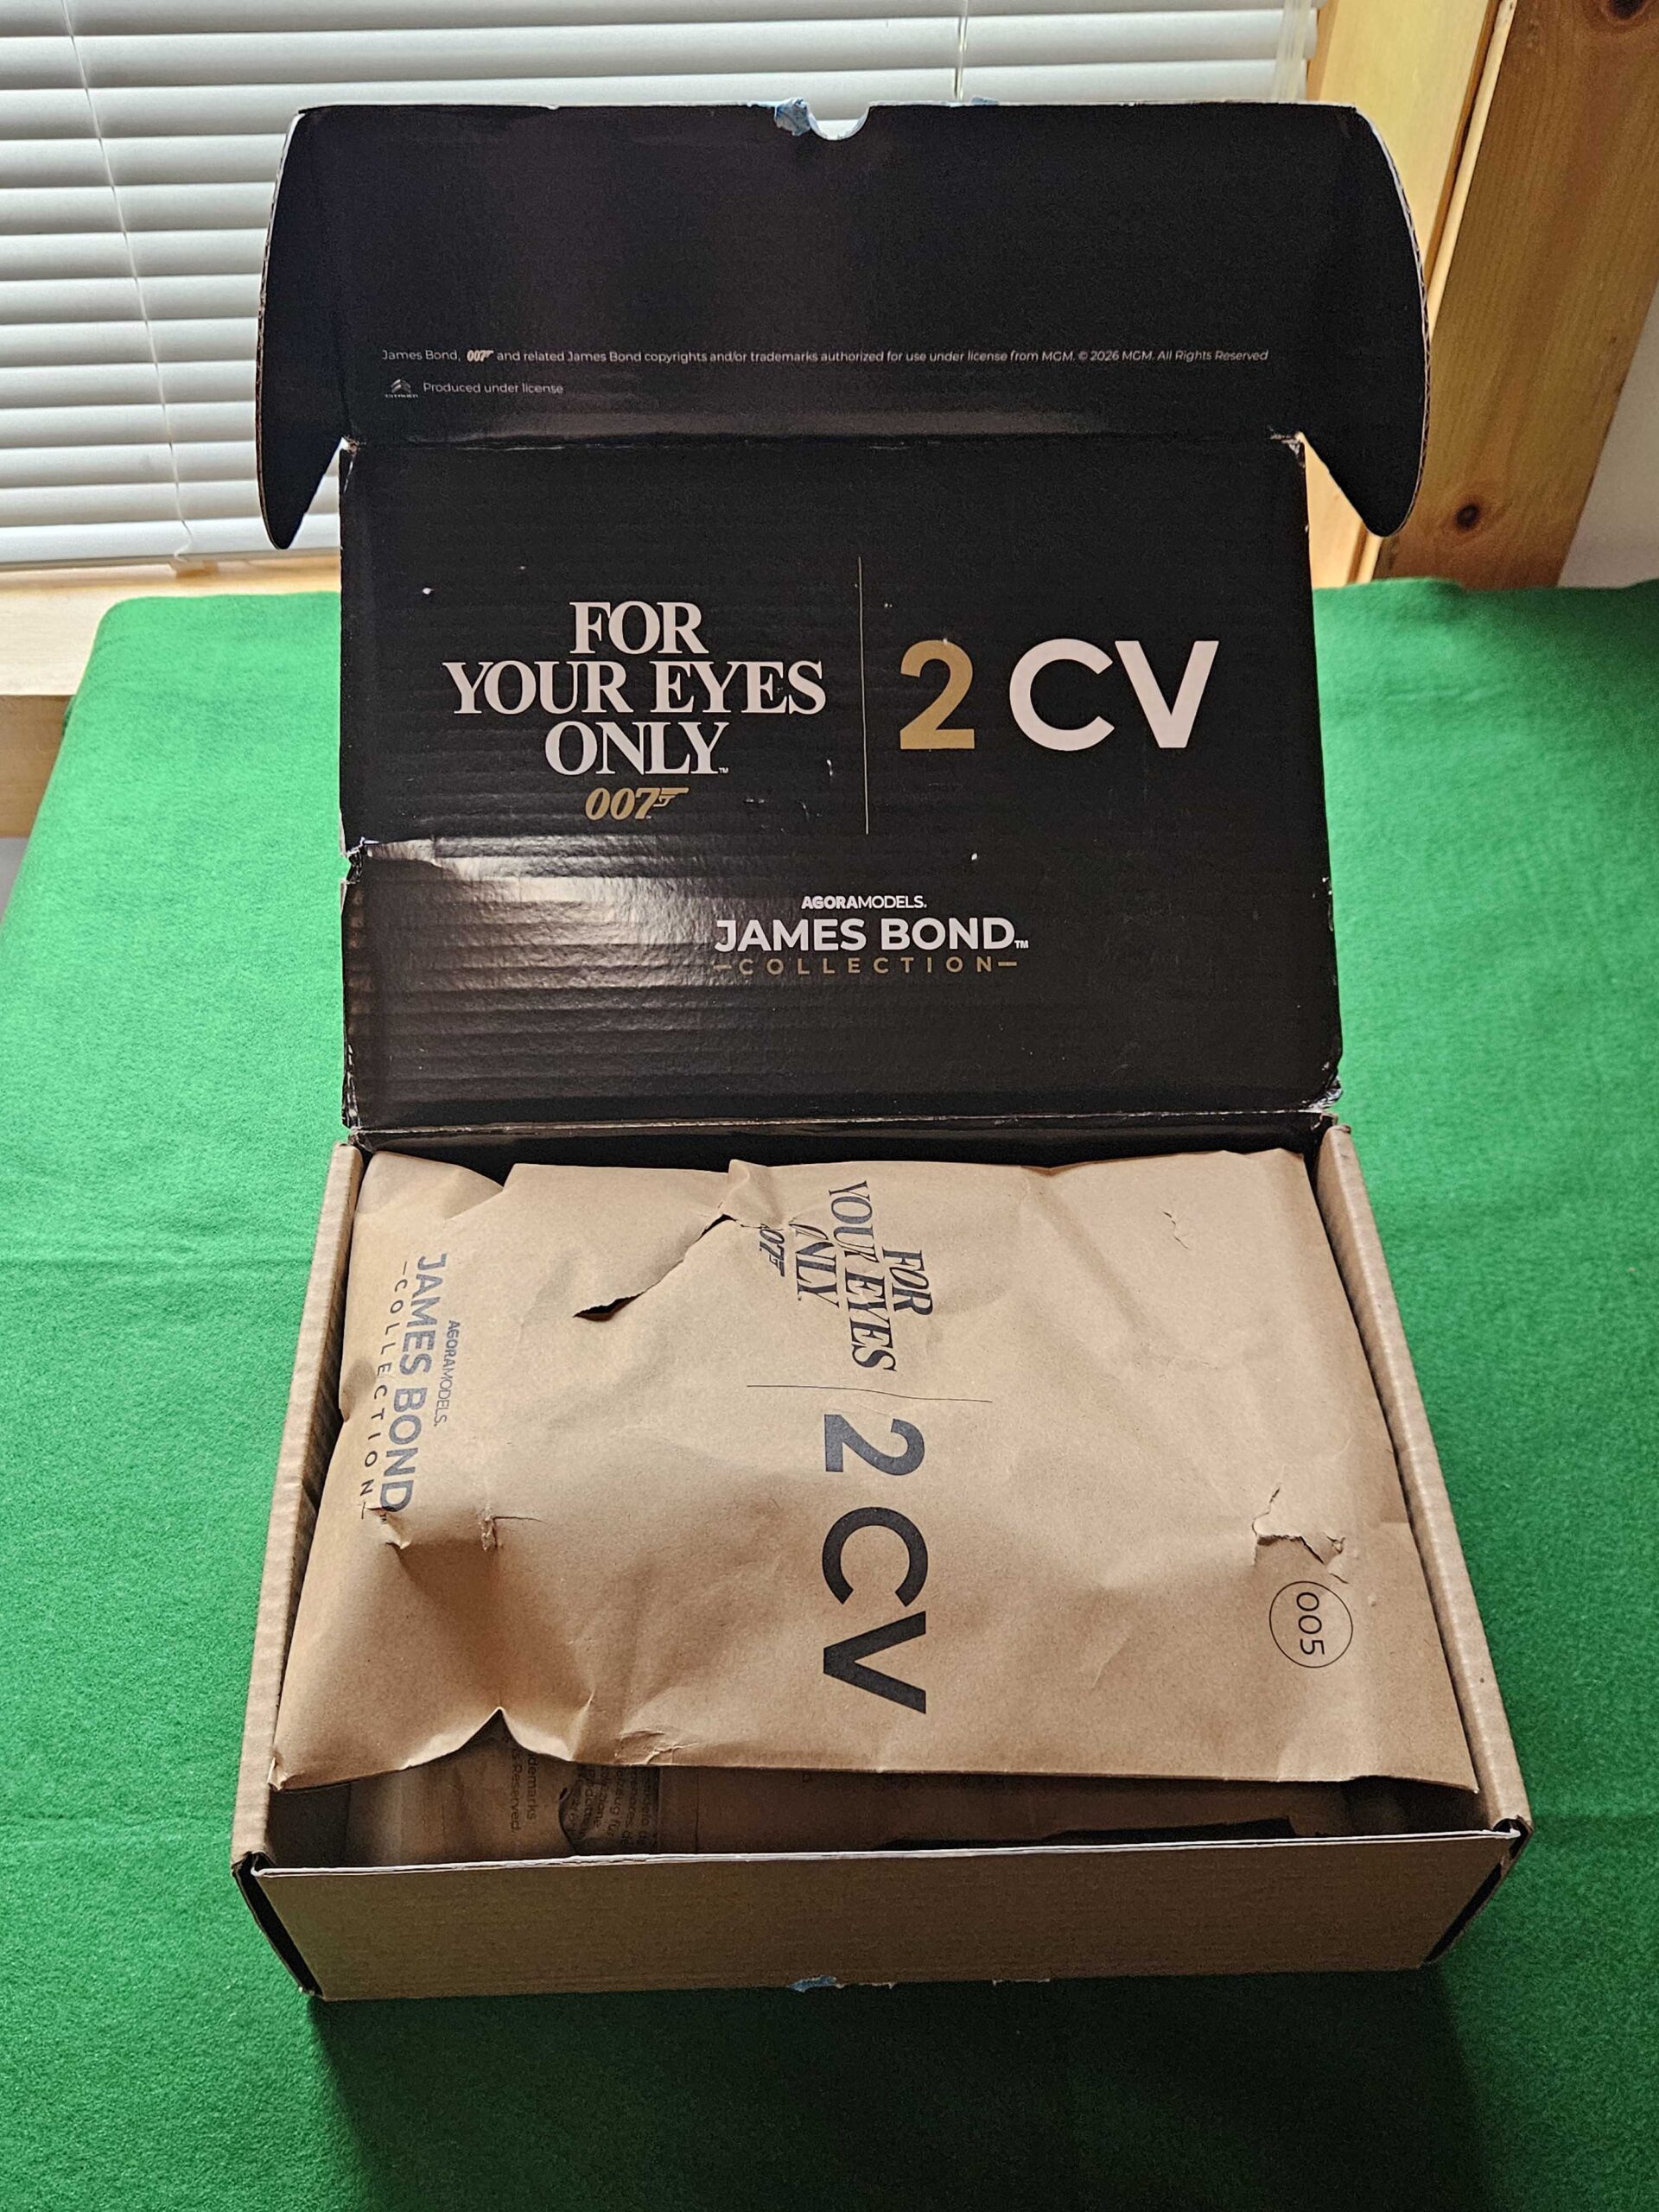
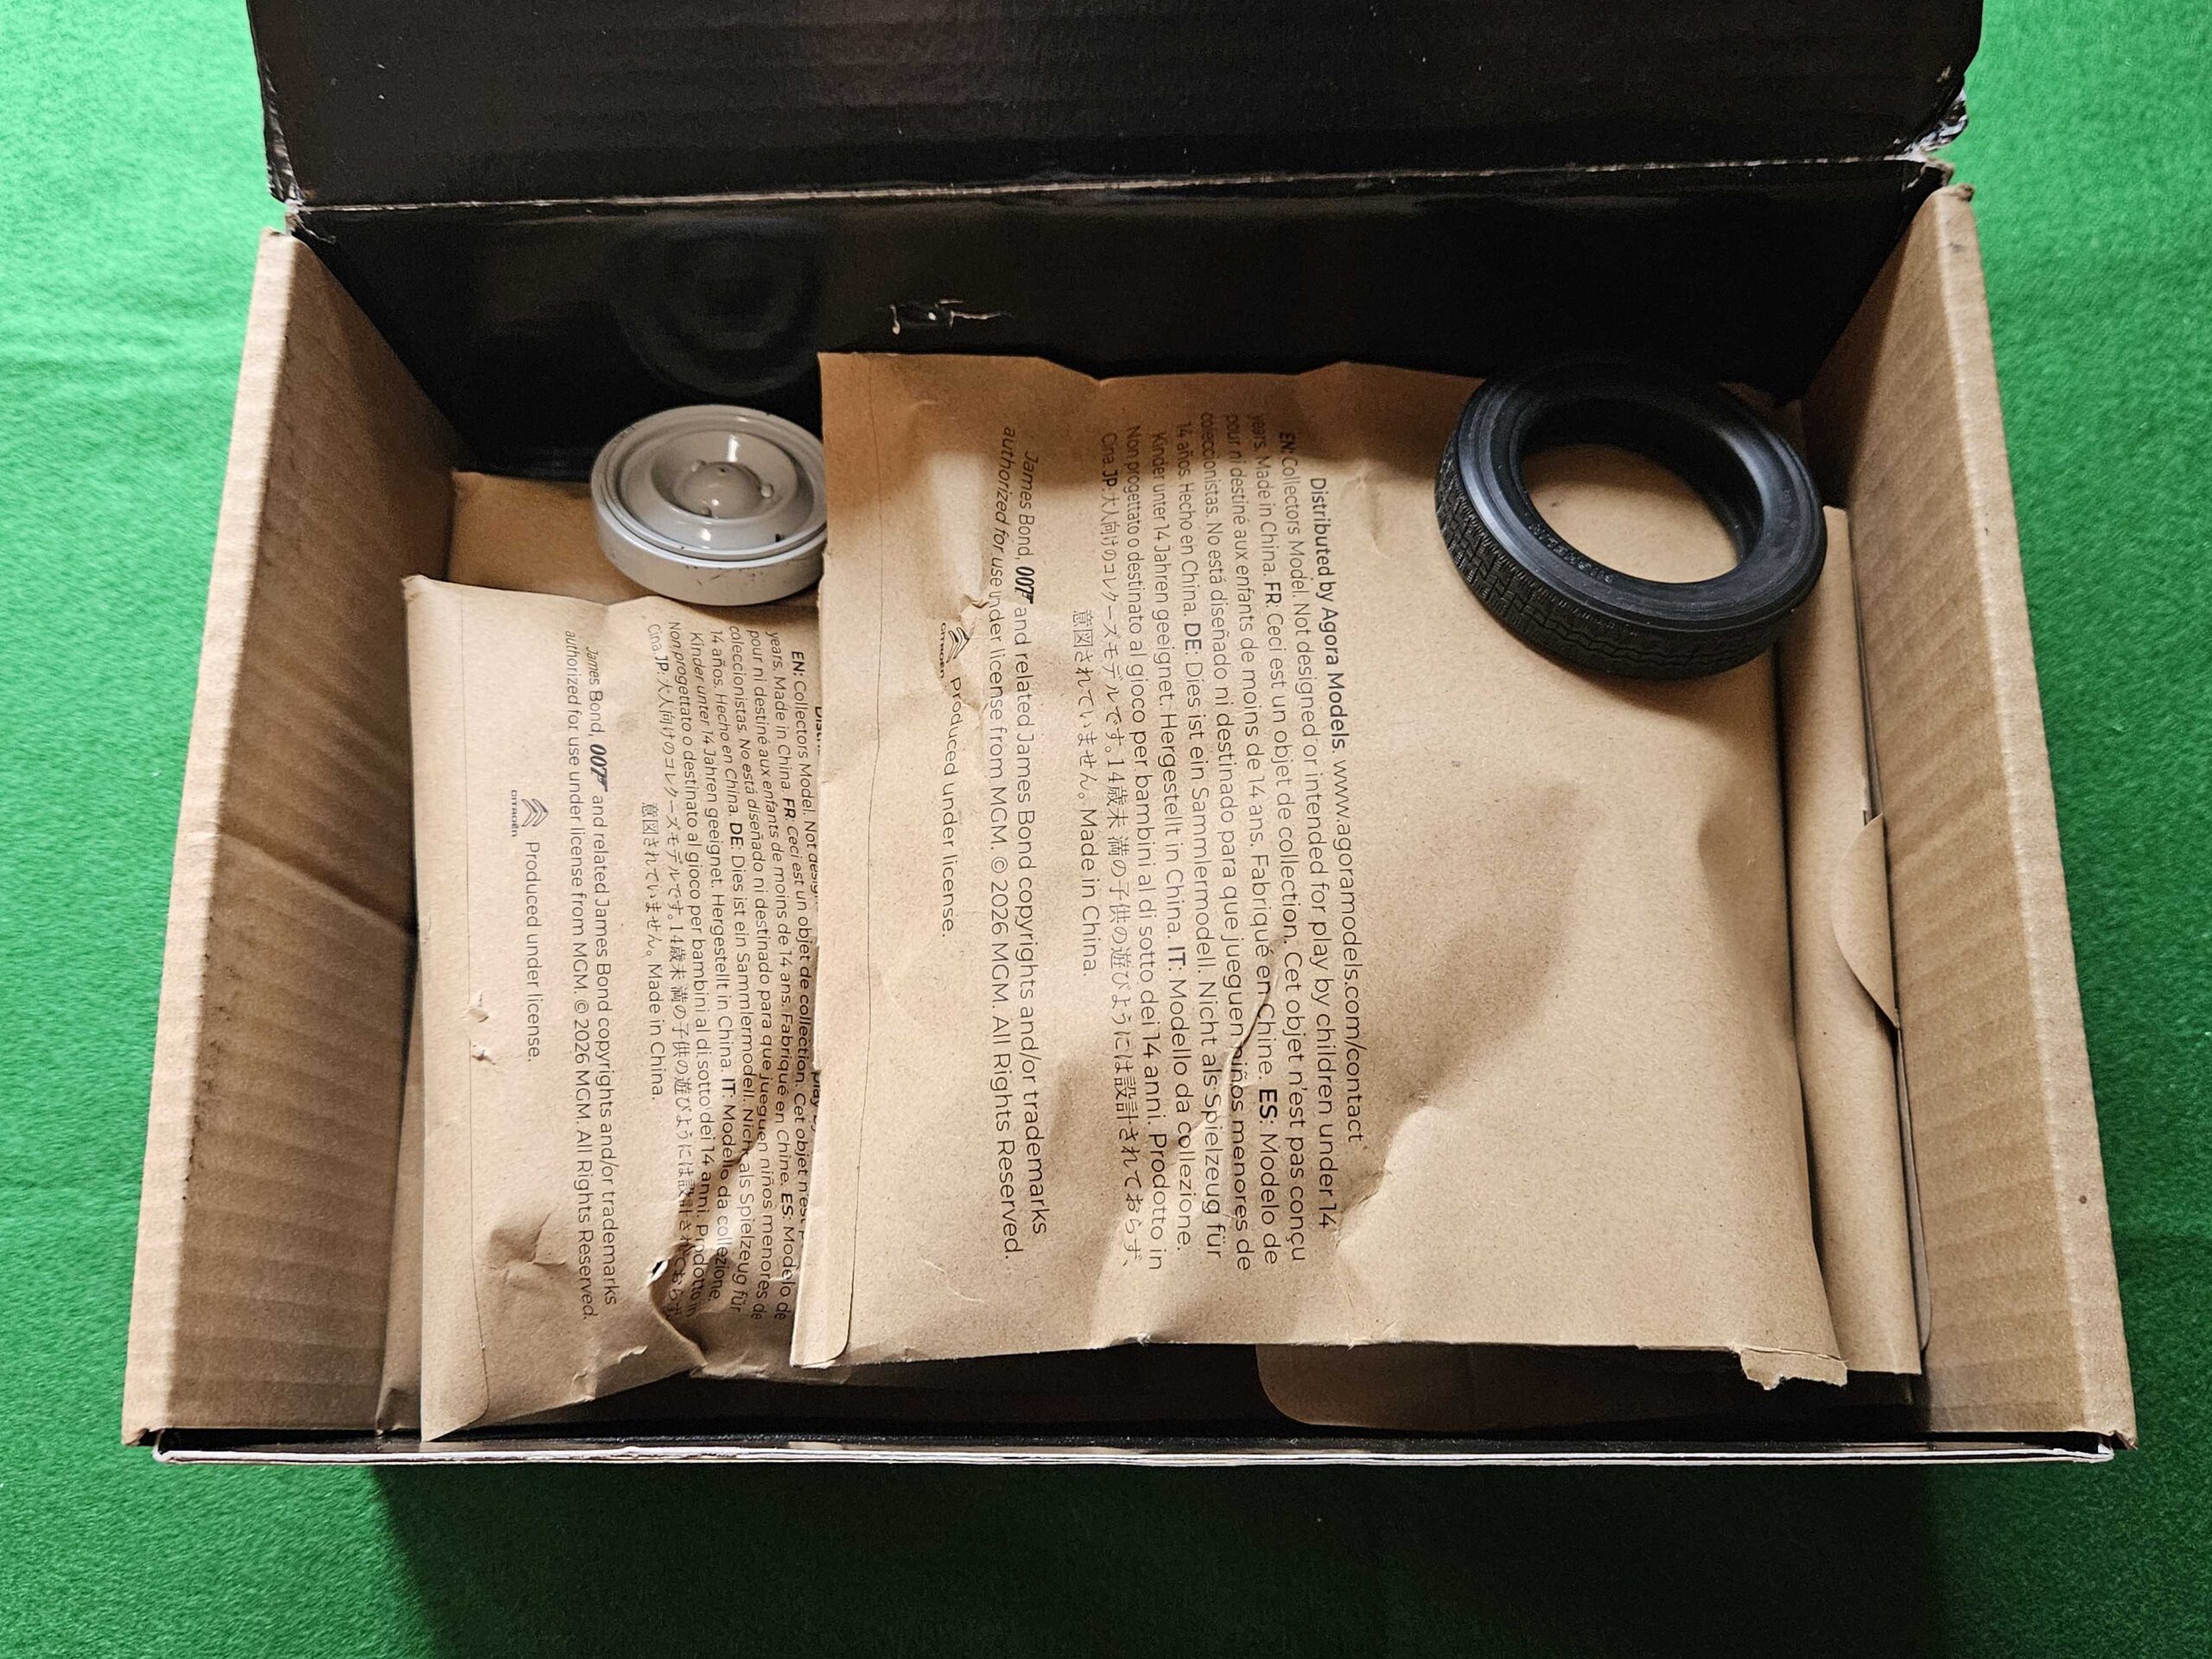
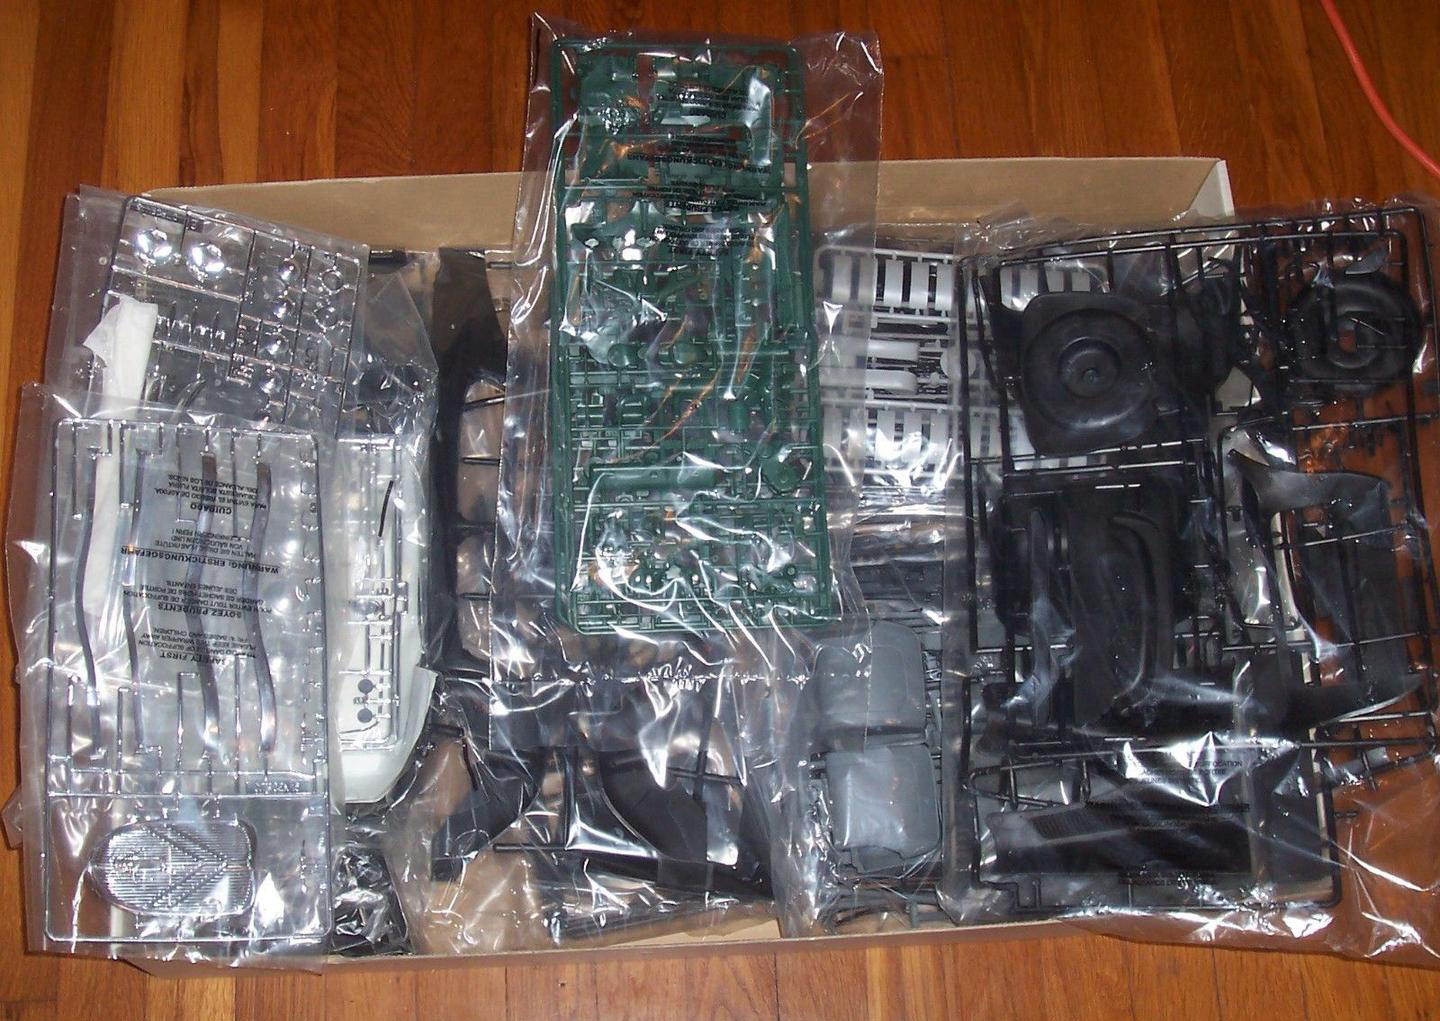
Opening the package is a bit of a tease to what the model will be. The online instructions at first appear daunting, but scrolling through each stage they seem well described and shown with pictures. (You can also download a PDF version of these instructions.) This time there were 5 stages to complete;
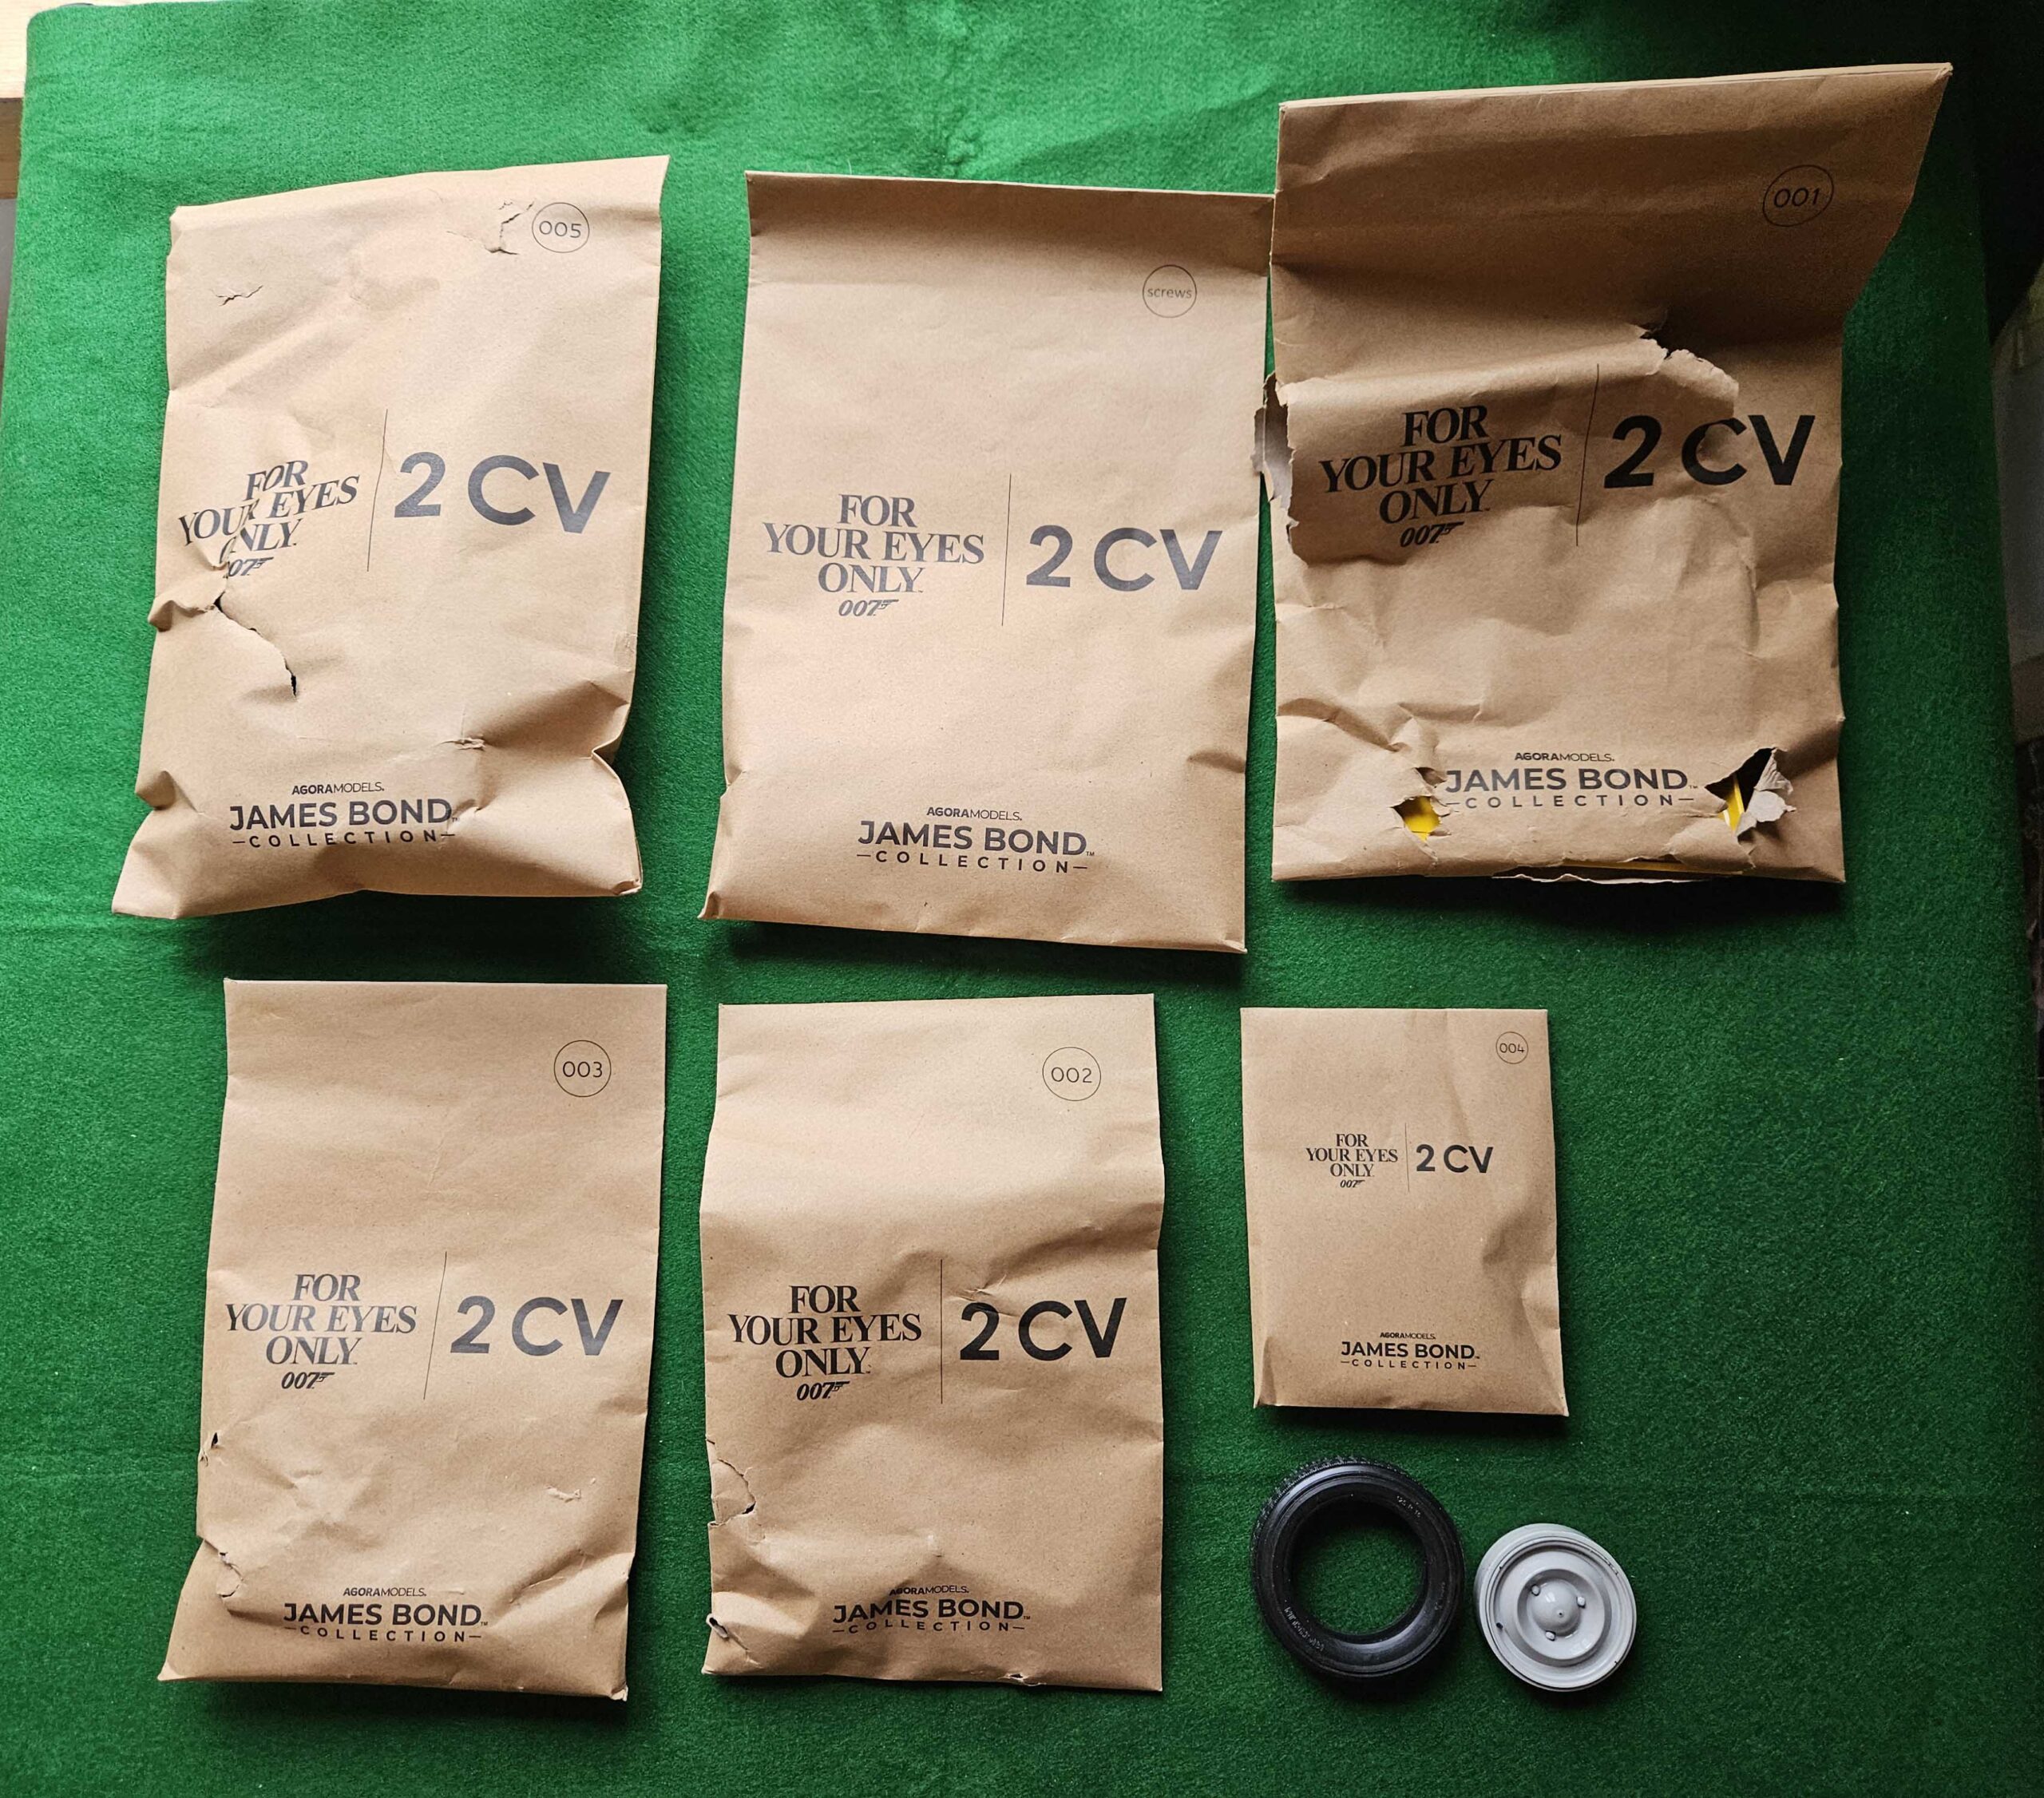
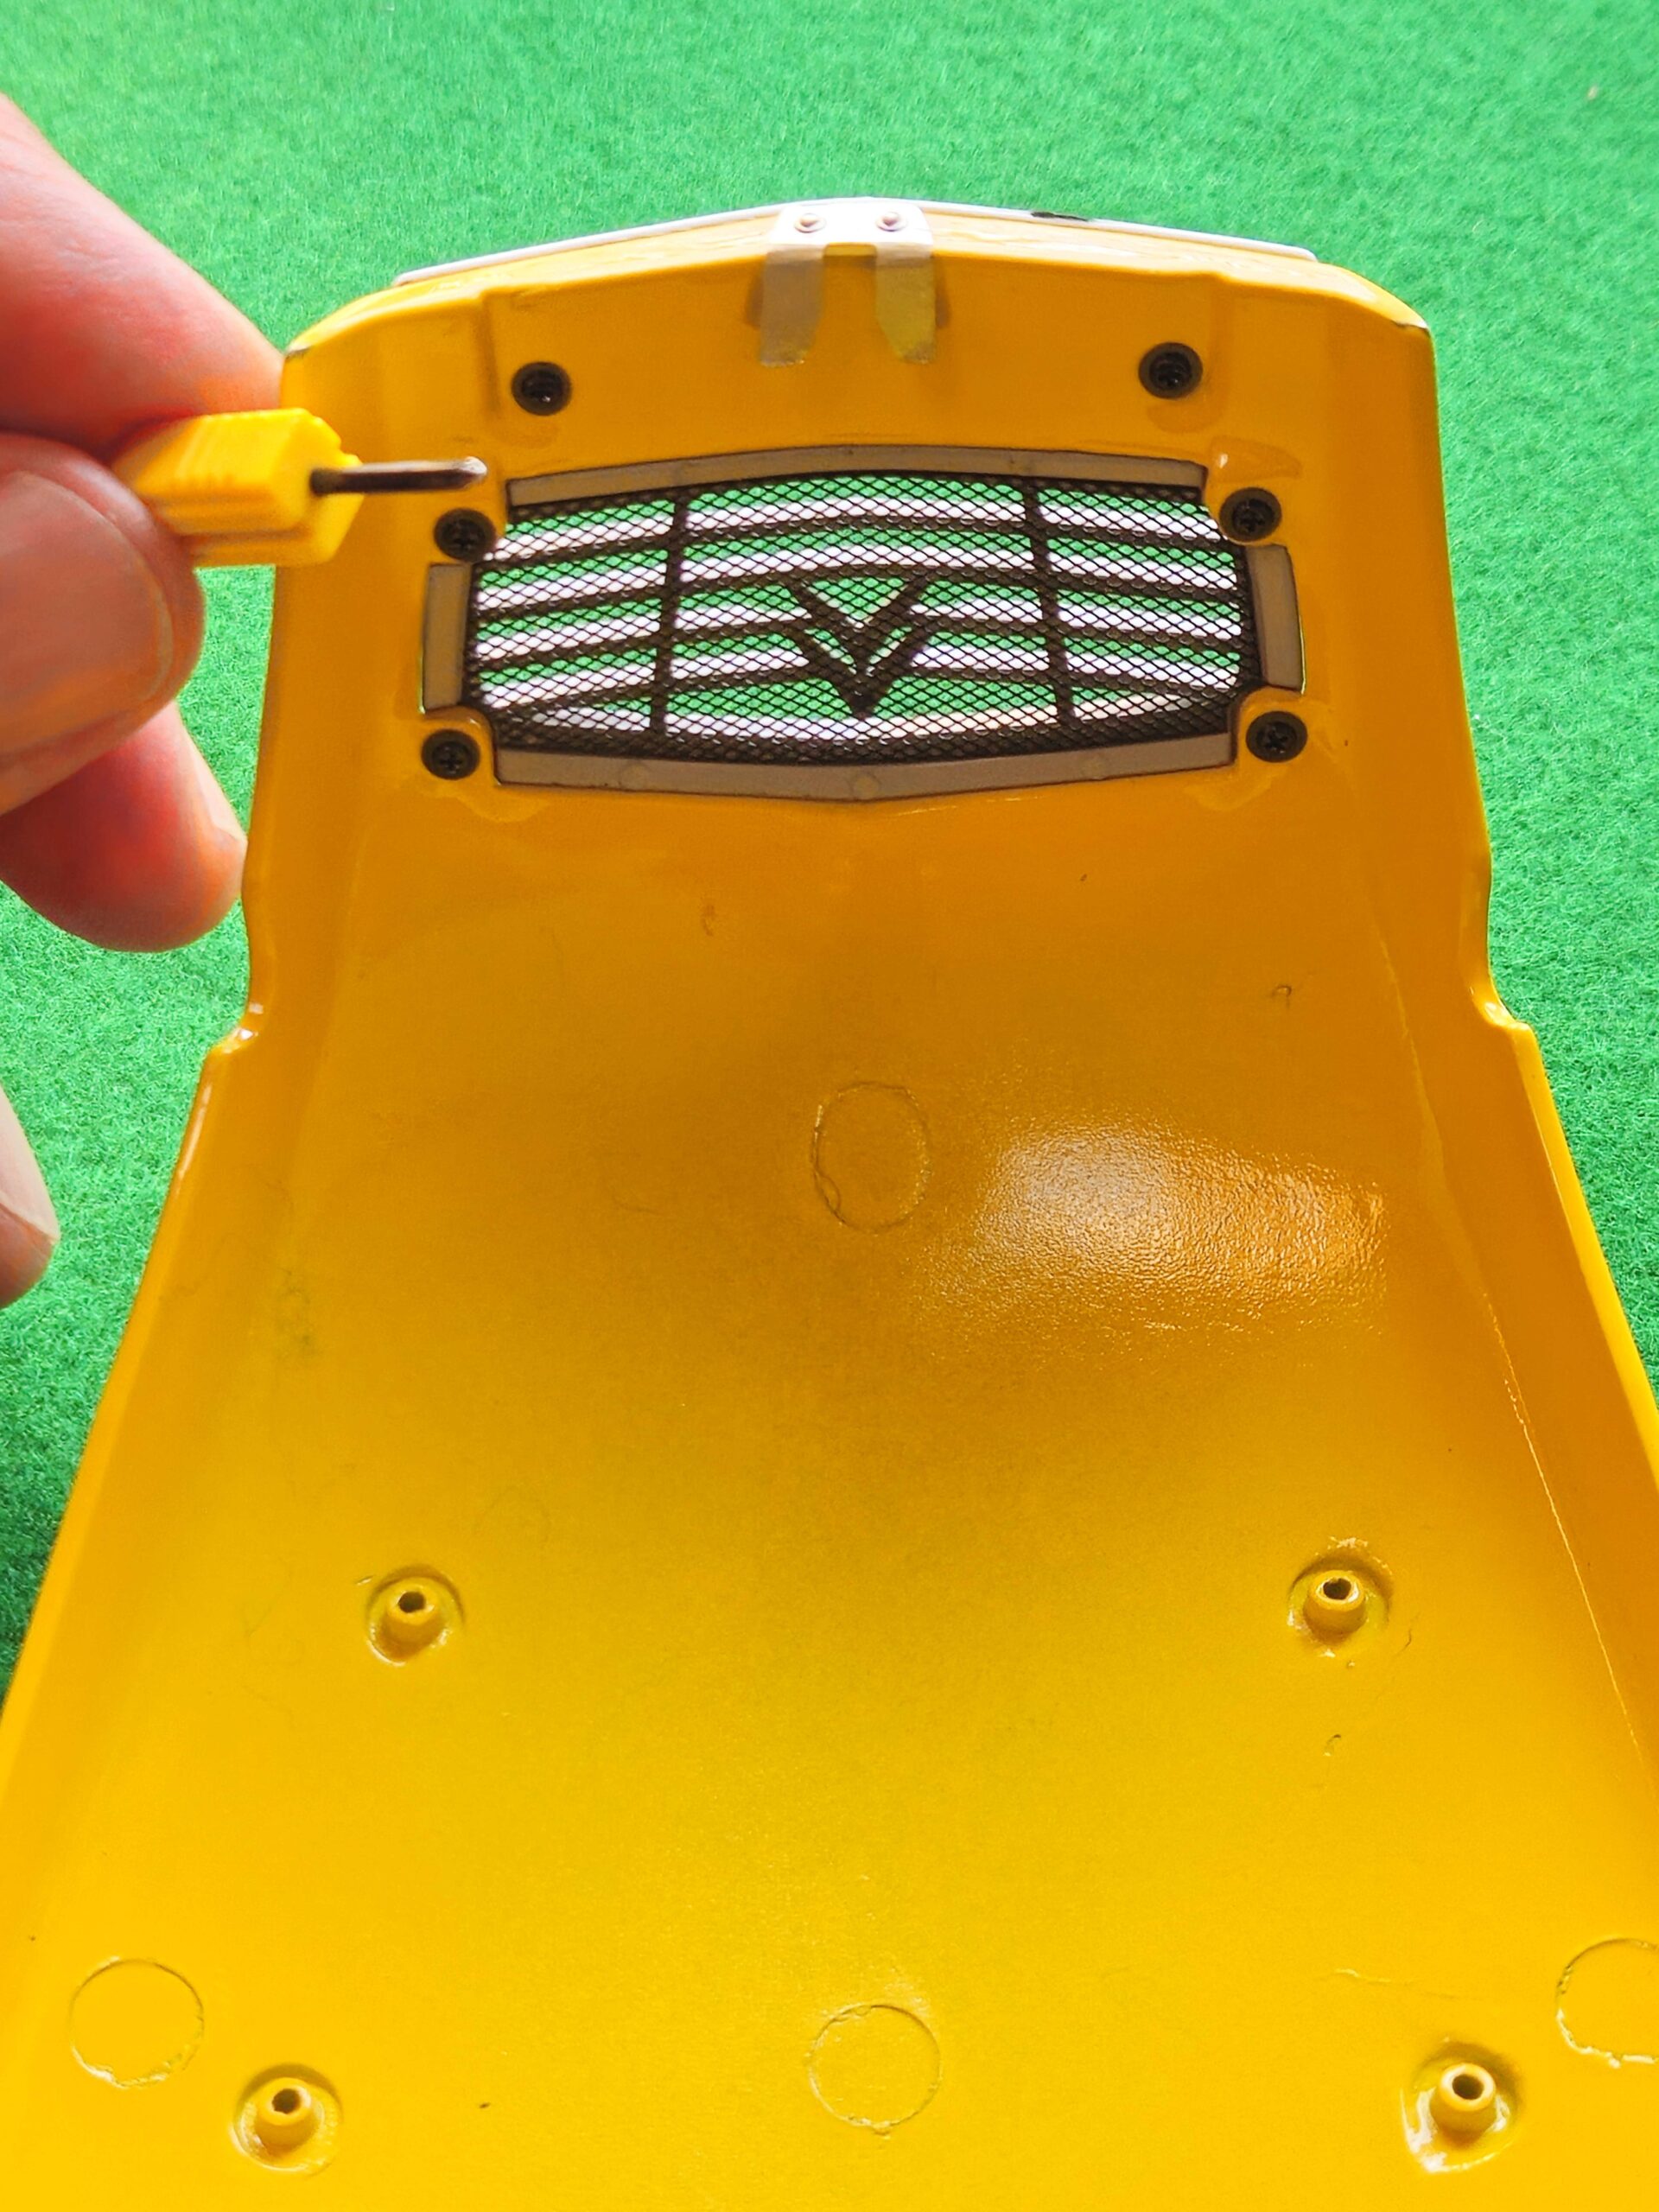
1) Fitting the grill and license plate to the hood.
2) Building the front left wheel and suspension arm
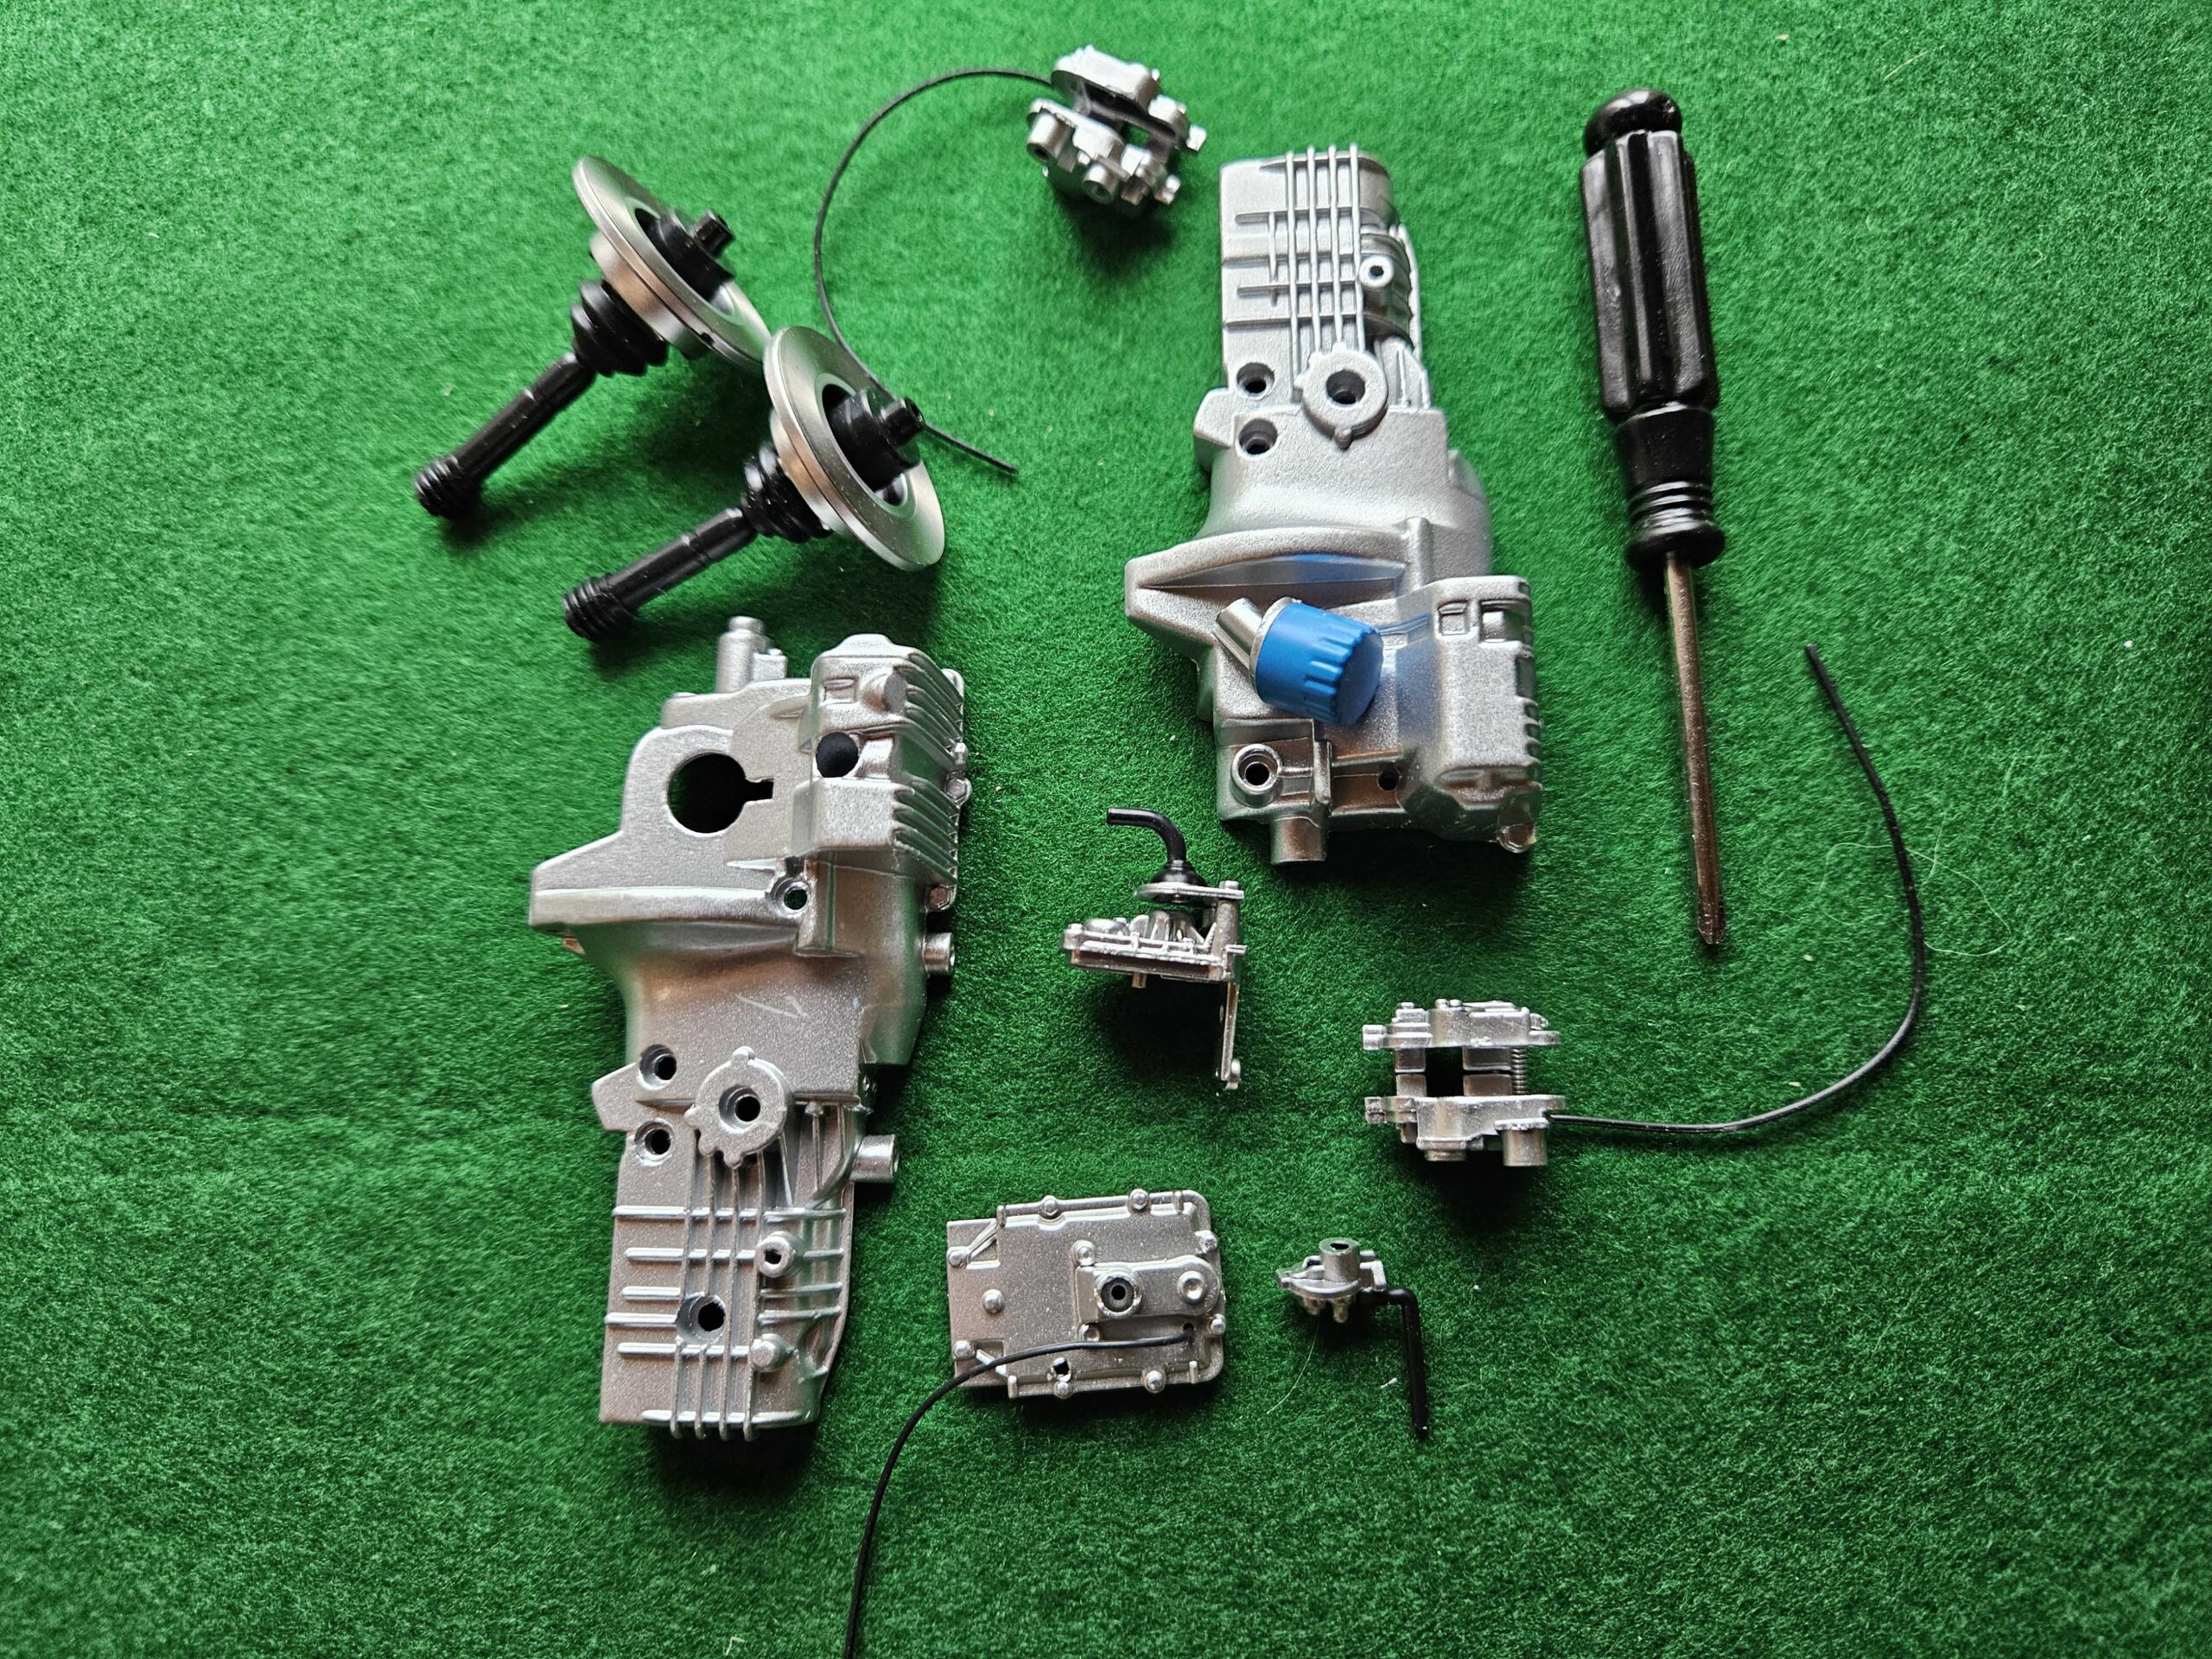
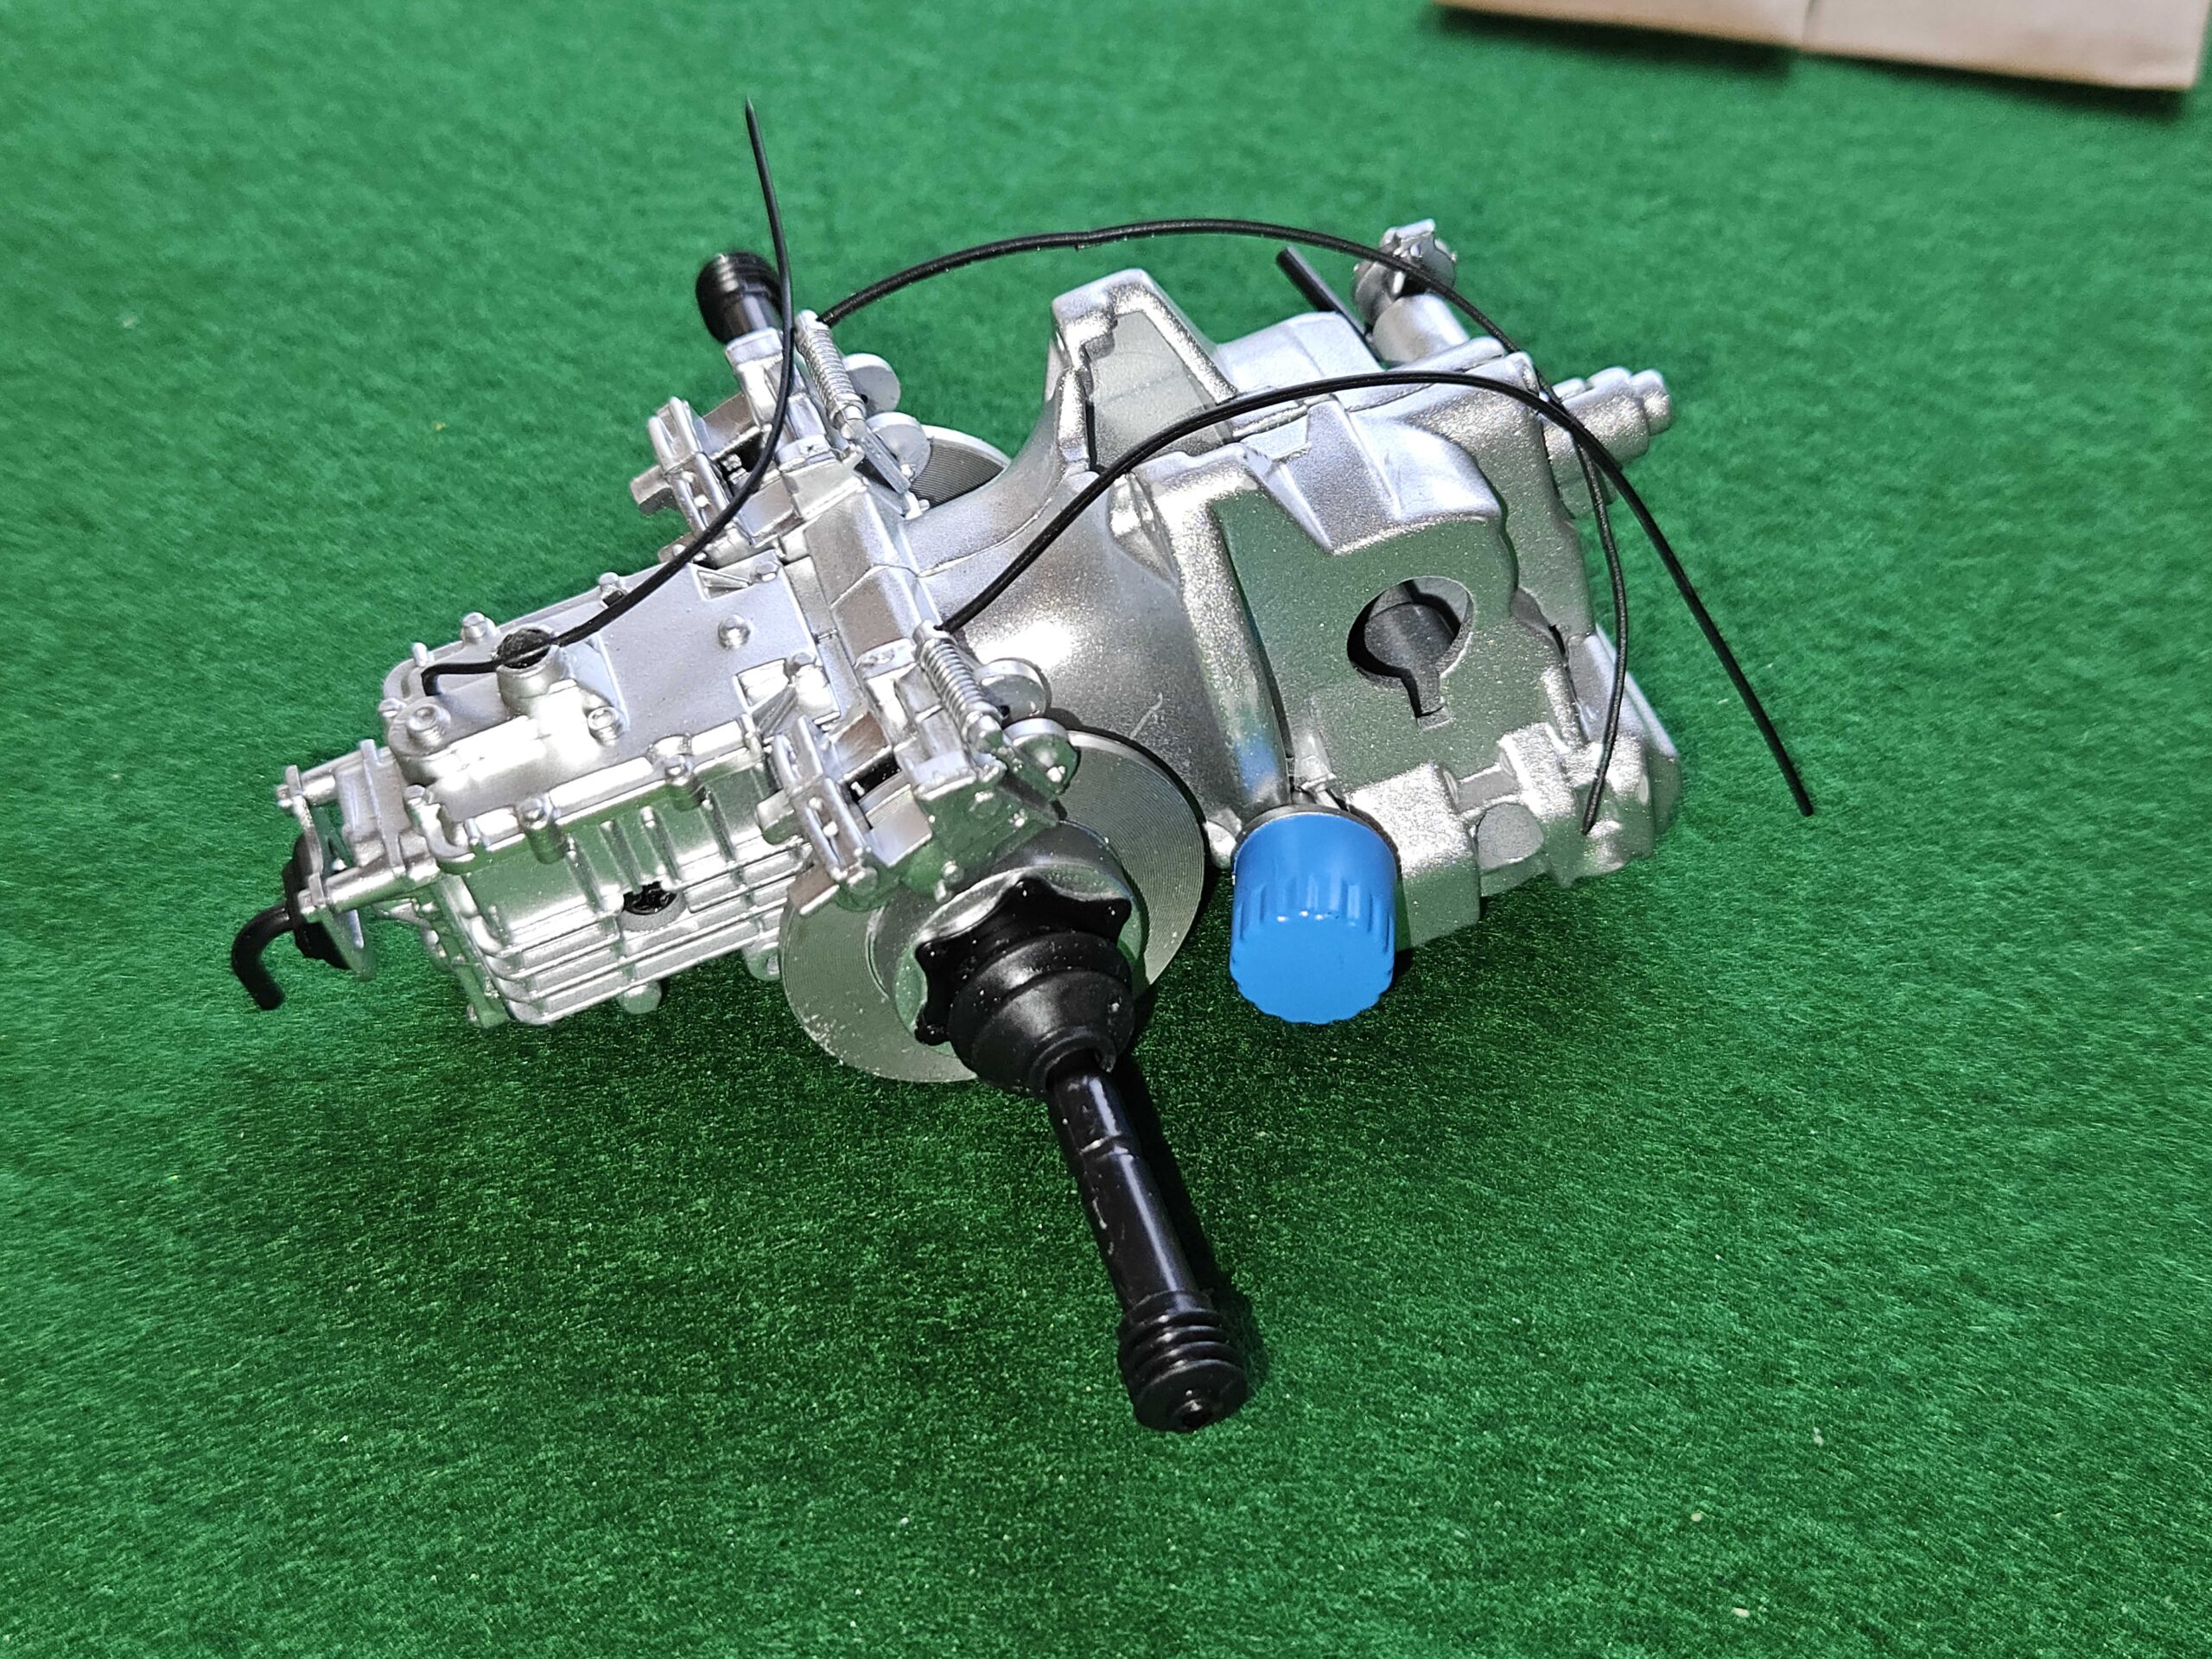
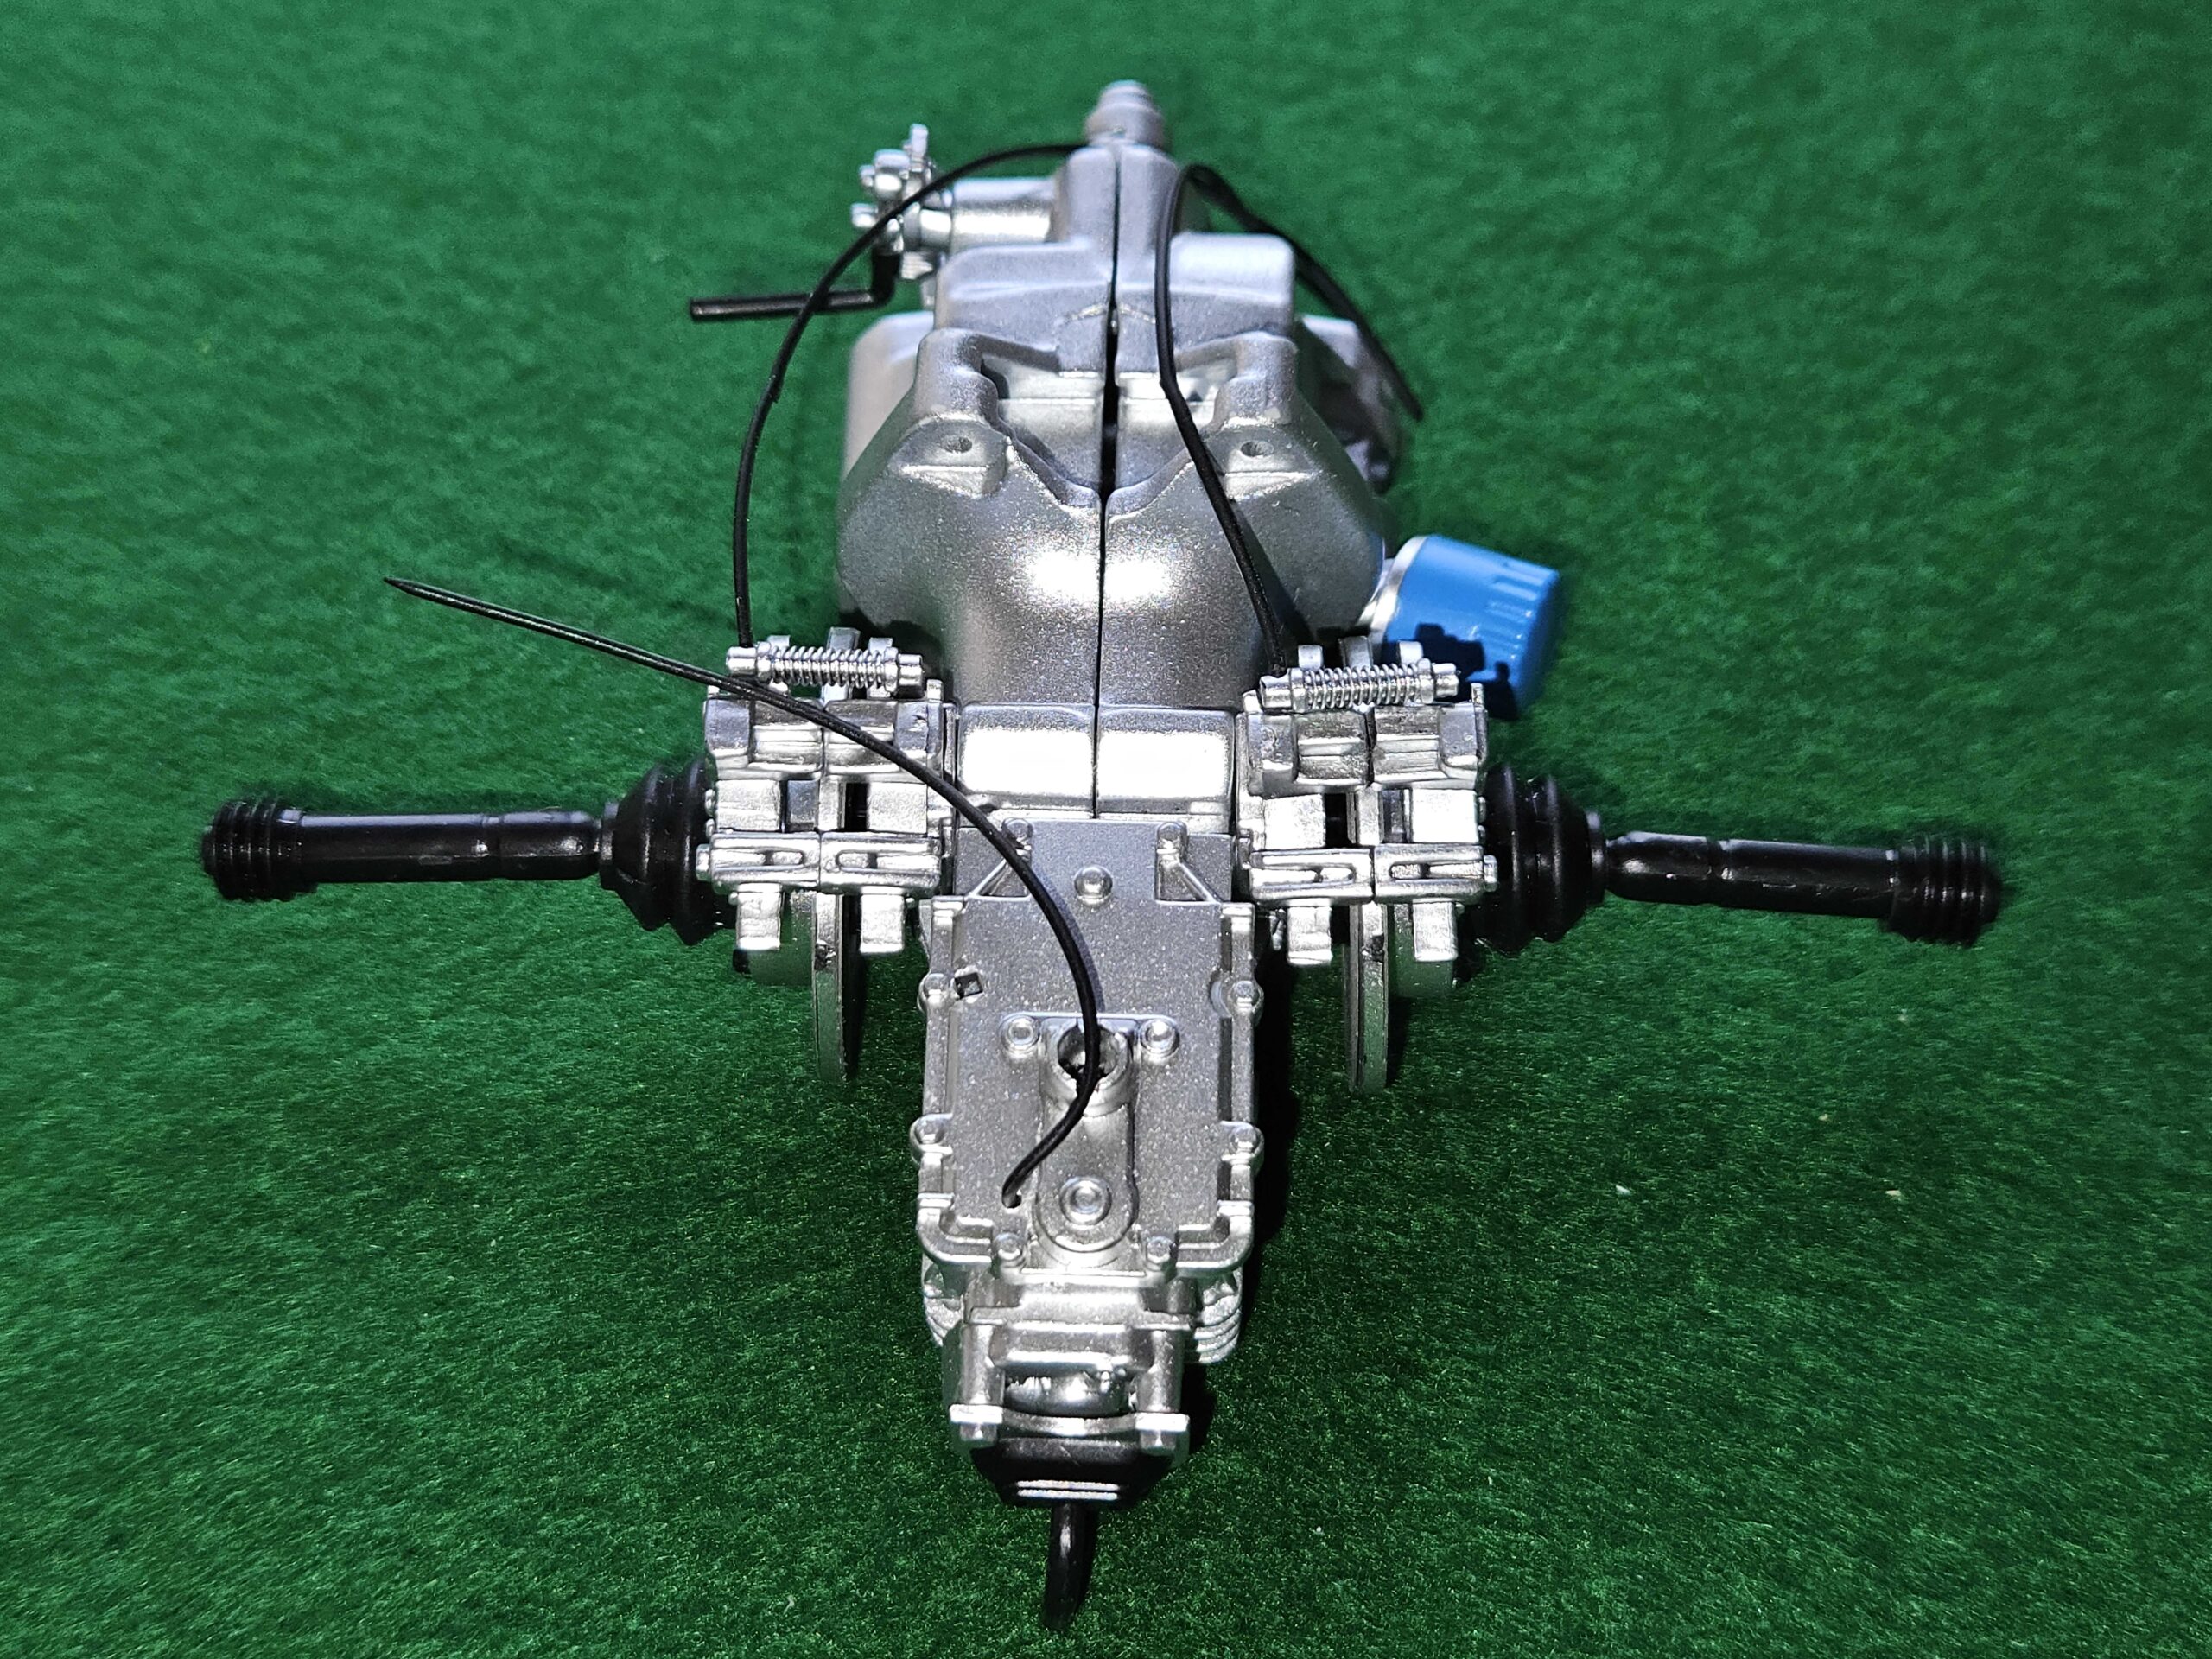
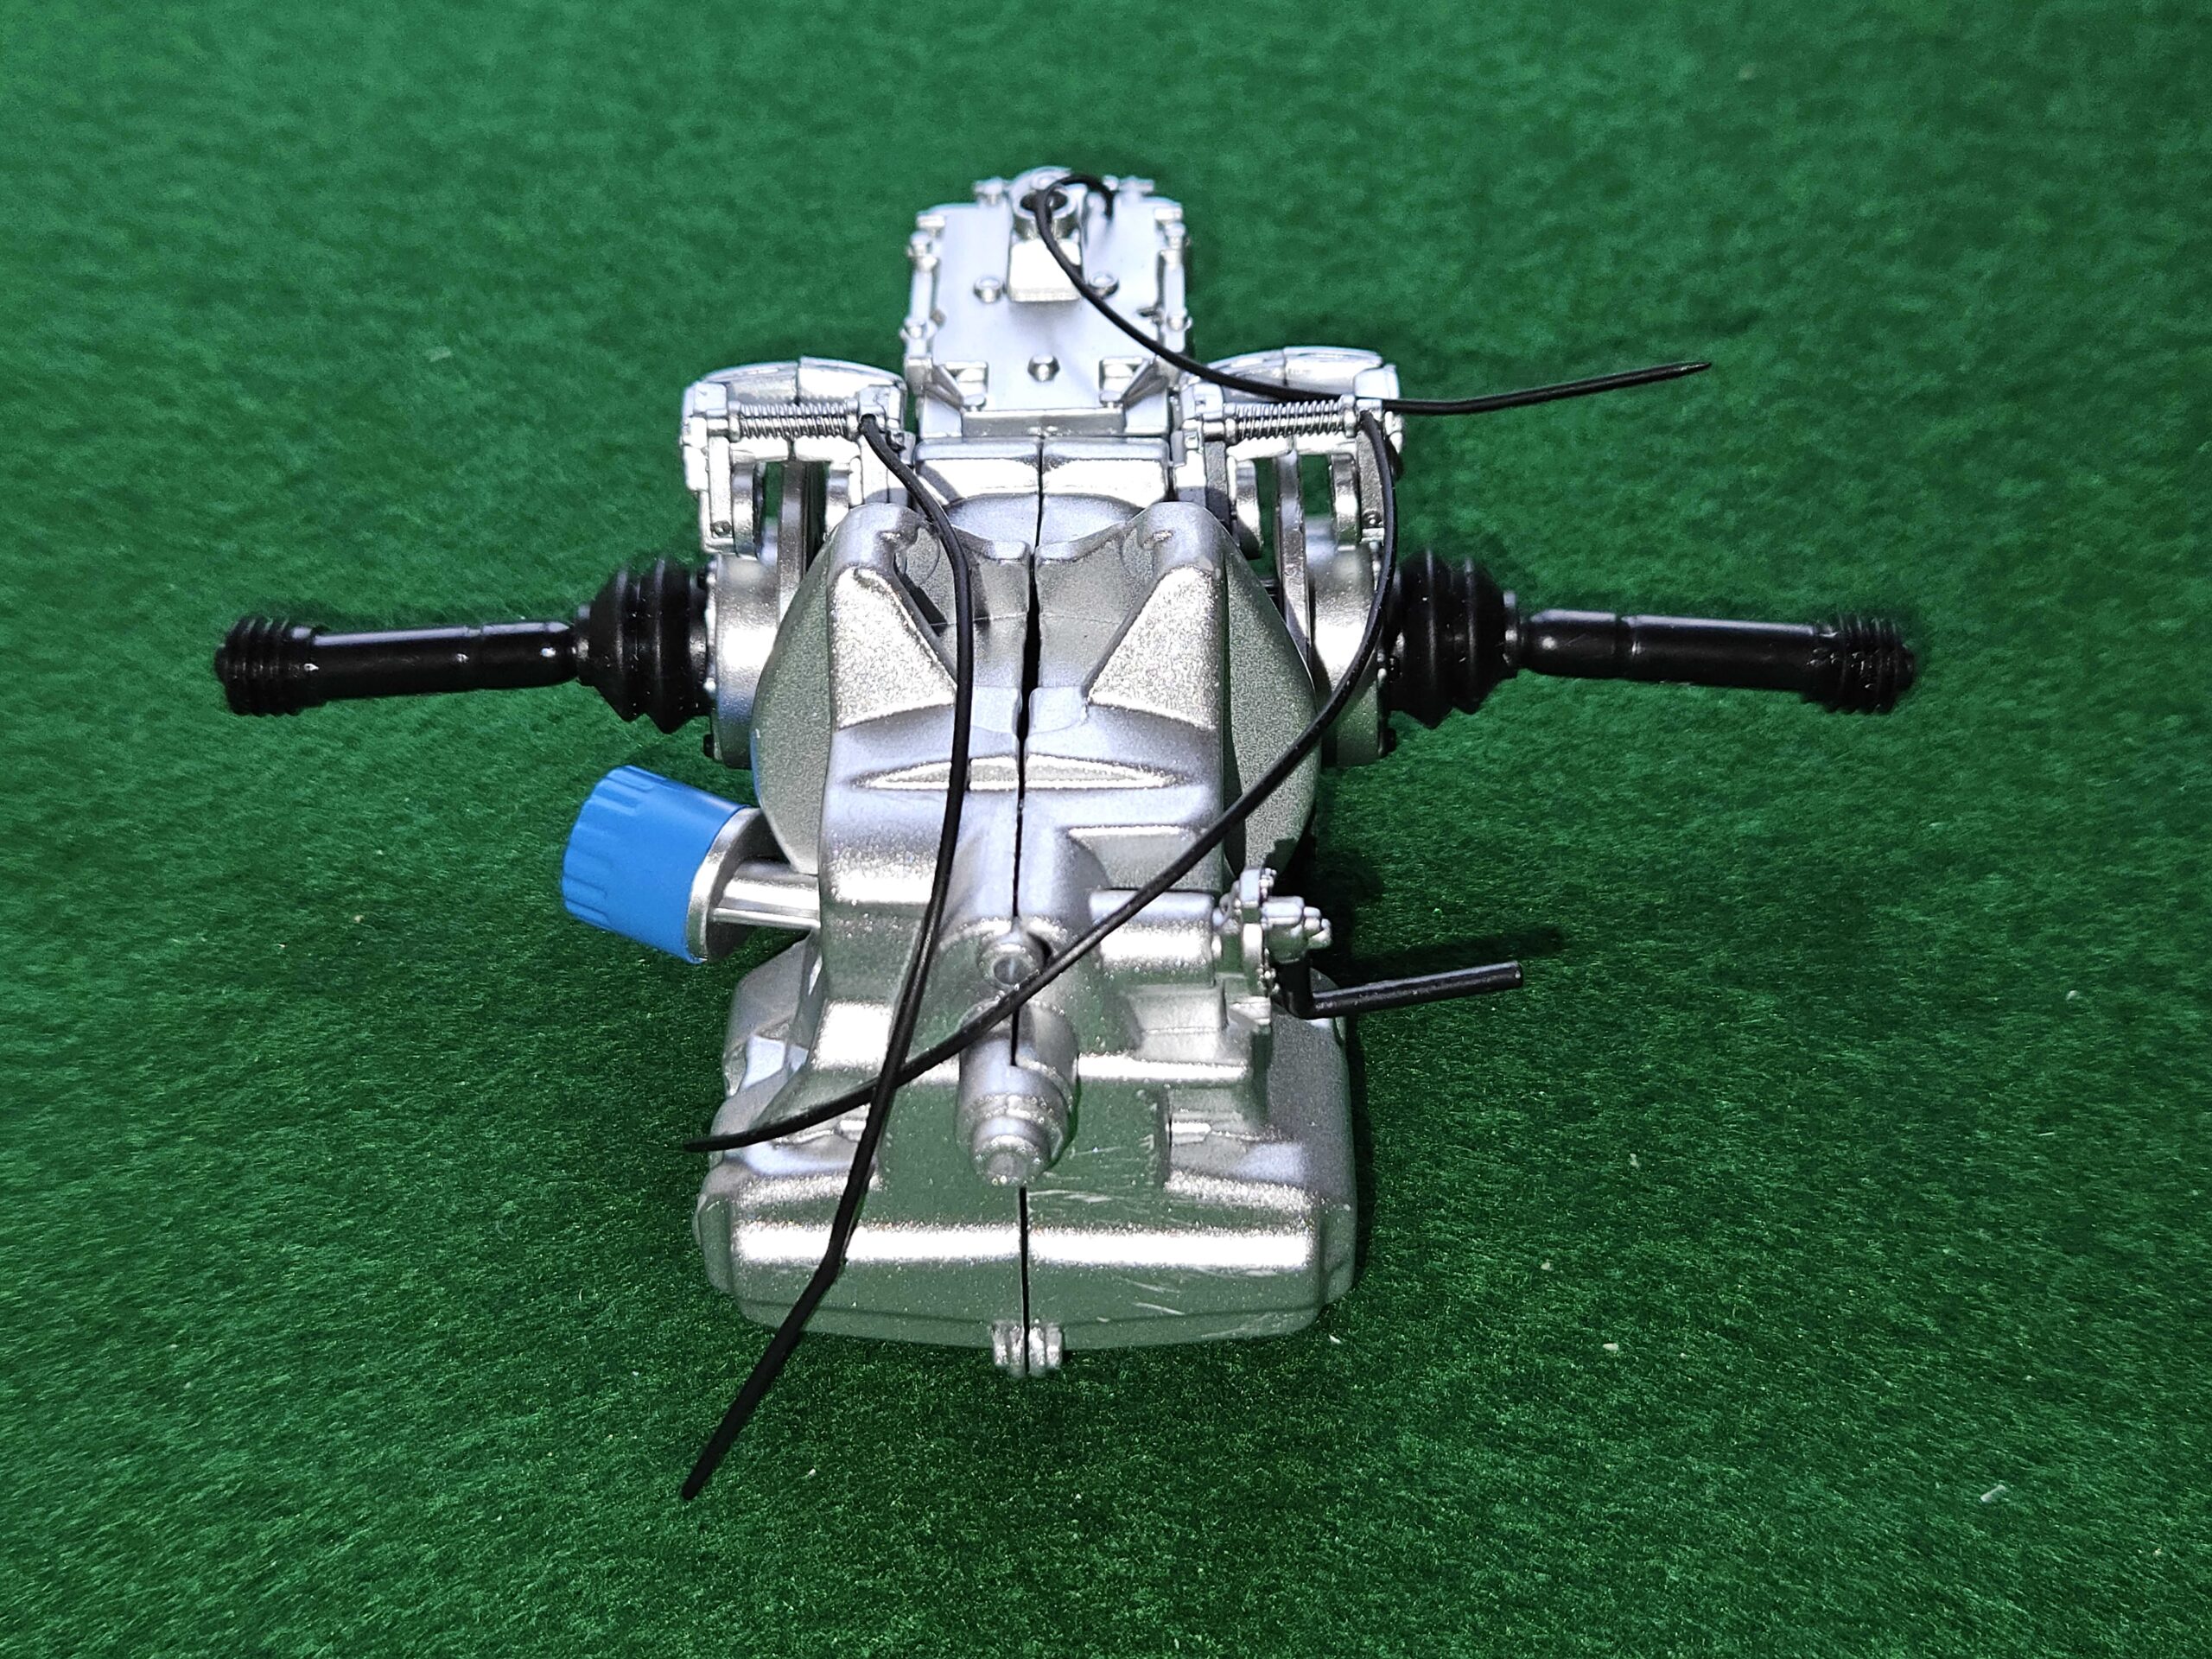
3) Building the gearbox and casing of the engine
4) Fitting the grill and license plate to the hood.
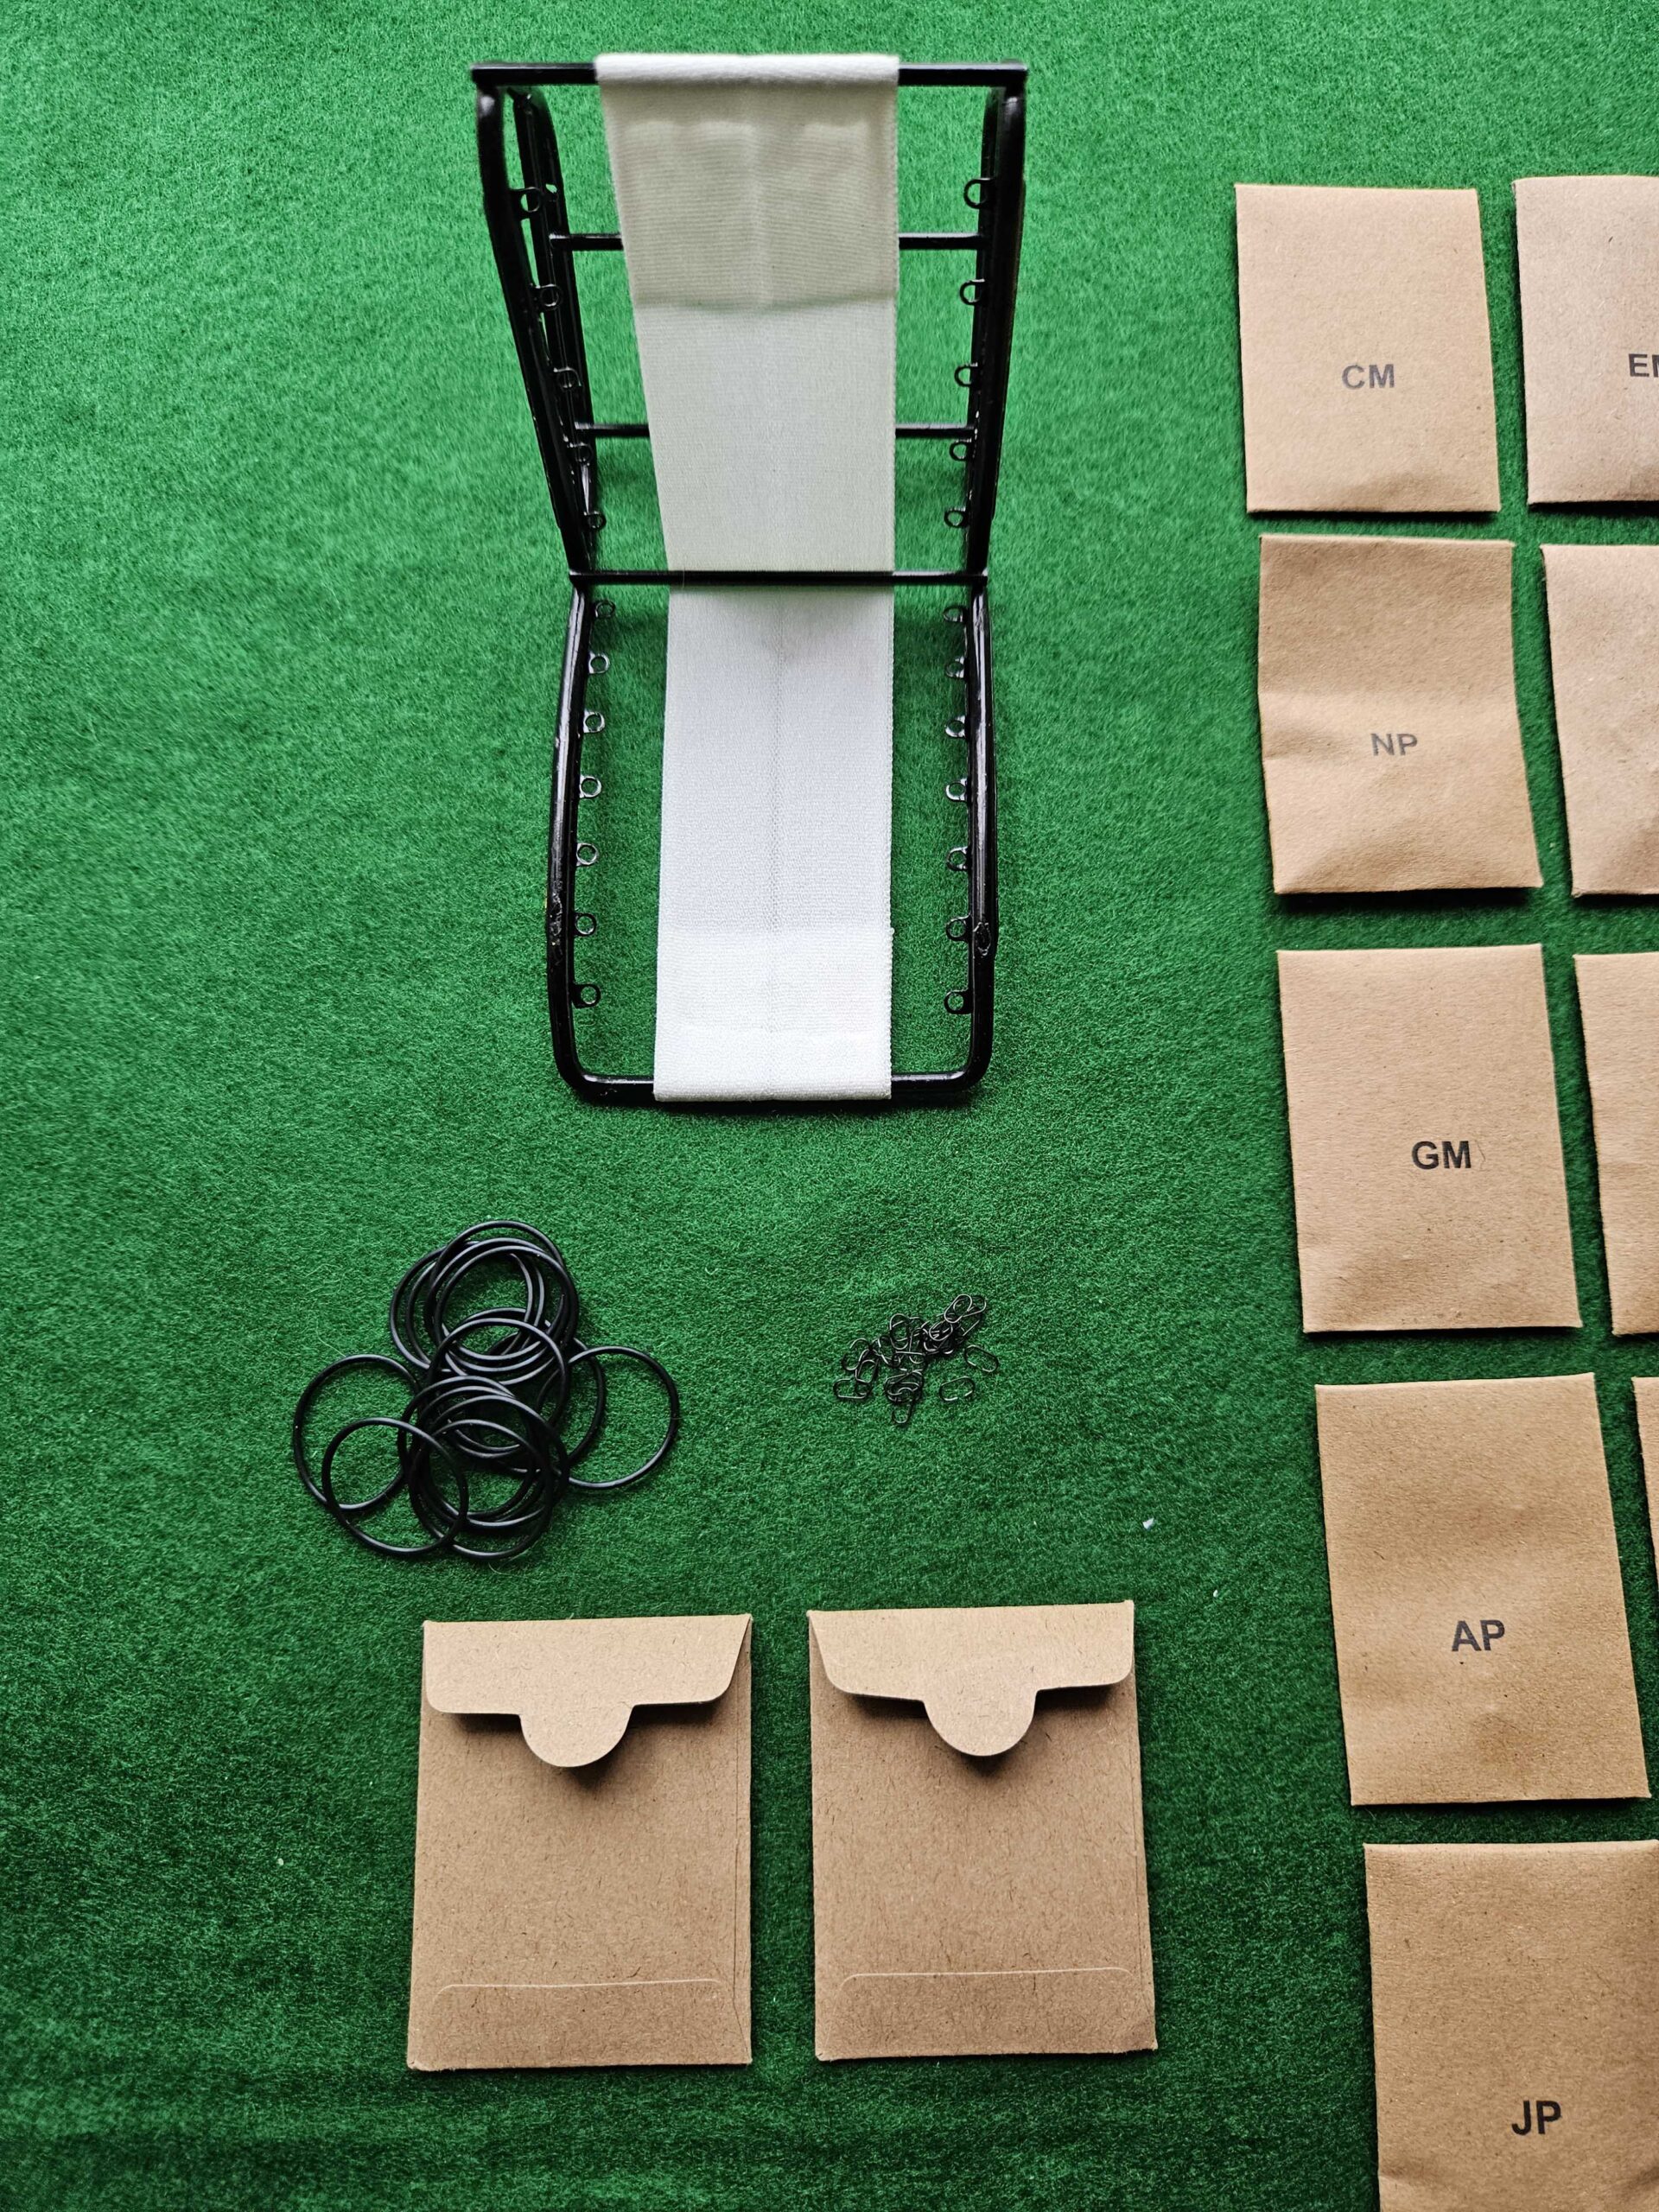
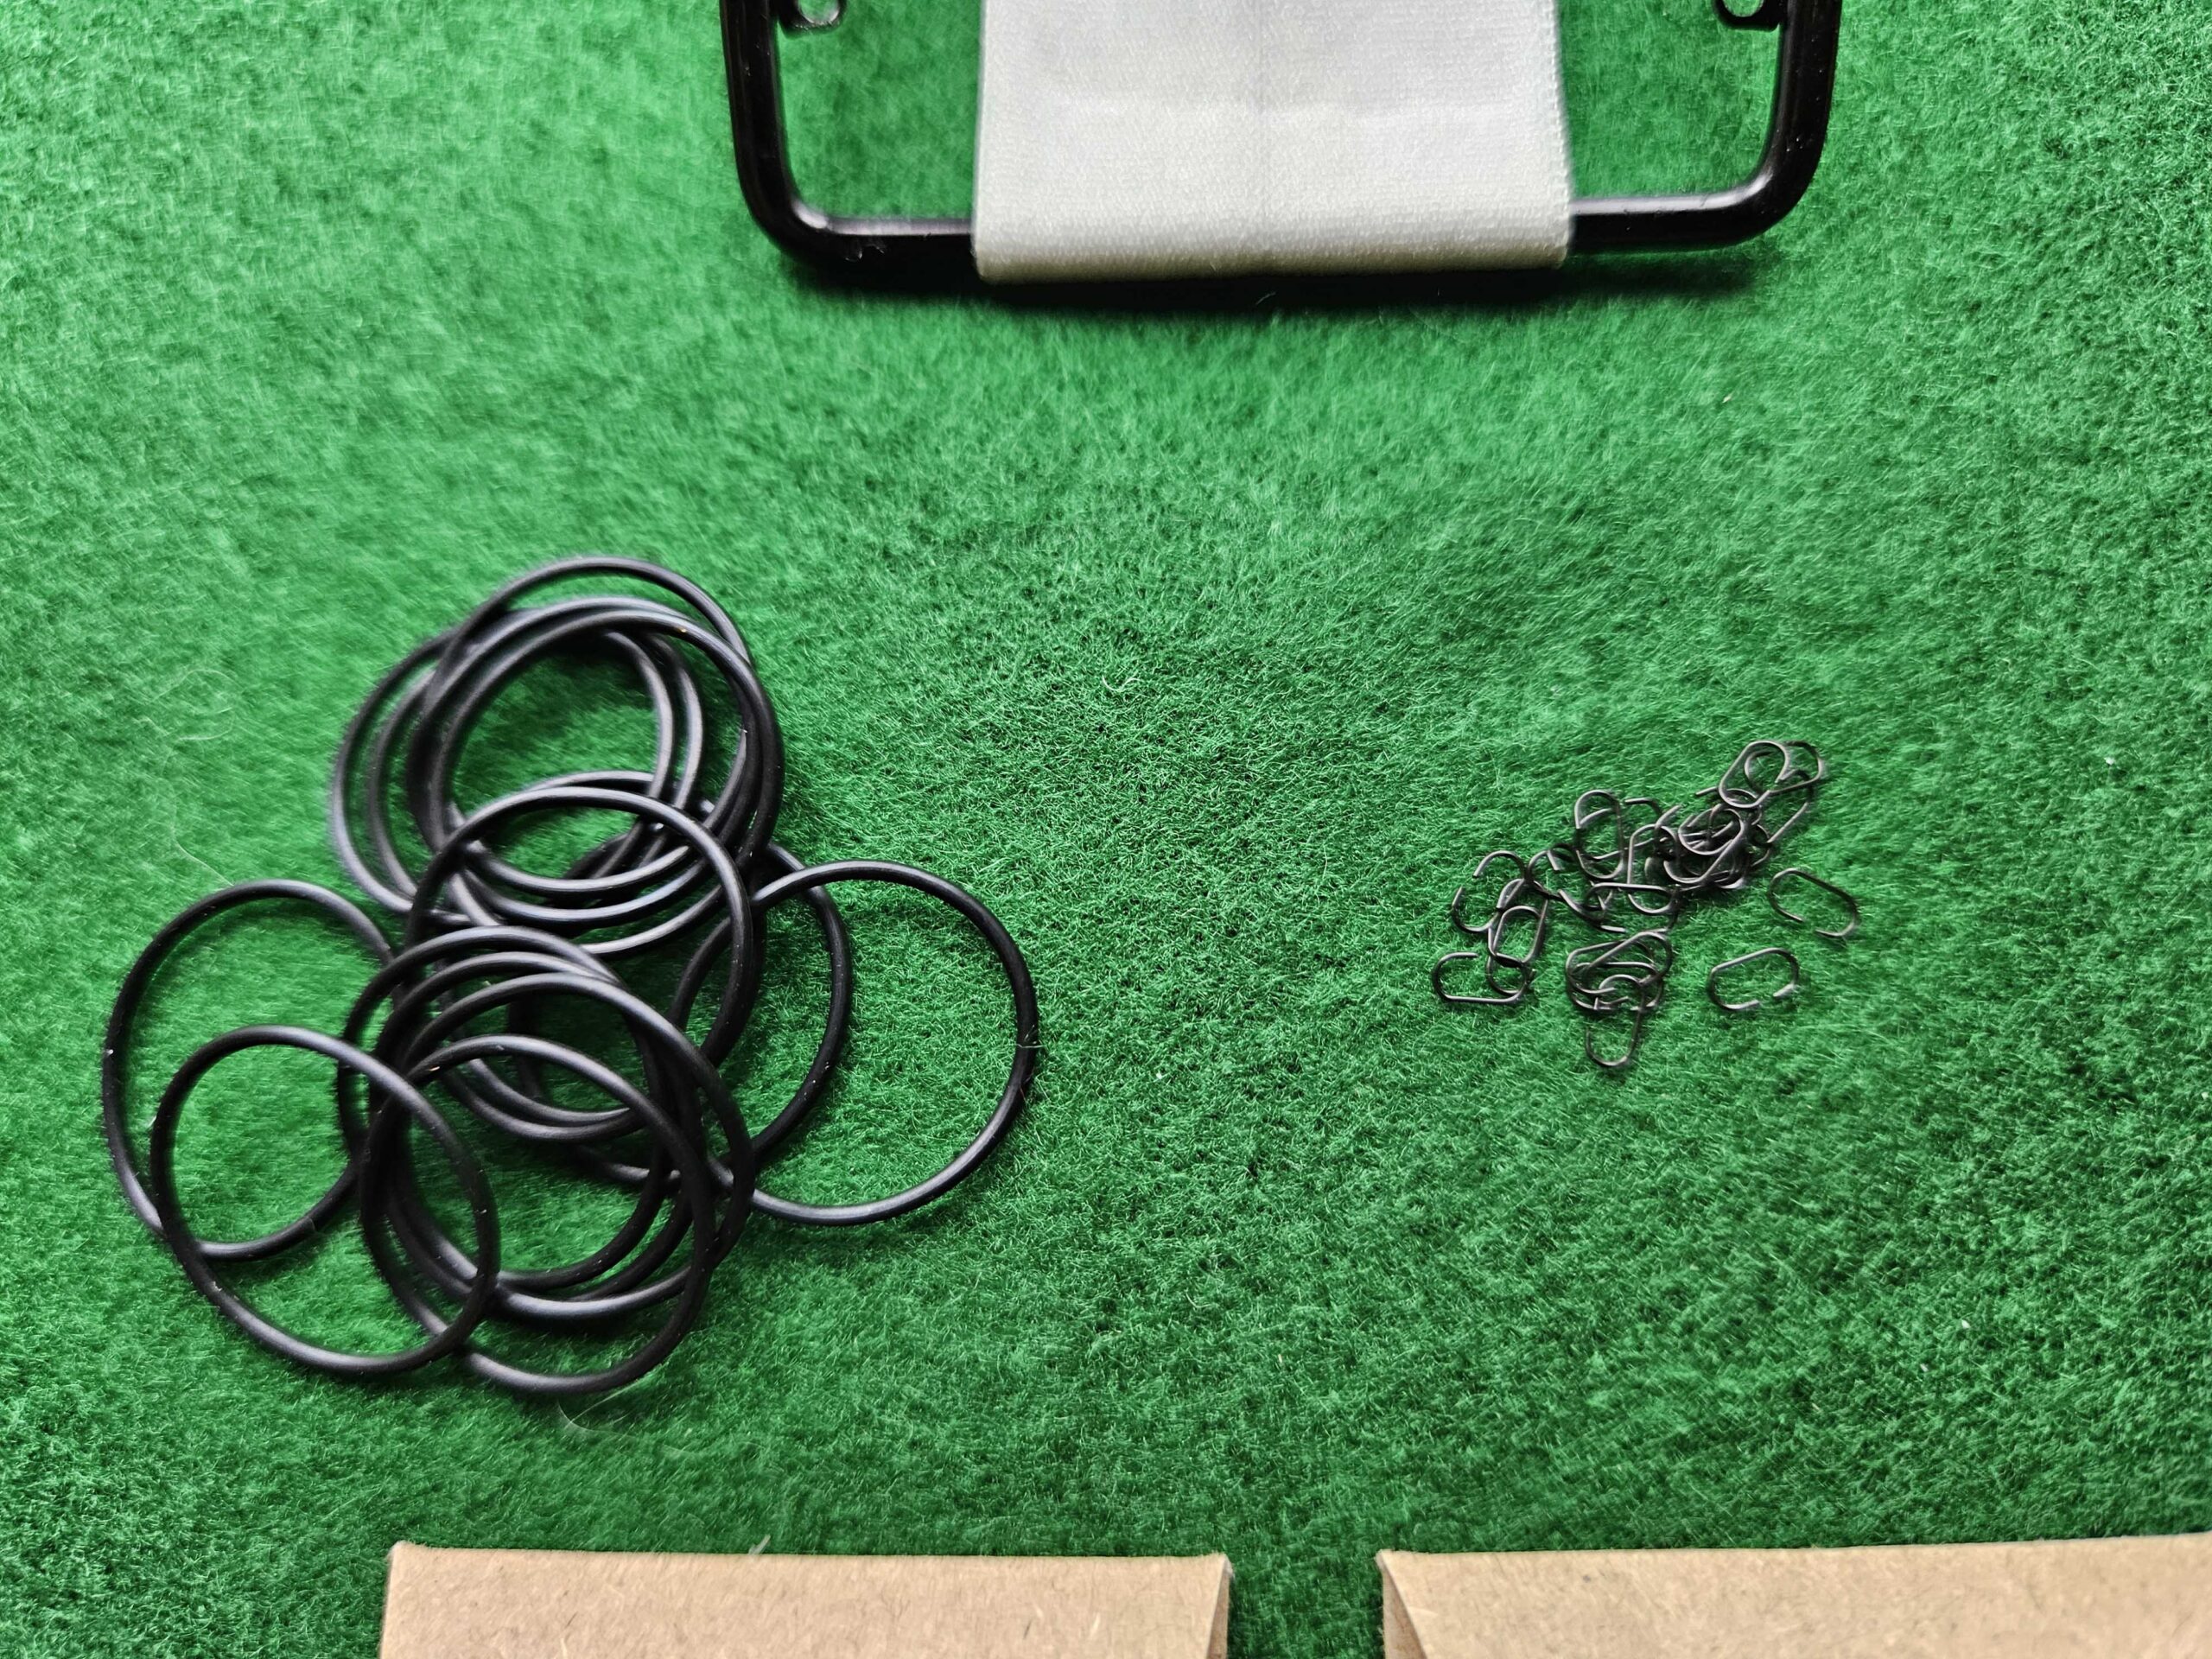
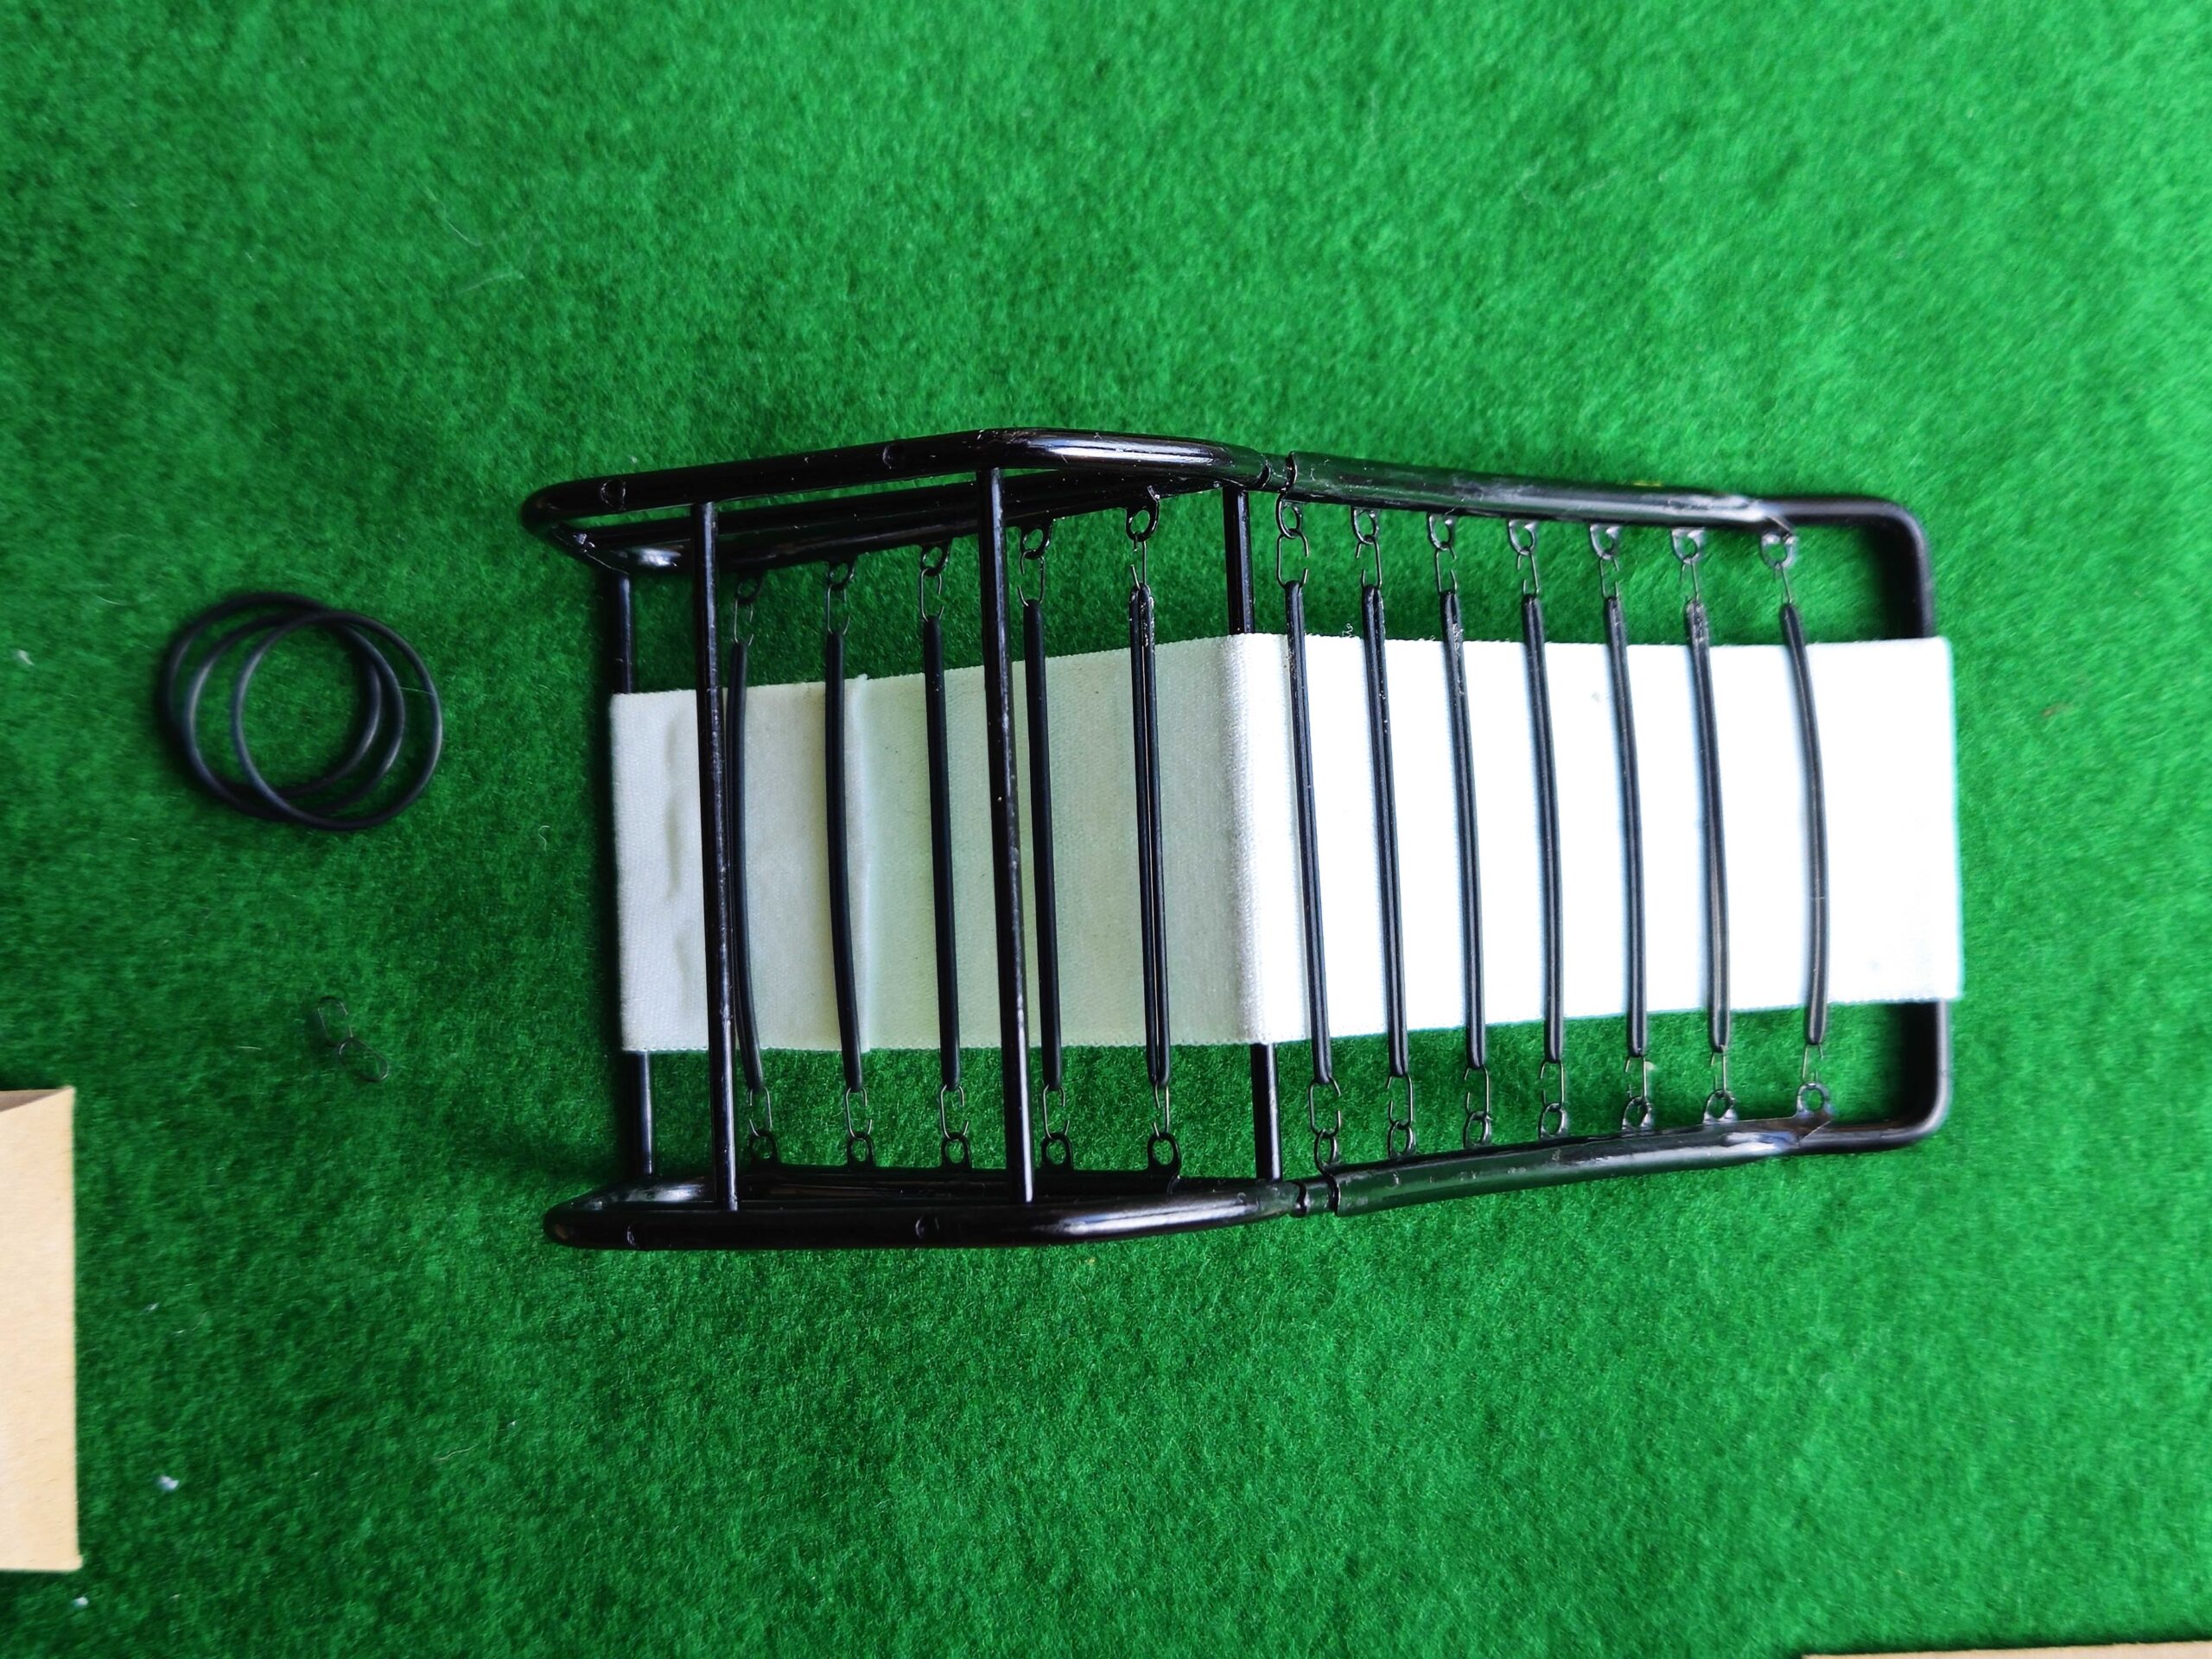
5 Assembling the front left seat frame. (Yes, manually fitting all the rubber donuts, but they cleverly stretch across the frame so you don’t have to hook into the center cloth sling.)
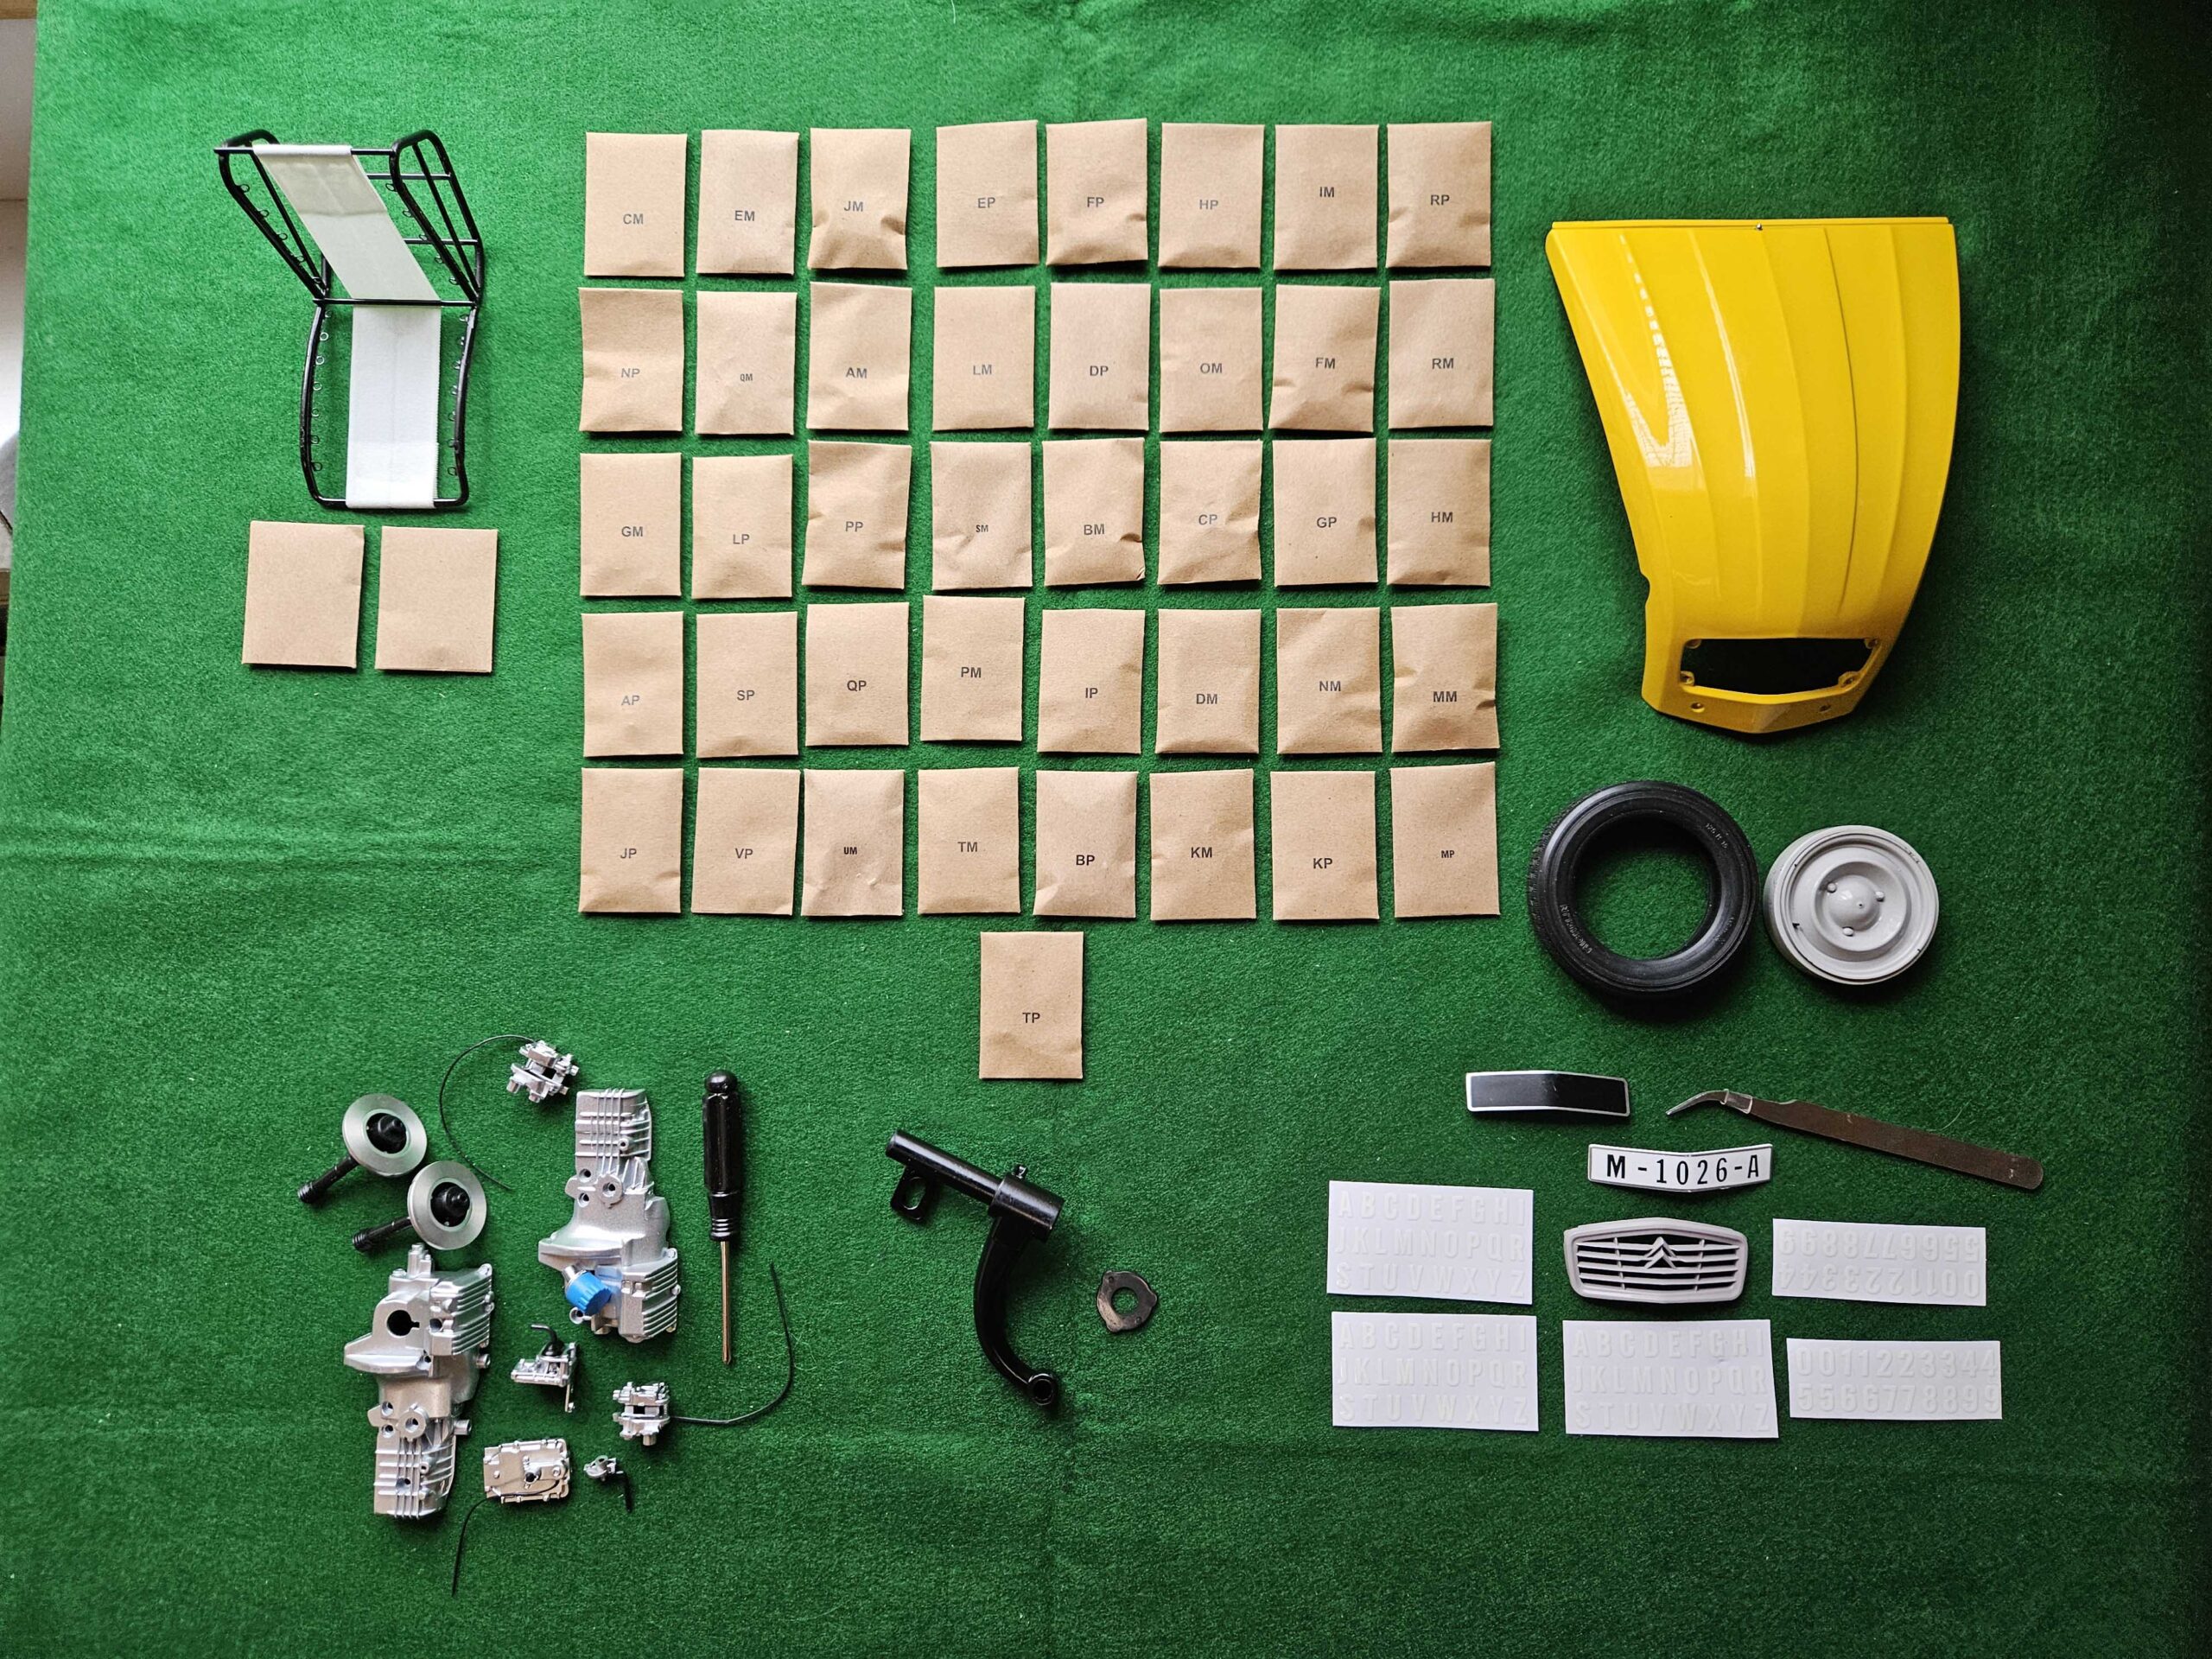

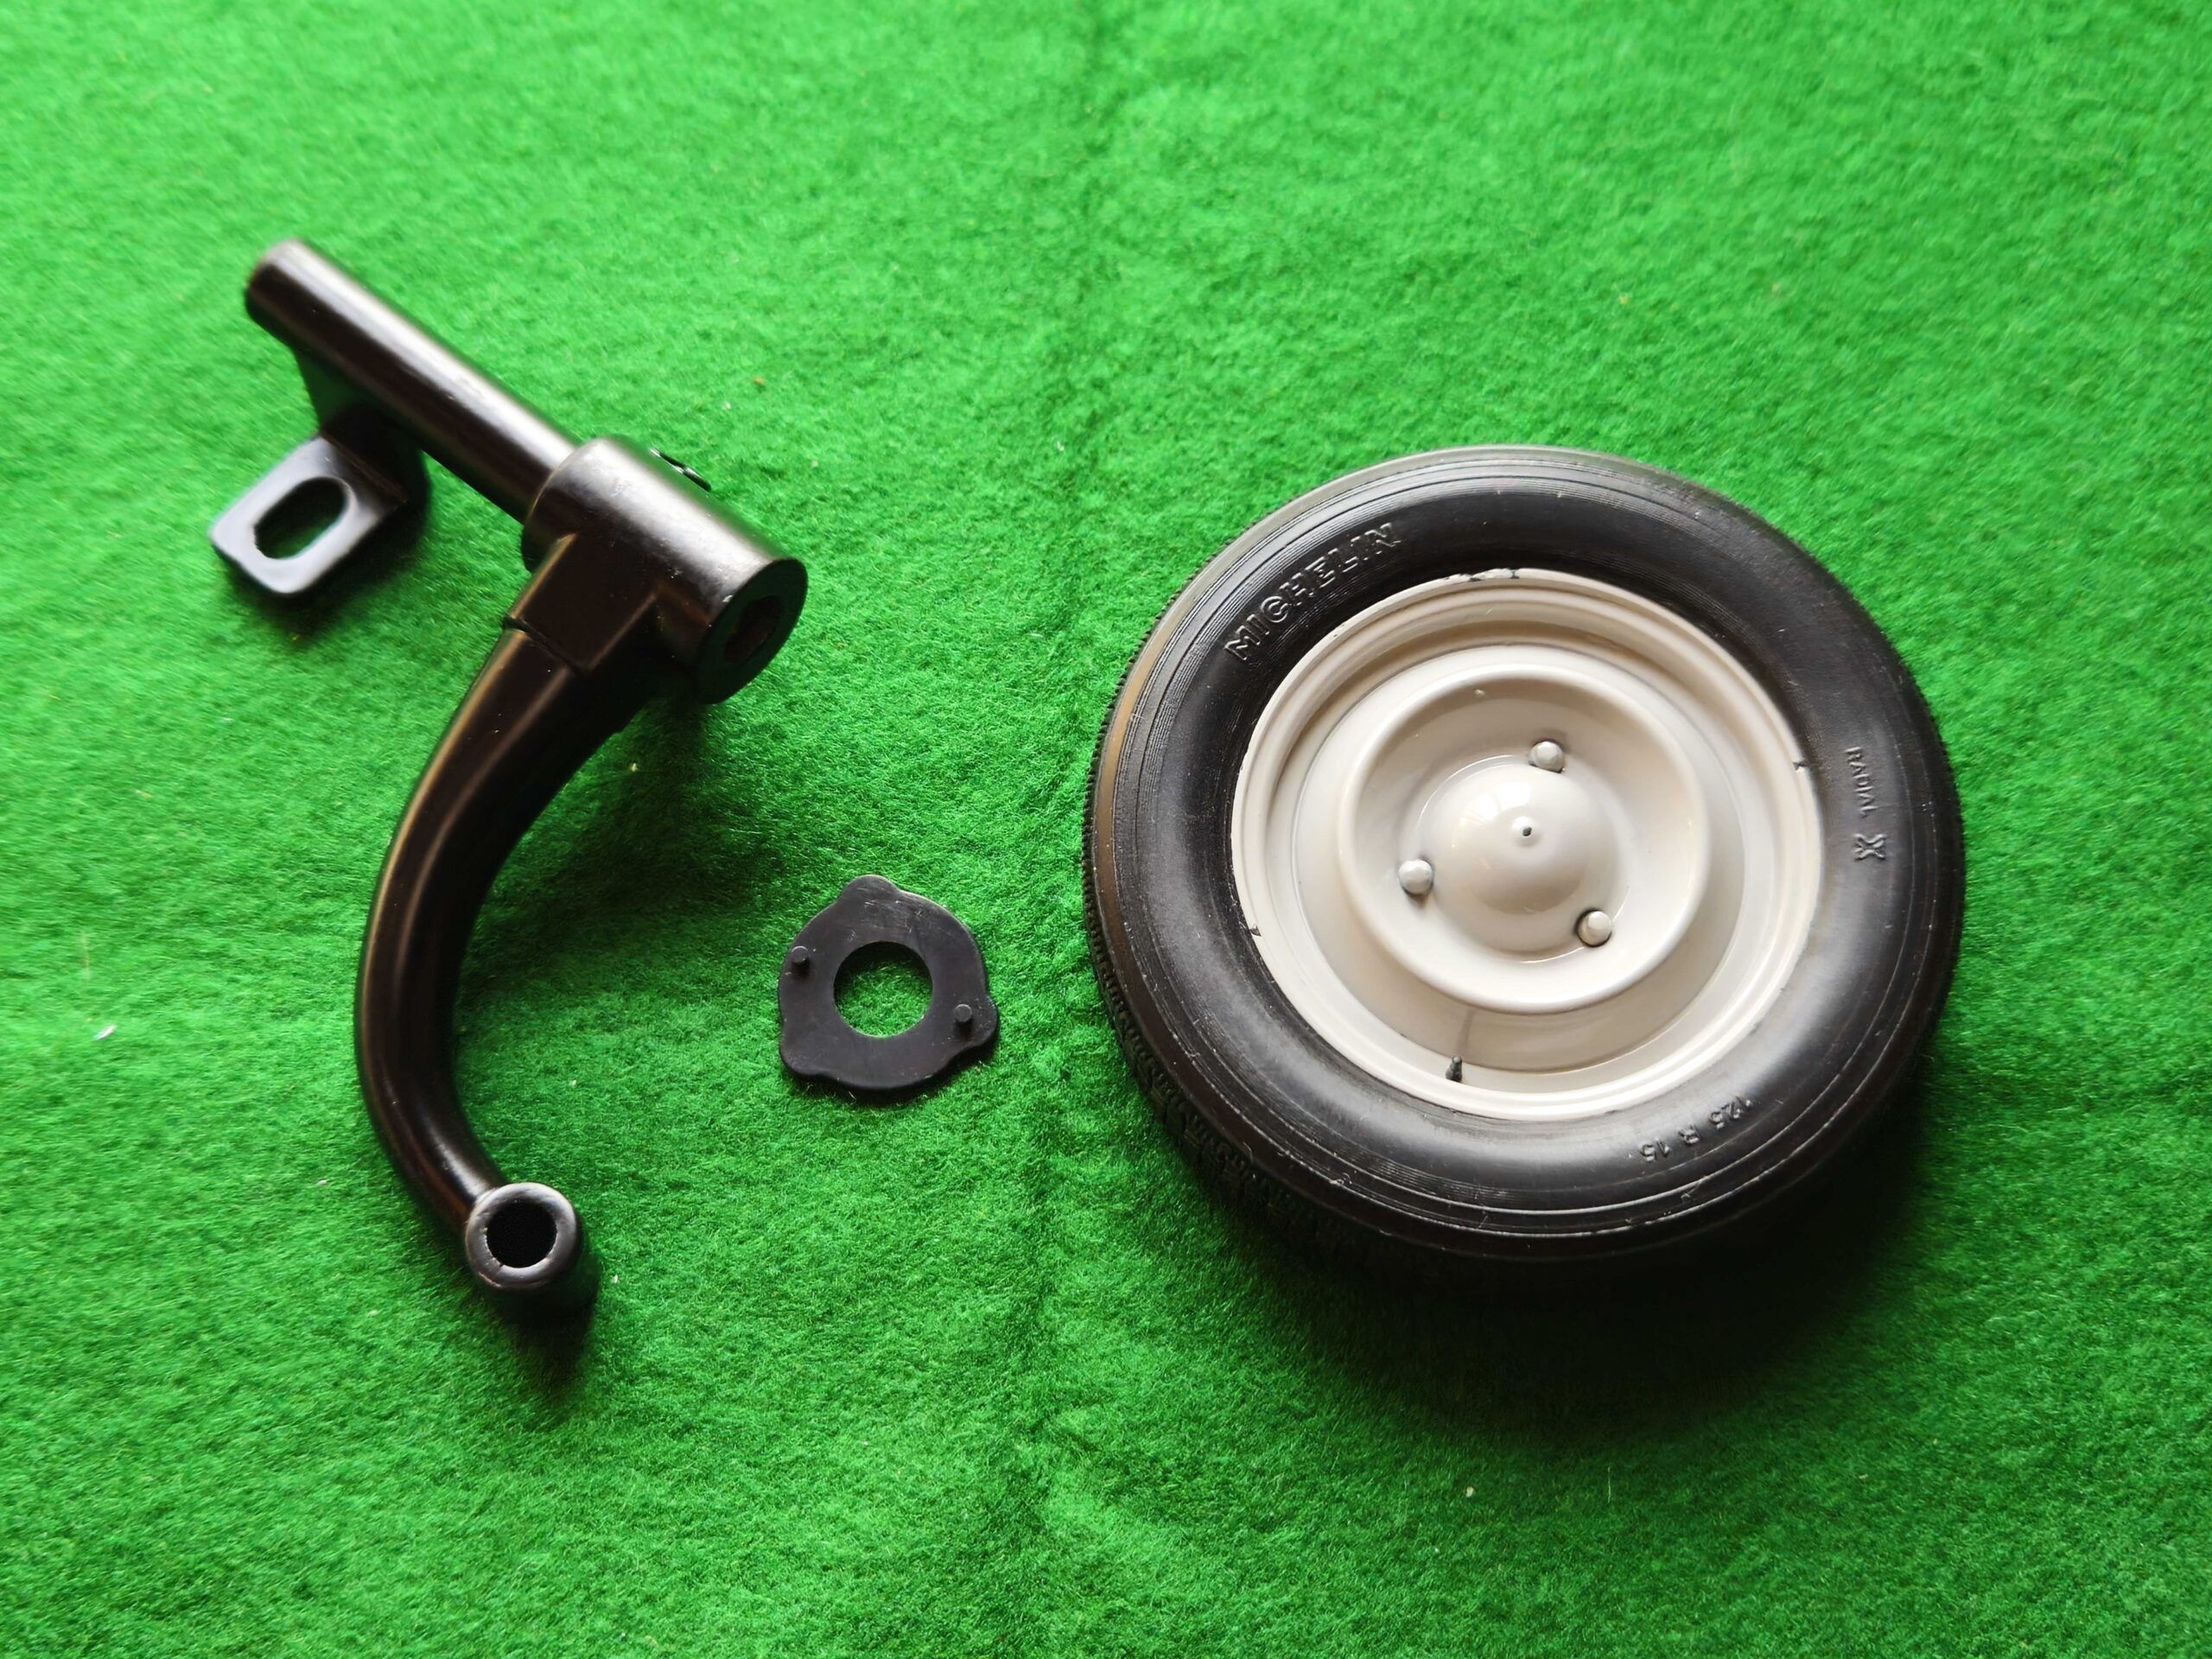
Now — onto assembling the hood grill, suspension arm, tire on the rim, gearbox & engine core as well as one front seat’s “o” rings.
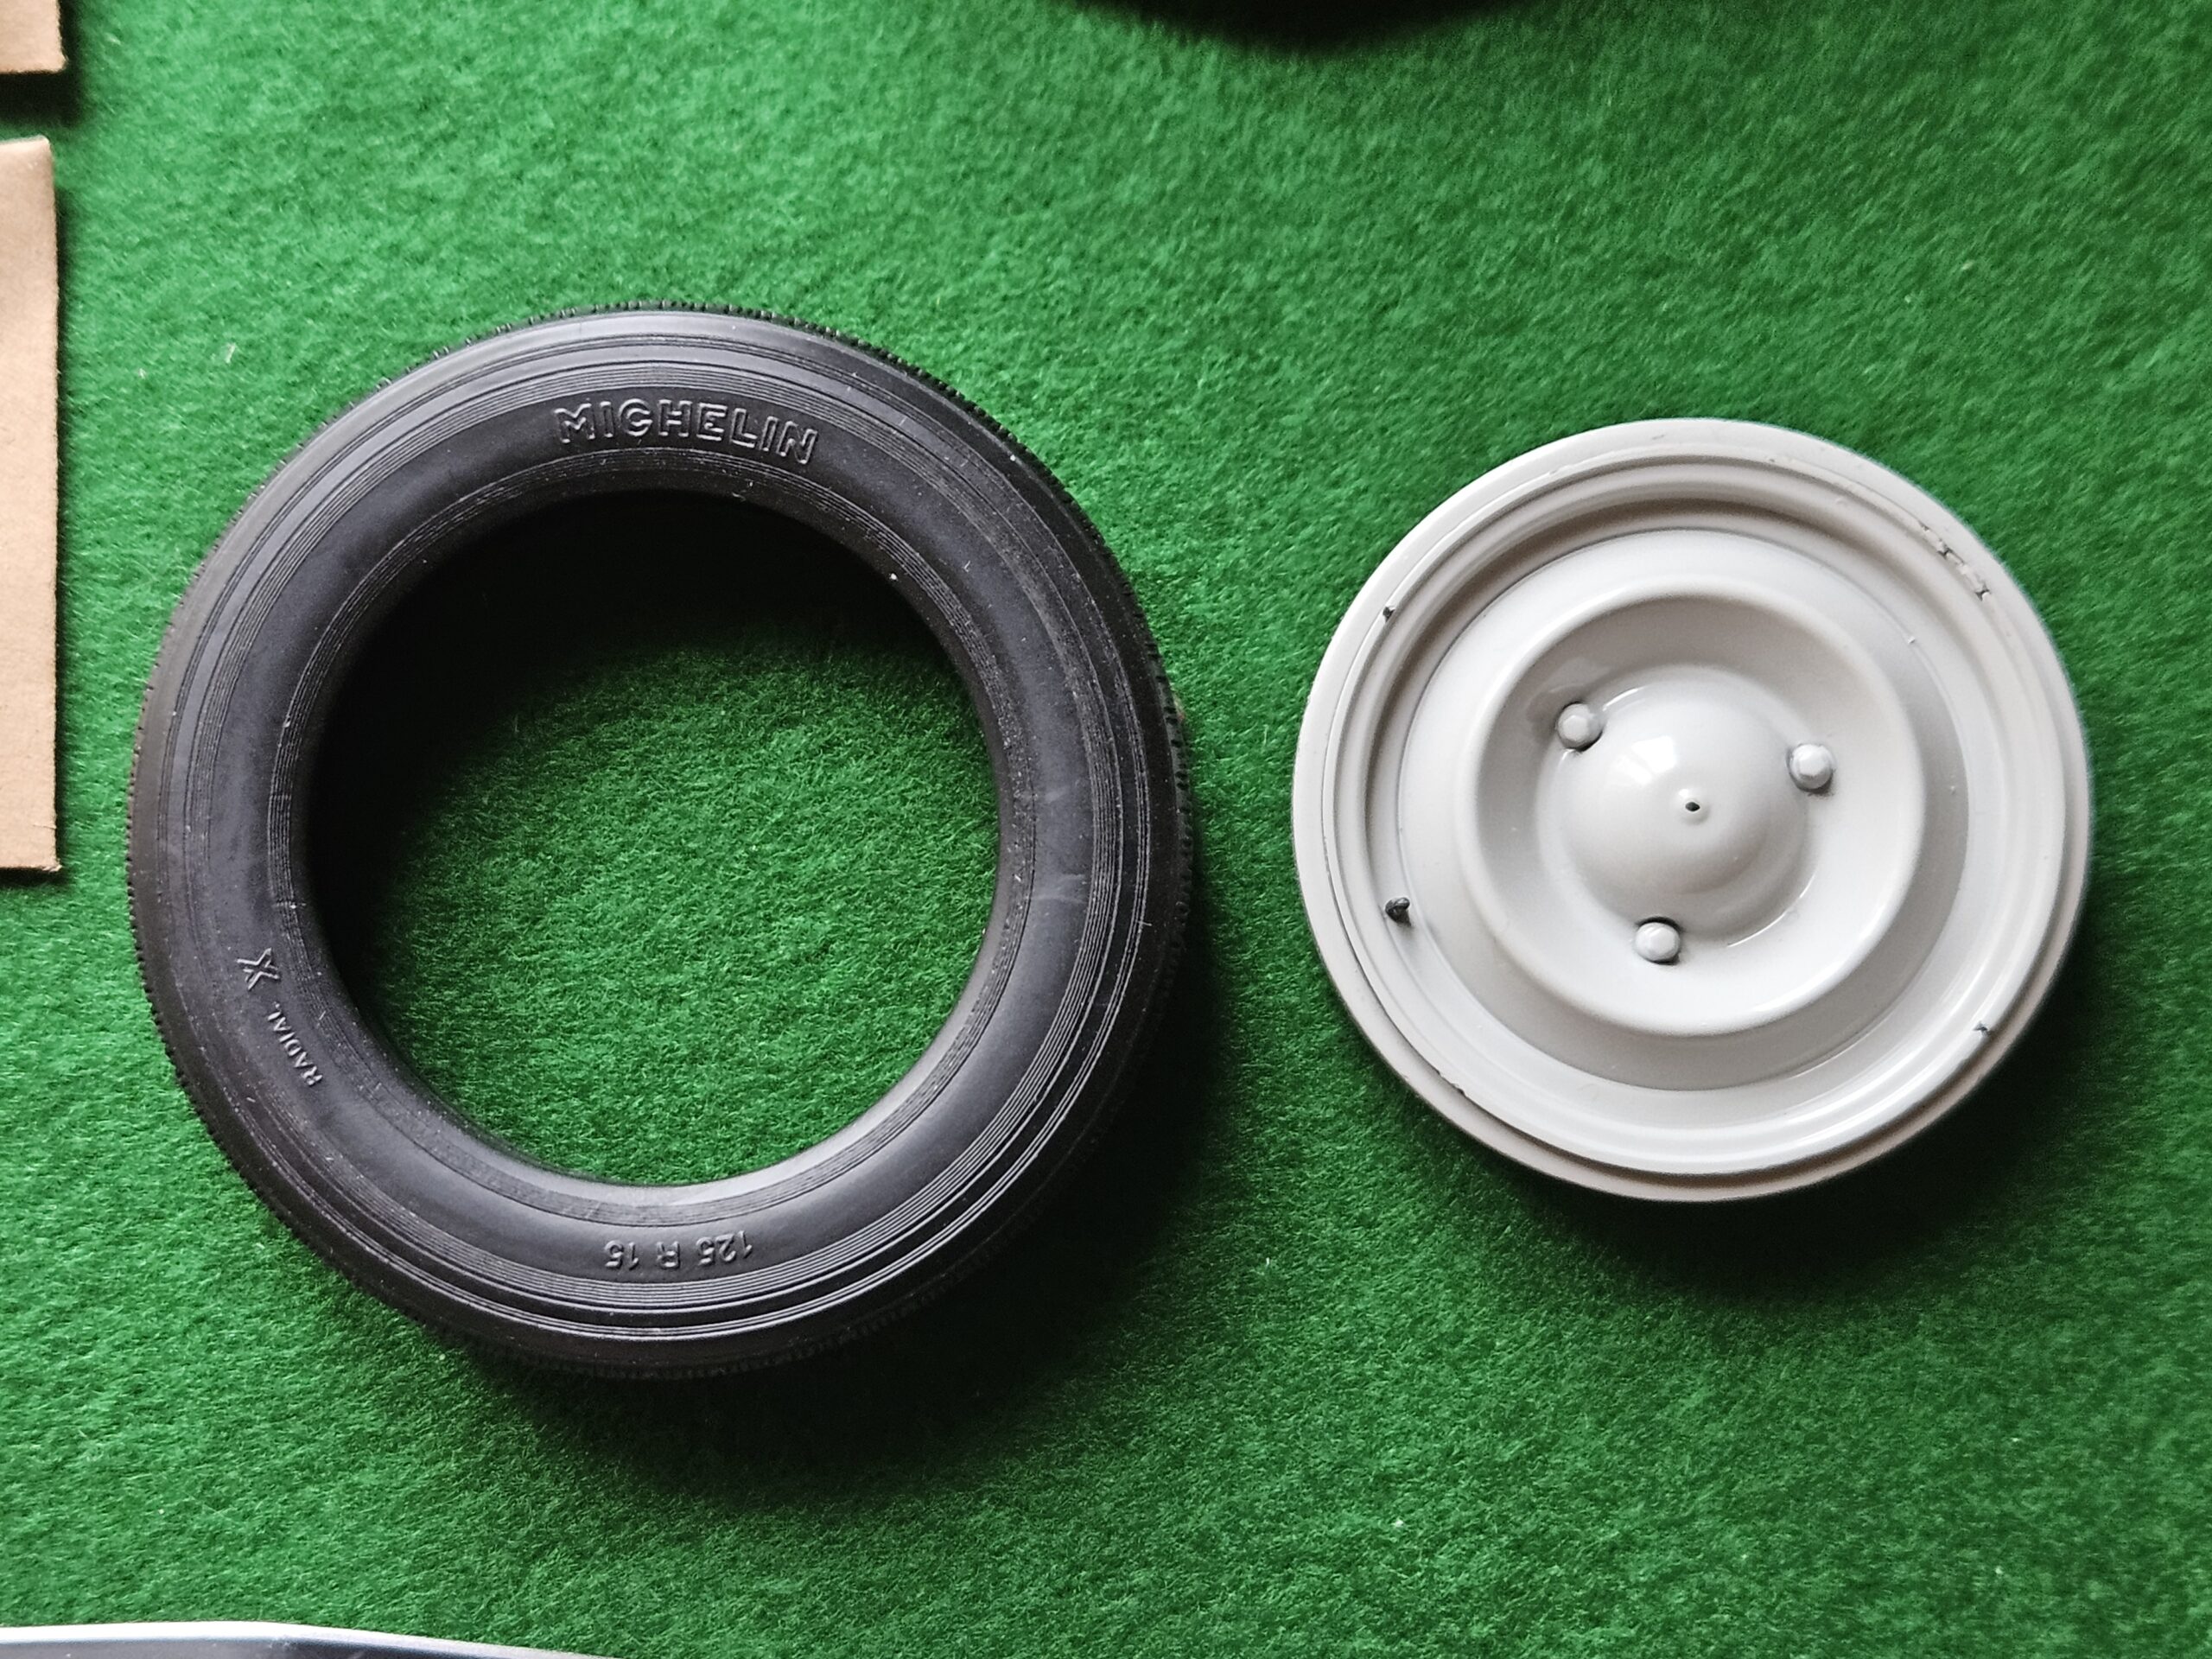
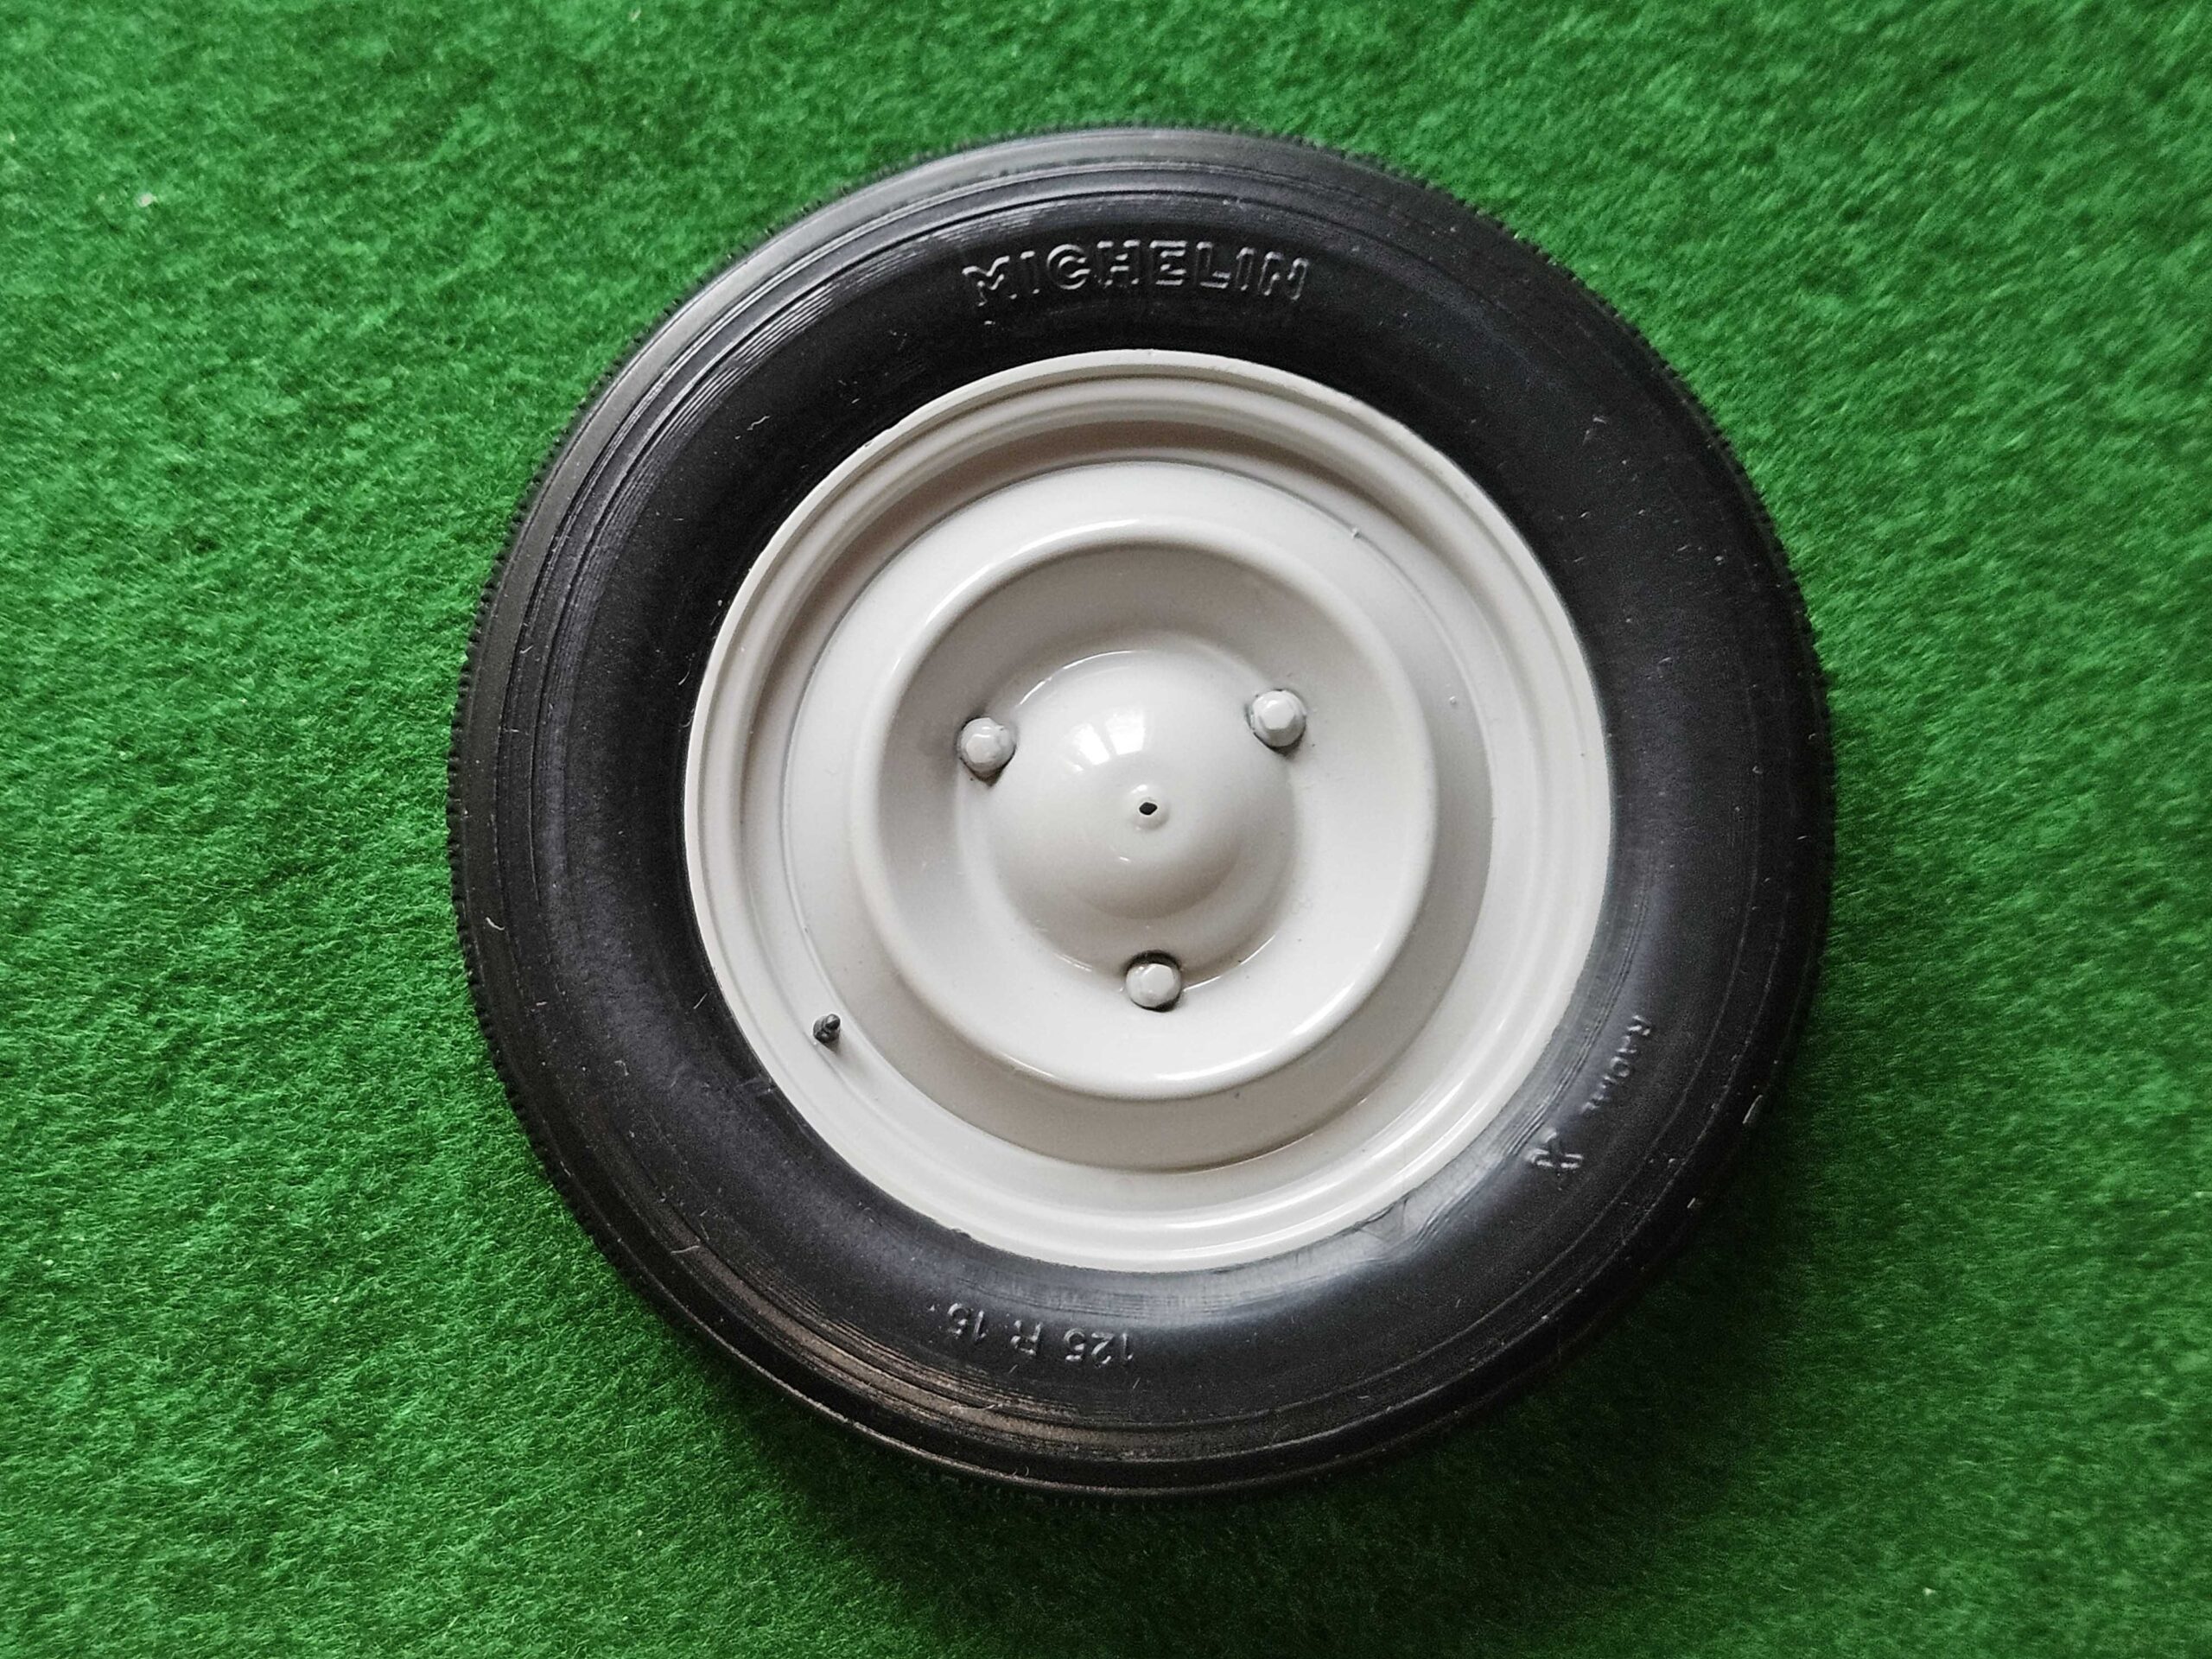
I started with the tire and rim. The tire is fairly hard plastic, but putting it in hot water for a couple of minutes (as they suggest) softened it sufficiently to easily fit over the rim.
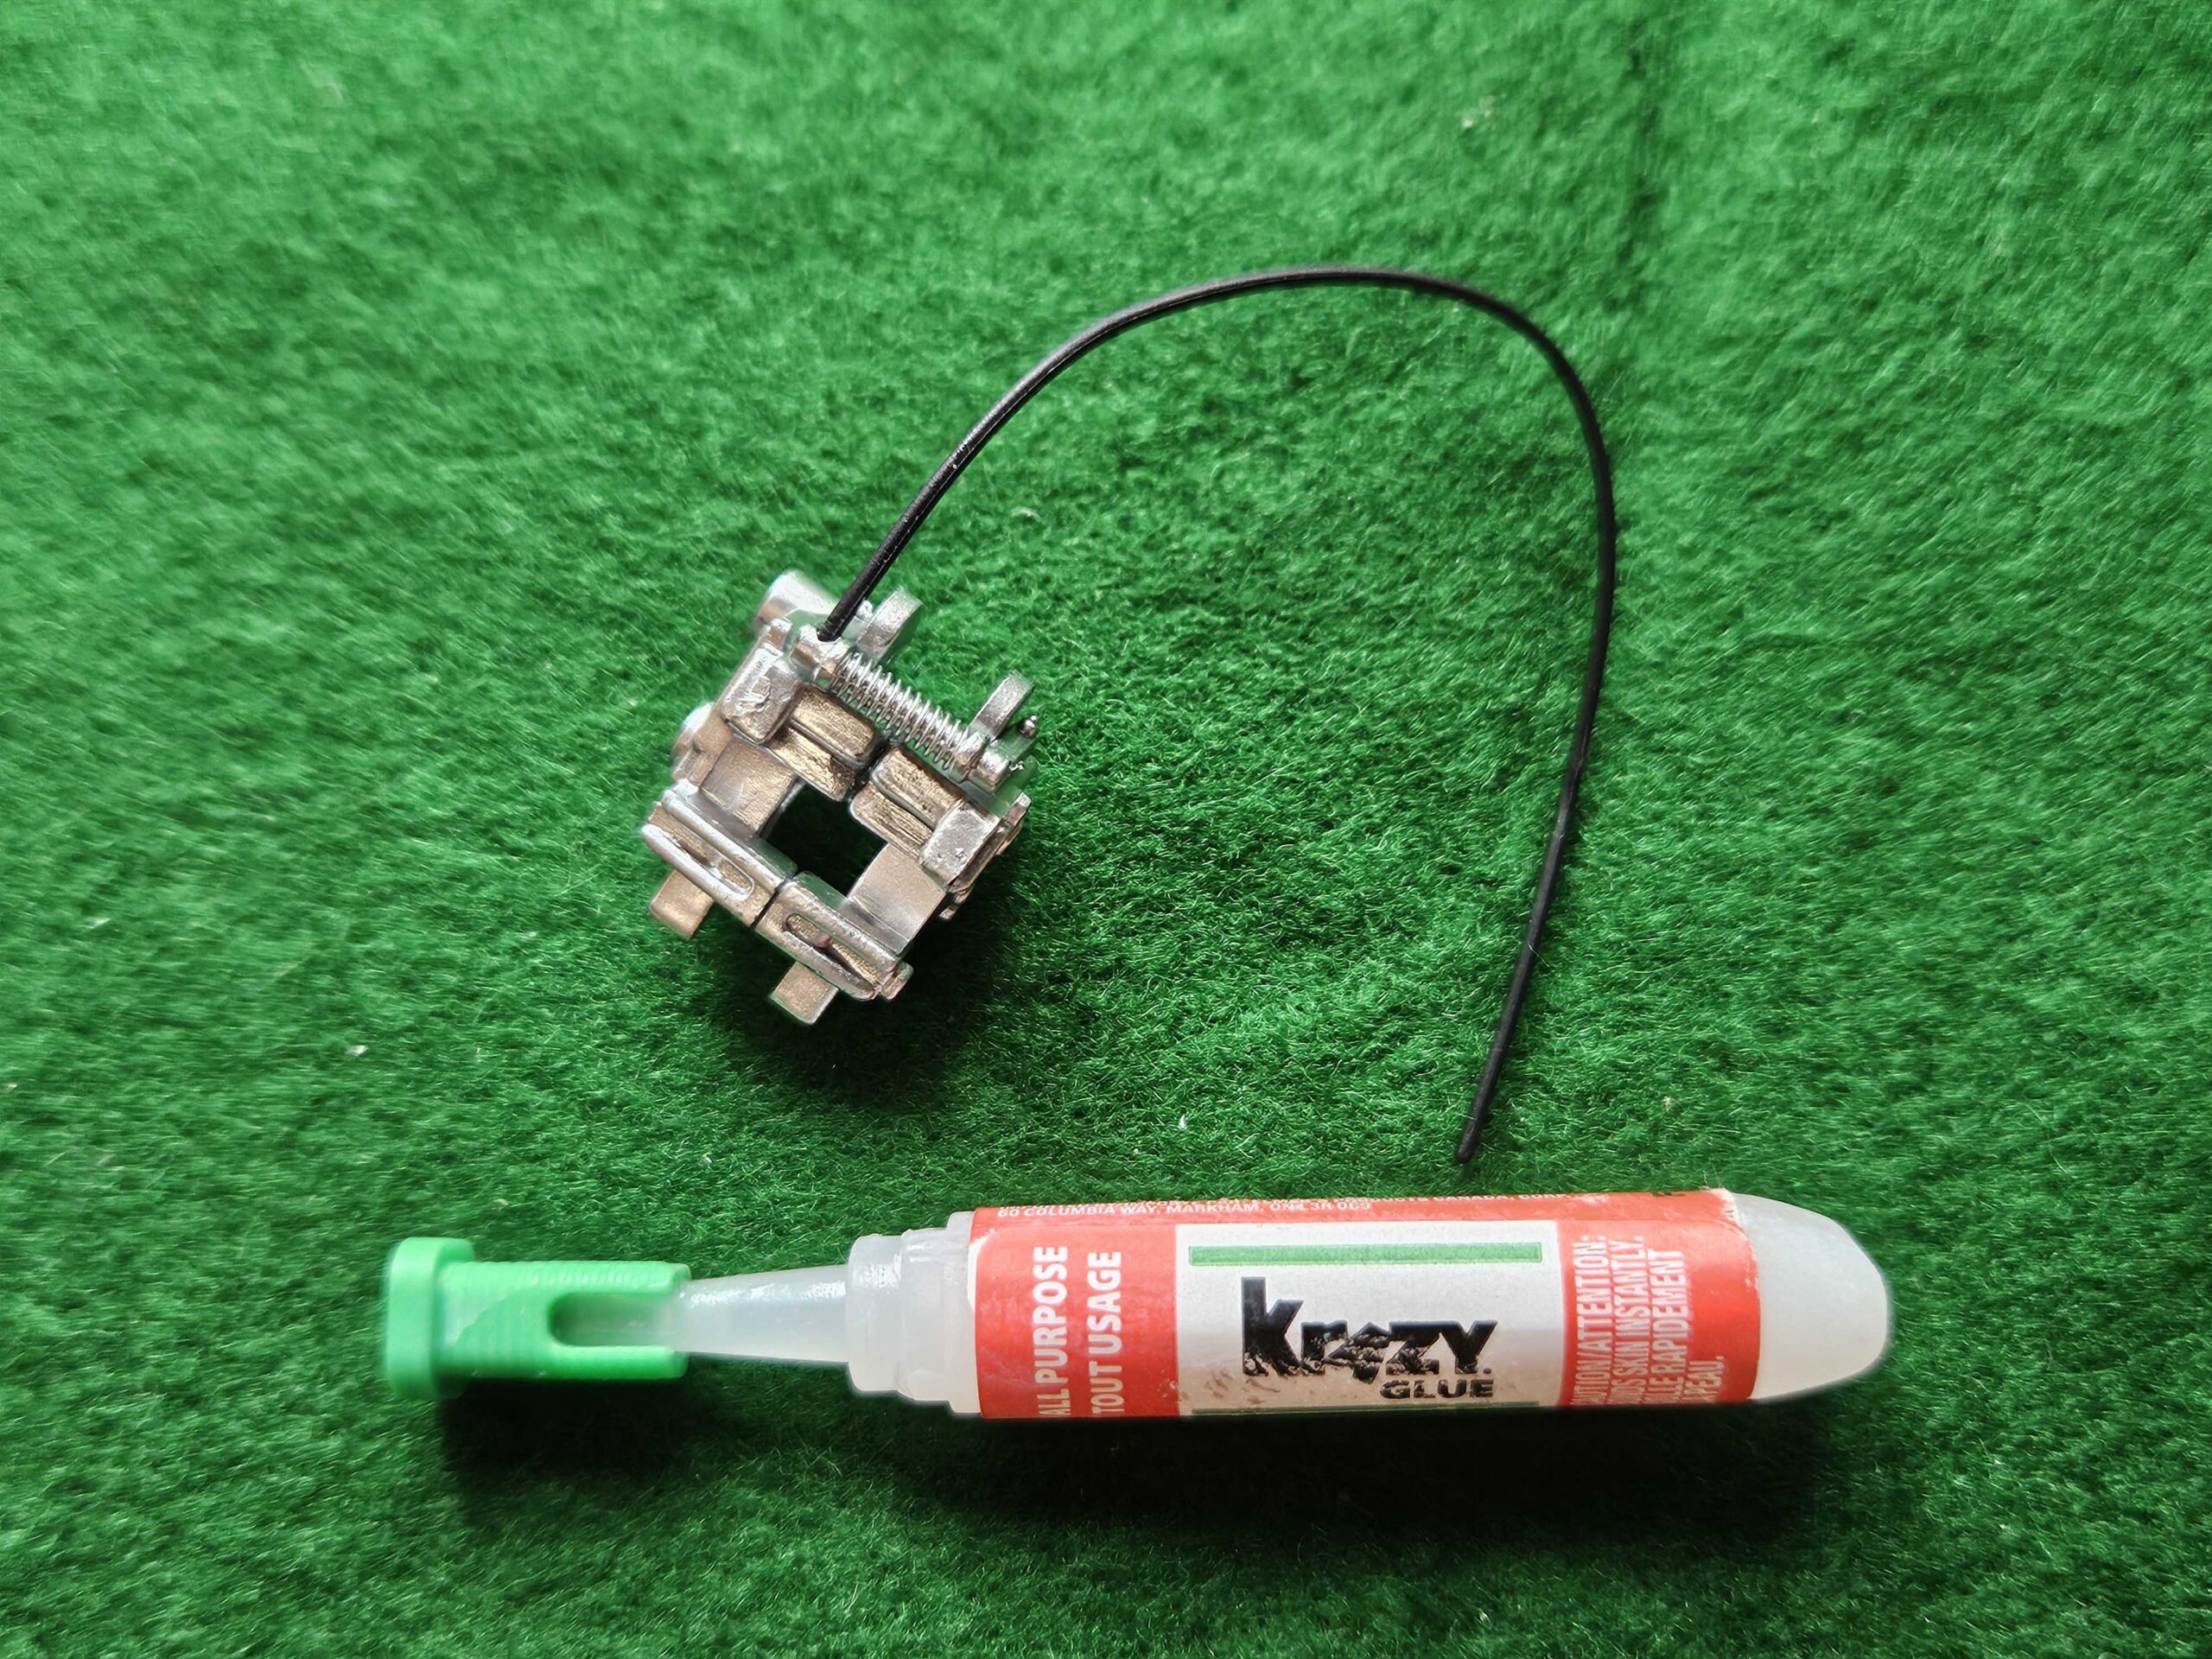
The gearbox and engine core were a bit of a challenge. I had no issue fitting the oil filter, but I had to screw the brake caliper to the gearbox case and fit the disc brake and driveshaft on each side. My large fingers managed to break one of the pre-assembled brake calipers as well as the fitting of the driveshaft into the brake rotor. Fortunately a little Krazy Glue applied to the break points got them back together just fine.

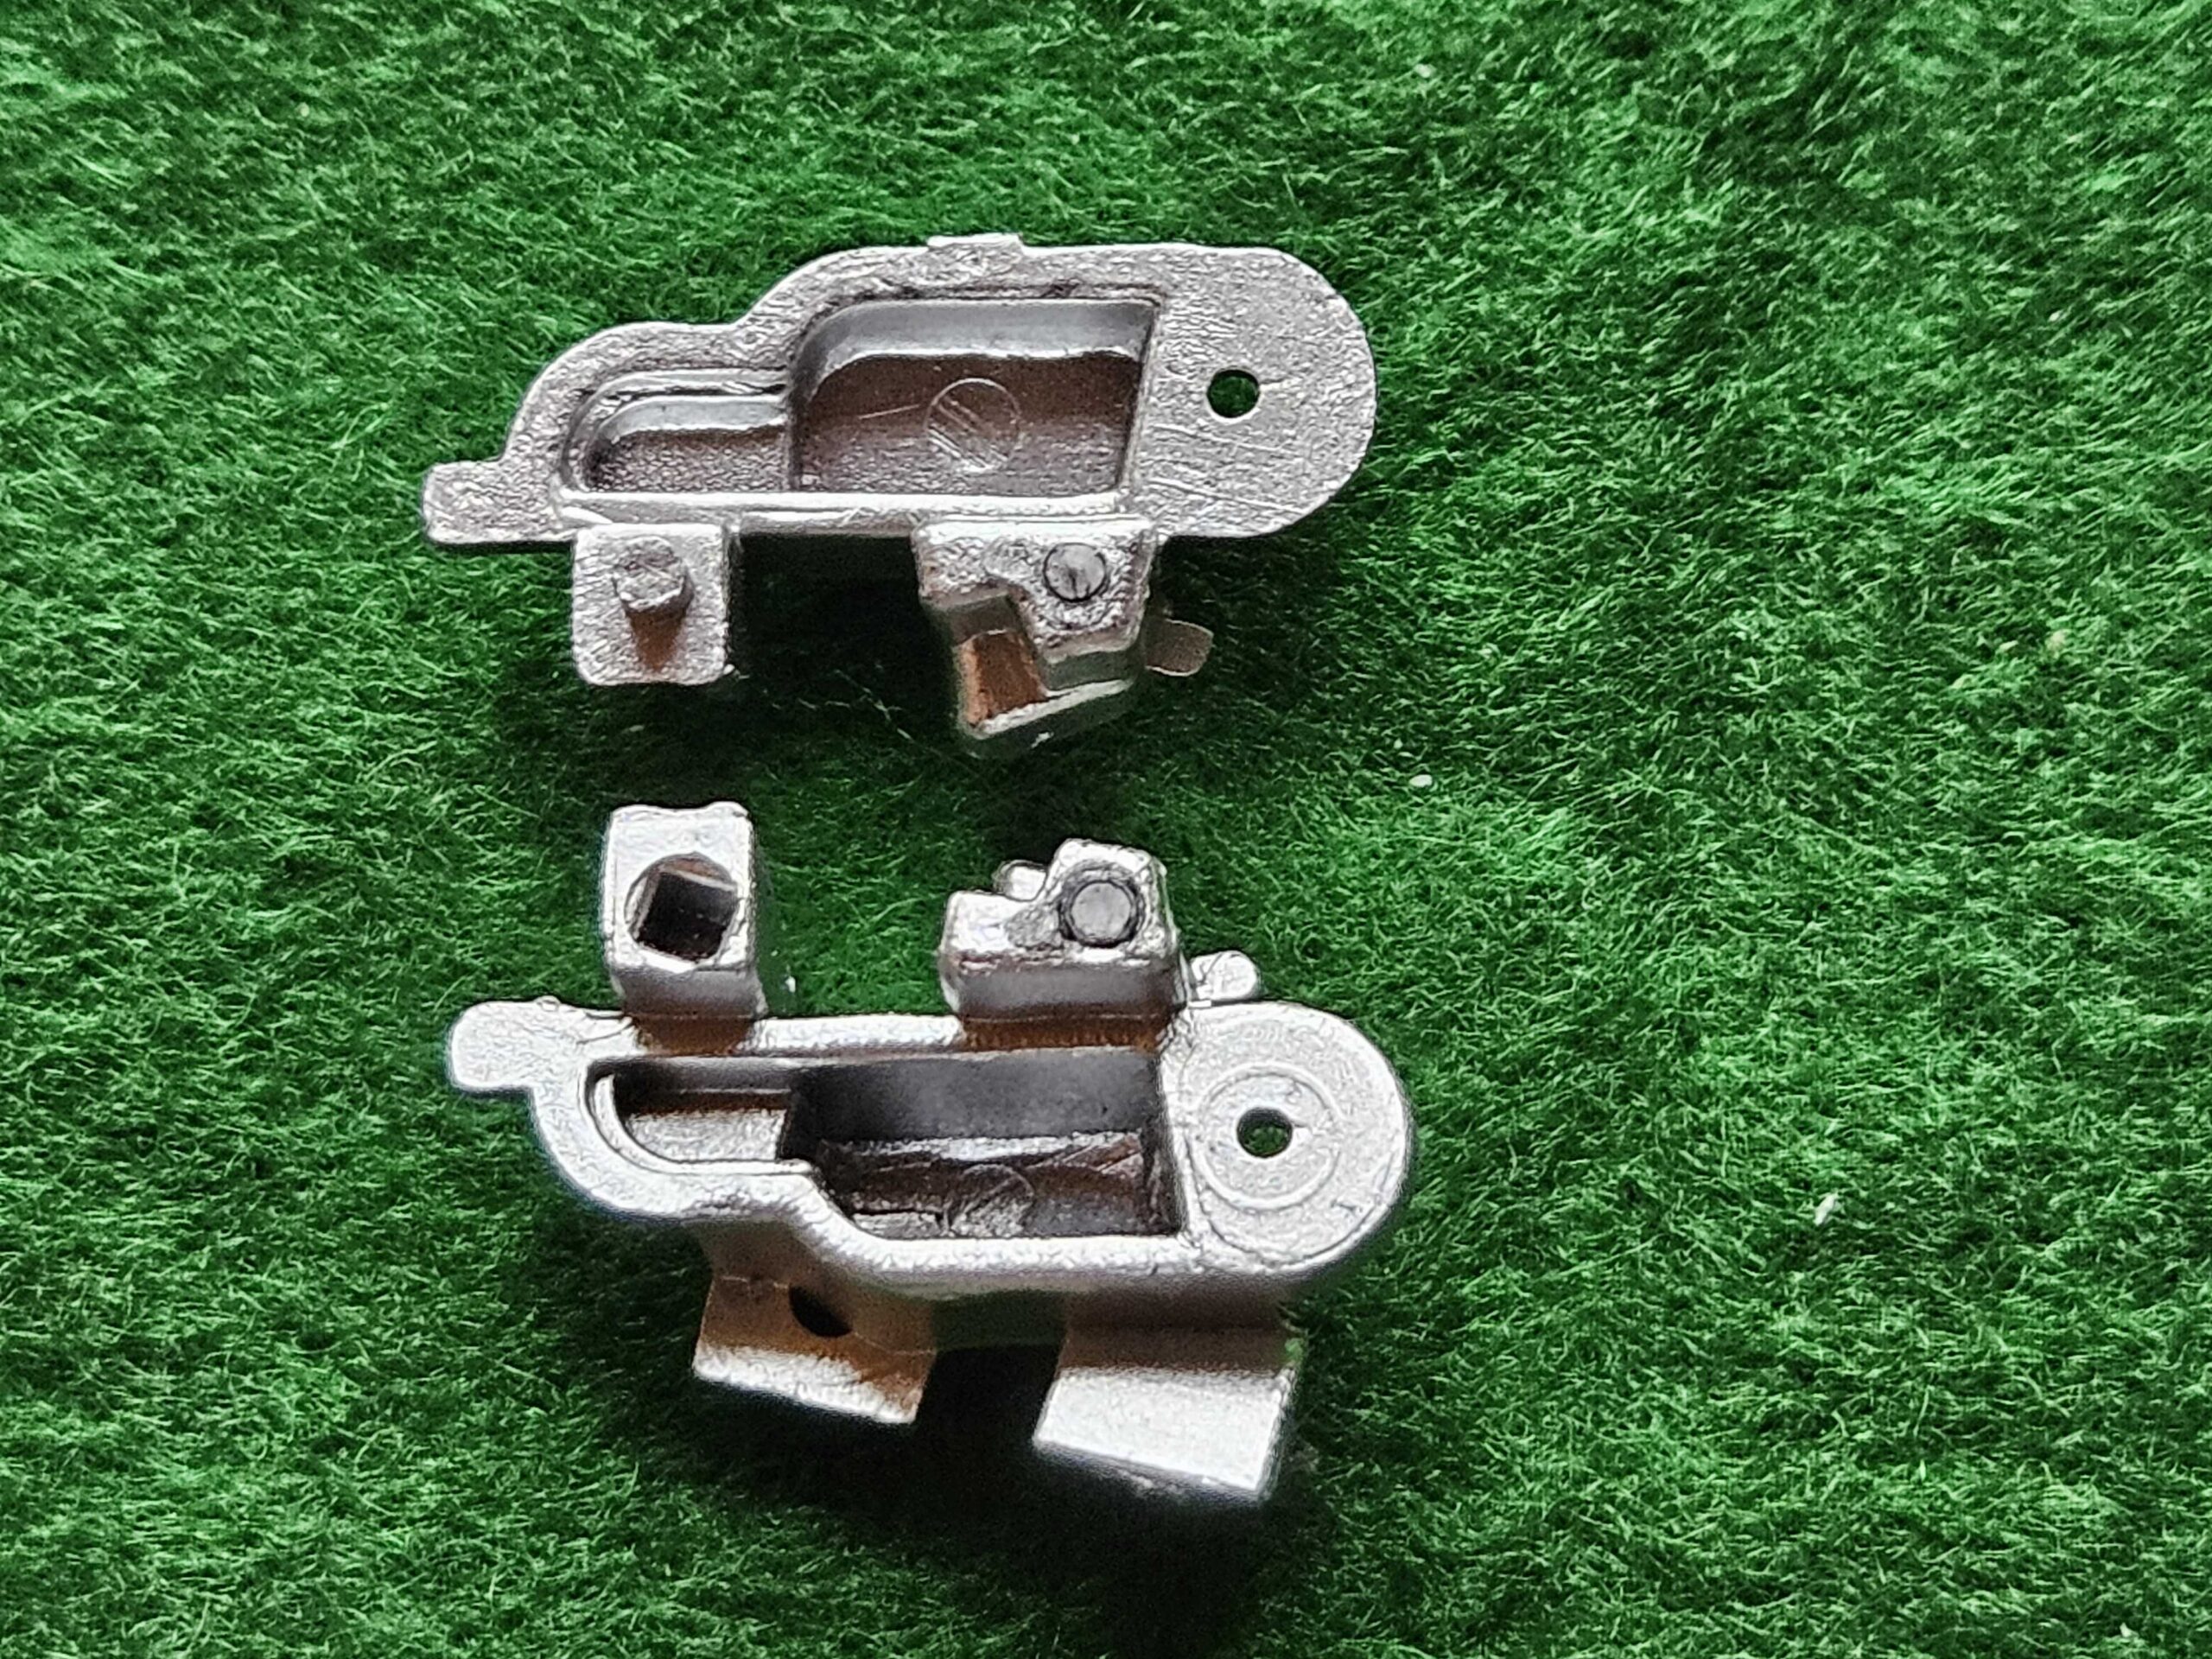
I then had to screw on the gearbox cover and rear of the gearbox that included the engine mount. For the gearbox cover I had to rout out the hole on the gearbox so the screw would go in. With that done I had completed that stage of the kit.
The next task was to fit the o rings to the single front seat that was shipped. As with a real 2CV, clips need to be fitted to the o rings, but unlike the real car — each o ring goes across the width of the frame rather than to the edge of the center canvas. They try to give you the “seat recovering” experience many 2CV owners have experienced, (including myself), and as the o rings are a small their method allows for practical handling. The clips are minuscule and the first attempt at trying to fit them to the o ring and the o ring to the frame was about as frustrating as doing a real seat! They suggest using the supplied tweezers, but I found that they didn’t grip and one of the clips flew into the air to land God knows where. There were a few extra clips in the pack (as well as o rings), so I had enough to complete the job and switching from tweezers to small needle-nose pliers I had on hand that actually gripped, made the rest of the clip and o ring fittings relatively easy.
Proceeding on to the hood and fitting the grill and license plate, I discovered that the supplied Phillips screwdriver was too large for the micro screws they specified be used. Fortunately I had smaller head Phillips screwdriver in a jewellers kit and I was able to tighten the screws with that. I chose to fit the “James Bond” numbered license plate rather than trying to peel and stick the supplied number decals.
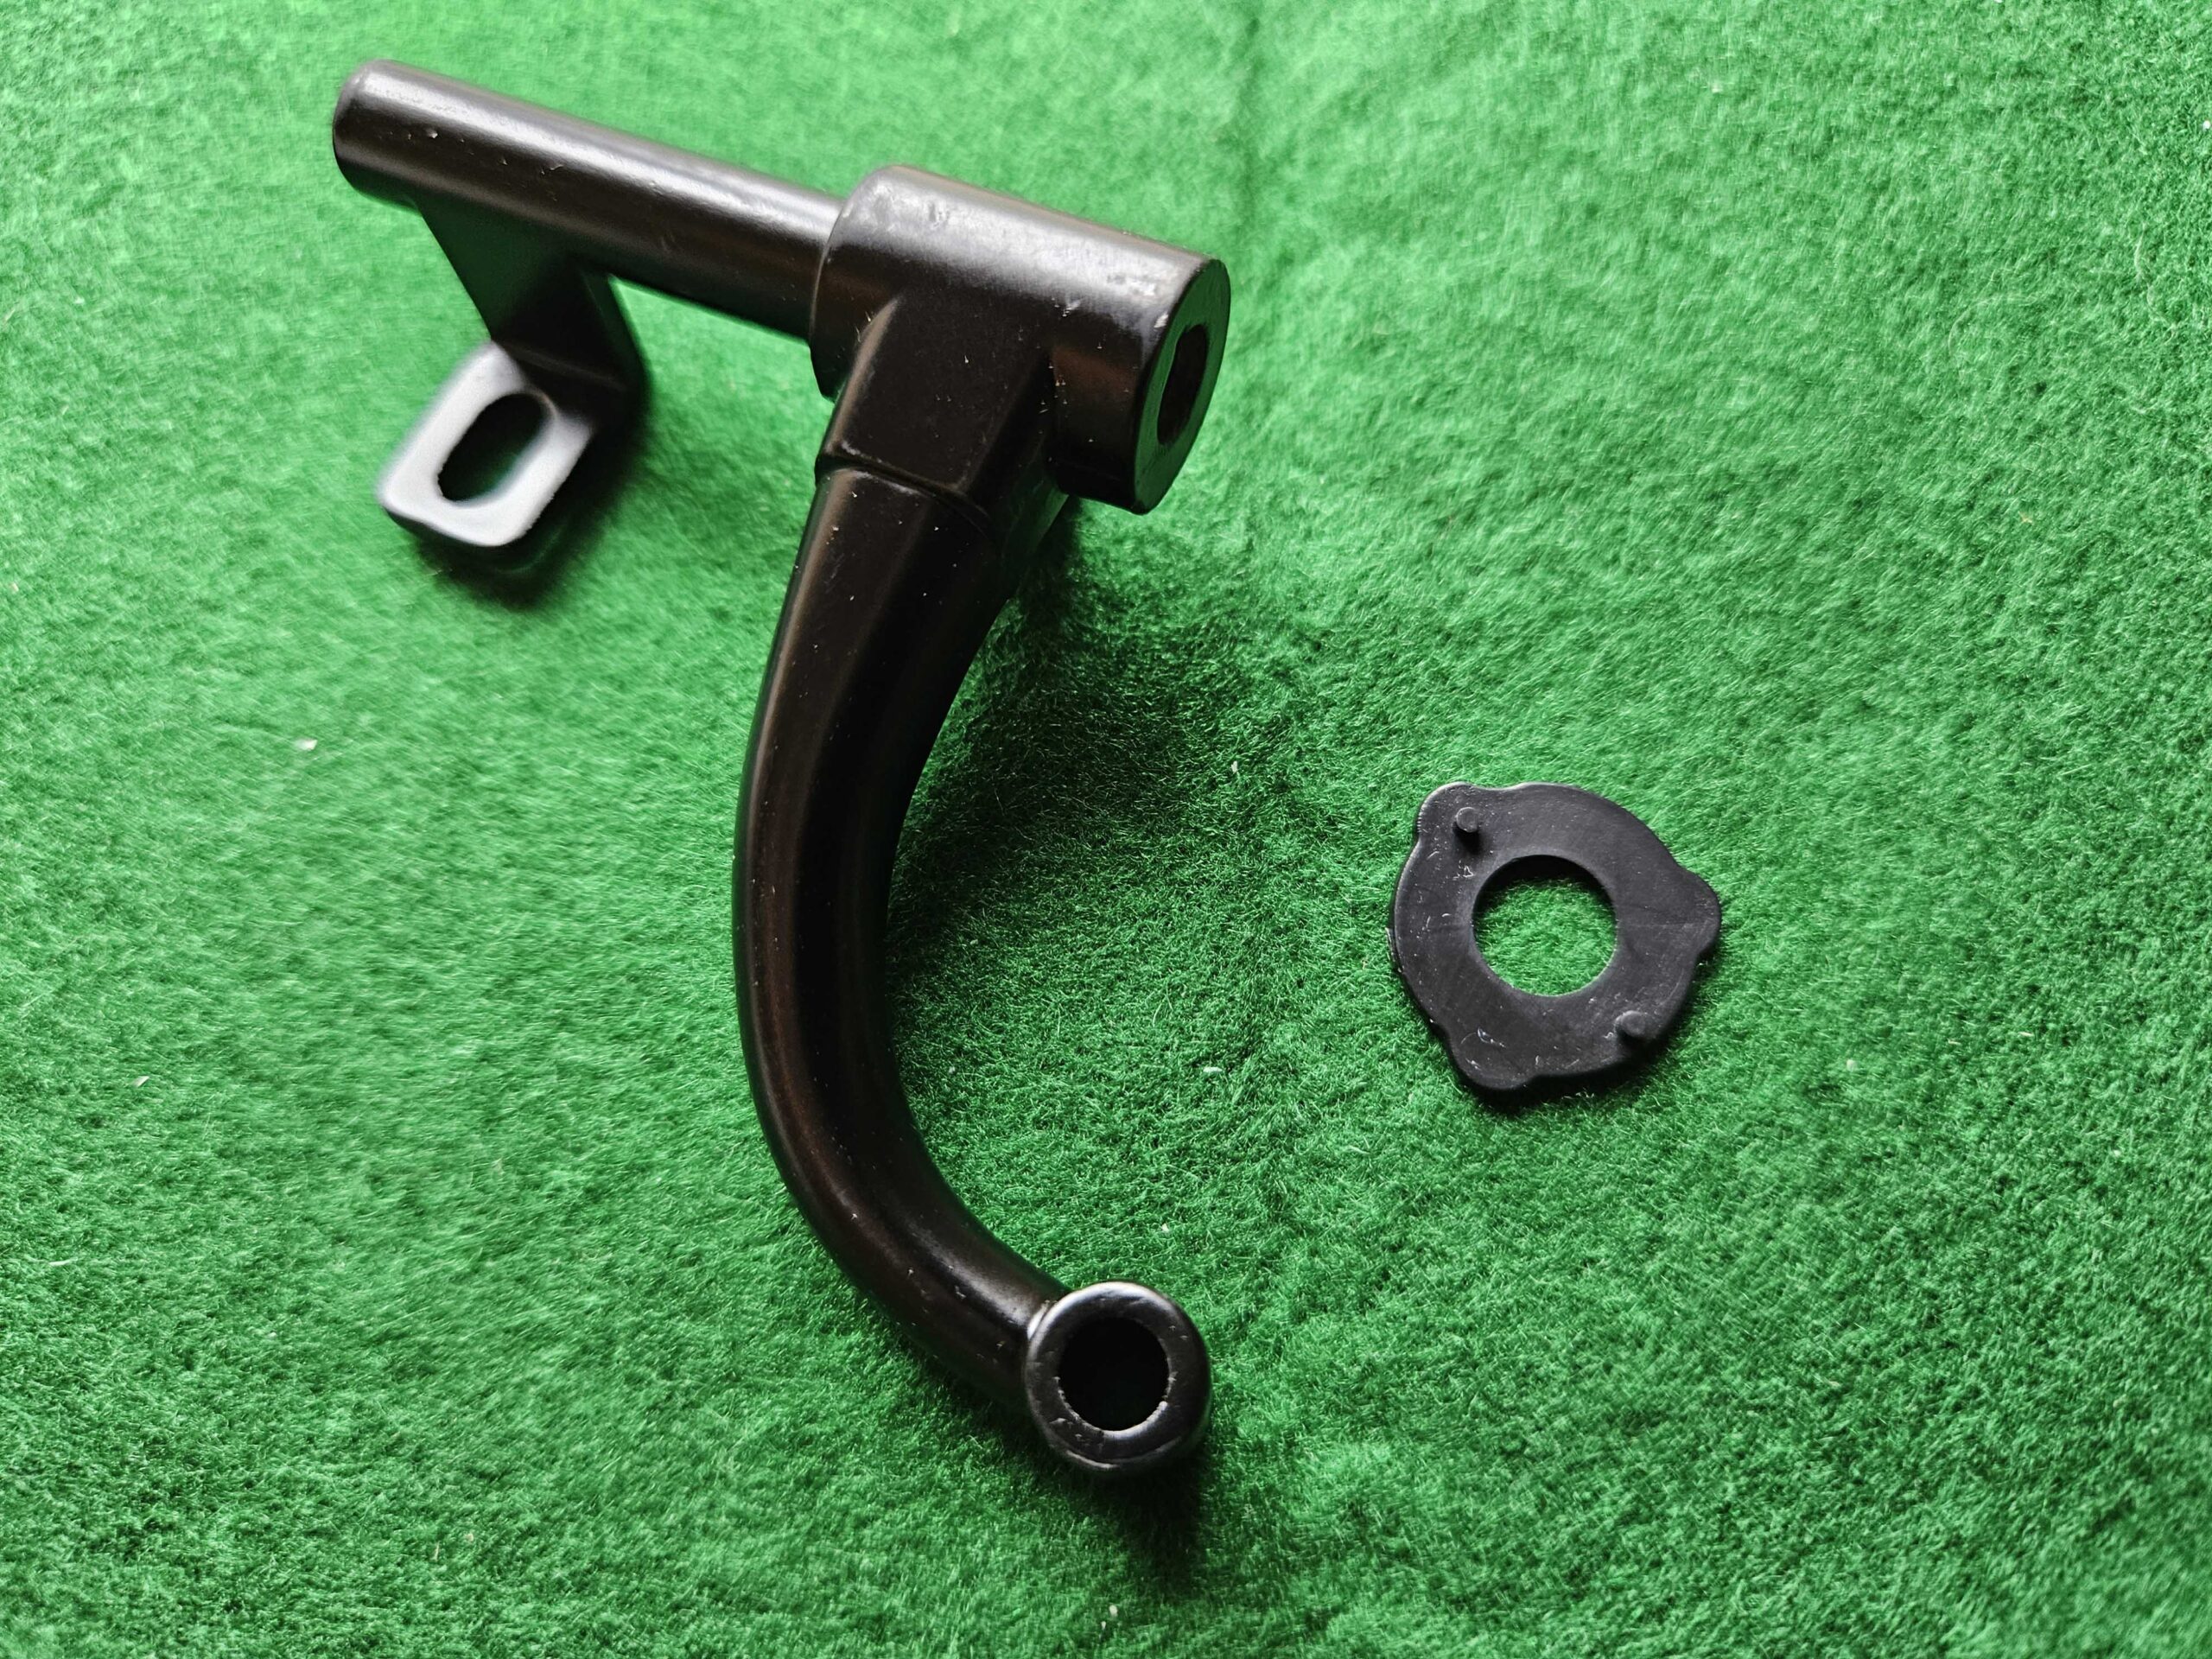
All I had left over was the was the suspension arm and an end cap that would attach to the wheel. There were no kingpins and hub assembly in the kit and no further instructions, so I presume those pieces and the build process for the suspension system is part of a future kit to arrive.
I’m looking forward to the arrival of the next box and curious to know what I will be building next!